This is part two of our three-part series for Arequipa, Peru. The first post on the amazing food you can find in this city is here.
Signing up for a Walking Tour
For every city that we visit, one of the first things that we do is to check out the walking tours available. We feel that walking around the city is the best way to get acquainted, and up close and personal with it! It also gives us a good sense of where we might want to spend more time exploring later on. Plus, there’s nothing quite like having a local take you around the city to the less touristy spots, and have them give you juicy nuggets of information that you wouldn’t get anywhere else!
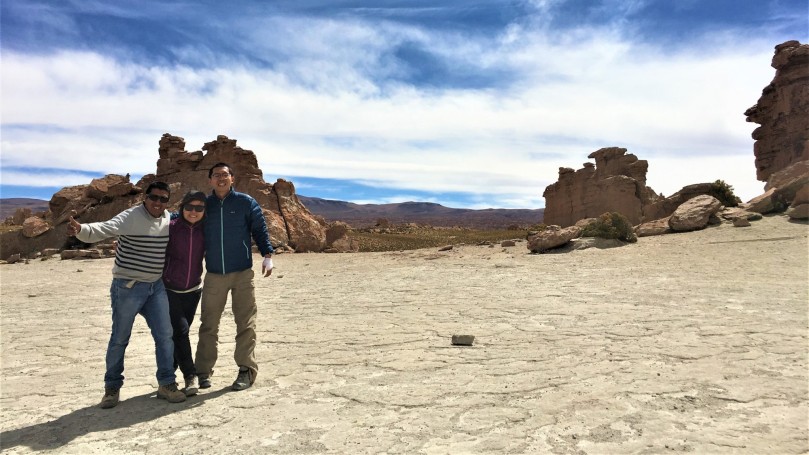
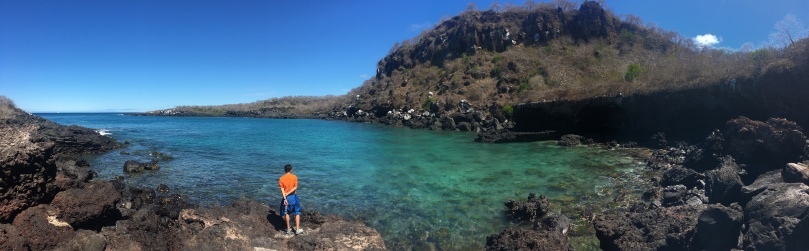
We met two of the bestguides in Arequipa. They were so knowledgeable and friendly, going out of their way to show us around the city. One of these guides was Carlos, who operates “Walk for Tips” on his own (We will talk about our other guide in the next entry!) Carlos introduced the city to us at such a deep level that we came out of our 4 hour walking tour feeling like true Arequipans! It was also a bonus that we were the only tourists on that day, as the weather was quite gloomy. Thanks to Carlos, we were able to shortlist the attractions we wanted to stop by for the rest of our trips.
With Carlos, our awesome guide around Arequipa city
Without further ado, here are the attractions that we strongly recommend visiting if you were to stop by this beautiful city 🙂
Highlights and attractions in Arequipa City
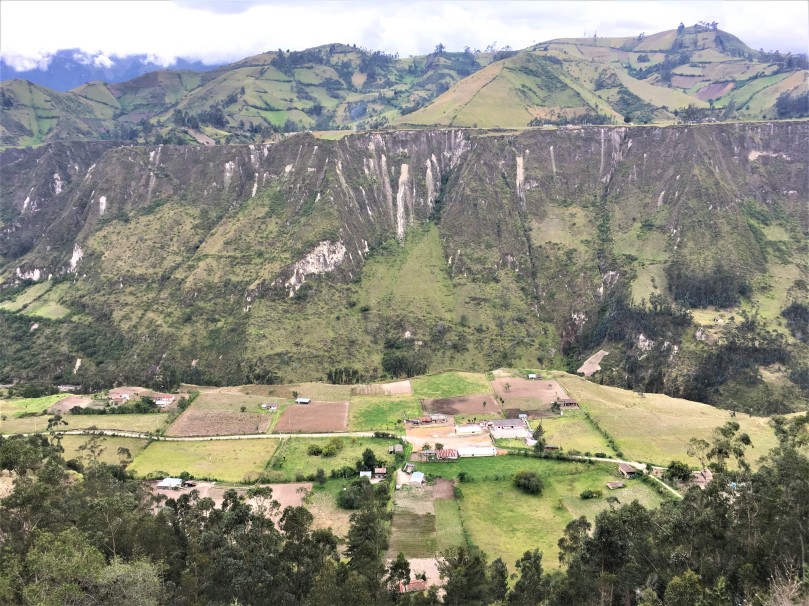
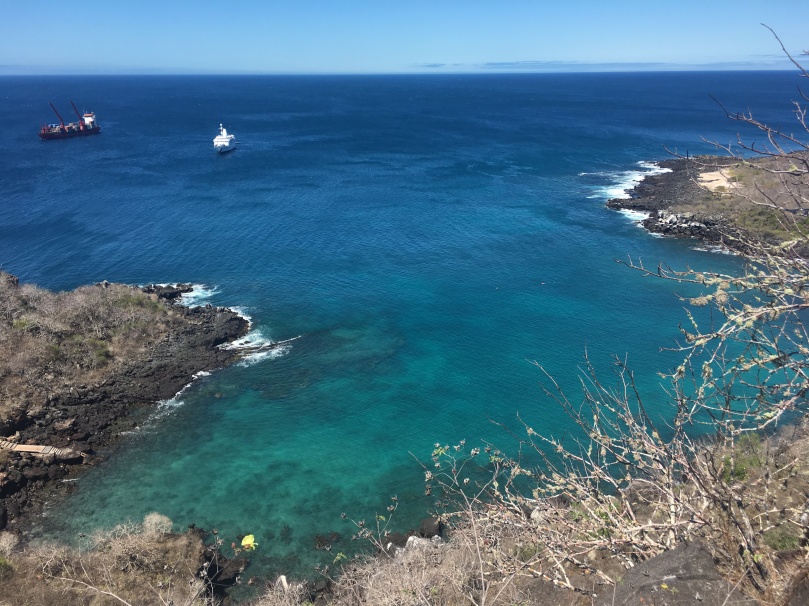
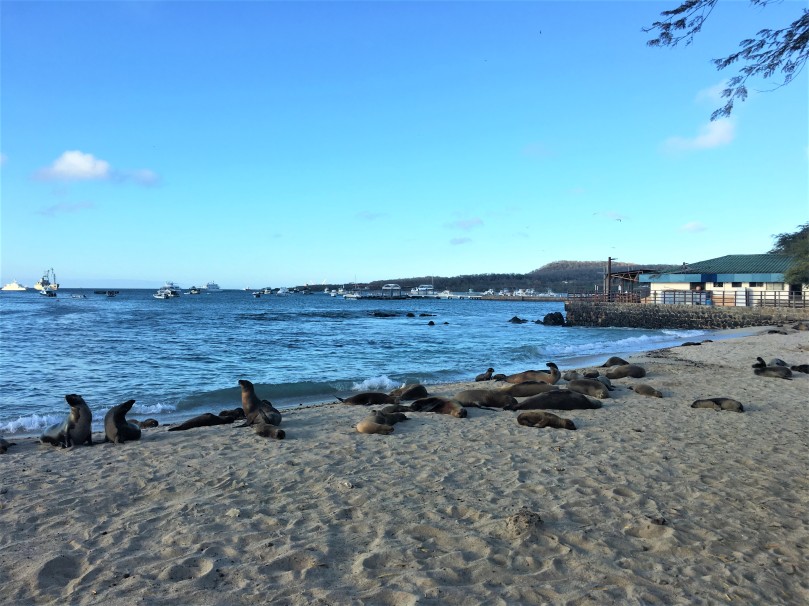
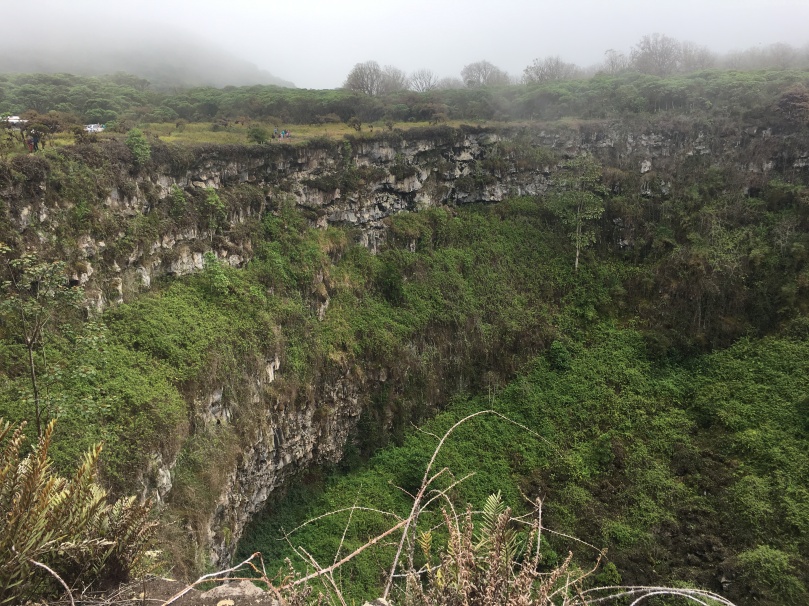
Yanahuara District & Mirador de Yanahuara
Houses lining the streets of Yanahuara district
Yanahuarais a middle-upper class neighbourhood that is best known for its pearly white buildings and structures. These are made of volcanic rock sillar and have been carefully preserved over centuries. Walking through the district, one can see statues of the likes of Simon Bolivar, a war hero, amongst others. Lines from famous poets also adorn archways.
Cobbled street and archway with poetic verses
Incidentally, cobbled streets were once used to mark where milk was delivered from the Andean highlands to the city. A cholita would walk her cow down these streets and when the bells sounded, people would frantically rush to buy milk.
Make way for La Cholita!
The visit to Yanahuara district typically ends at its highest point,Mirador de Yanahuara, where tourists often travel to in order to get a good view of the entire city as well as the three mountains (or rather, volcanoes) surrounding it – El Misti, Pichu Pichu and Chachani. For the more adventurous, a day trip can be planned to scale or bike up these volcanoes!
The view from Mirador de Yanuhuara
You can also buy some souvenirs here (typically knitted items like scarves or small memorabilia like alpaca keychains) and even buy some queso helado (local ice cream – read more in our food post here) from a cholita.
Mandatory wefie at the mirador! Can’t help but chuckle when I recall J’s disastrous haircut due to some miscommunication issues 🙂
2. San Francisco Church and Plaza
San Francisco Plaza, also known as Revolution Square, is where locals often gather to start demonstrations for various causes. For this reason, it is a popular gathering point.
The plaza, with the church at the background
If you have travelled across South America, you will probably know that the Franciscans played a very important role in many of the cities’ historical development. They were a powerful group who advocated education for locals and were also known for their peaceful means of evangelism. As such, Franciscan churches can be found in almost every South American city.
An interesting thing that we learnt from Carlos is that on many of these churches, Catholic traditions were often mixed with local Pagan traditions, and these were inscribed on church exteriors themselves. For instance, the sun (or ‘Sol‘, in Incan culture) is traditionally worshipped and thus can be seen above the main gates. Emblems of the puma, condor and snake, which are viewed as sacred in indigenous religion, are also subtly incorporated onto the front pillars of the church.
Can you spot these emblems? 🙂
Address: Calle Zela 202, Arequipa 04001, Peru
Map here
3. San Lazaro Neighbourhood and Church (Iglesia de San Lazaro)
This is situated in the historic centre of Arequipa, where, according to UNESCO, the original layout of an indigenous hamlet is still preserved. One of the key features of the San Lazaro Church is that it has three bells! Today, the church is a popular venue for weddings, and the small park in front of it can be cordoned off for receptions. 🙂
San Lazaro Church and its three bells
Address: Alameda San Lázaro 126. Cercado, Arequipa, Peru
Map here
4. Plaza de Armas
Plaza de Armas, literally translated as “Plaza of Arms”, can be found in almost every South American city. It usually denotes a large central plaza which is home to an iconic statue or two, and is surrounded by key buildings.
Plaza de Armas, Arequipa
Lining its four sides are the main cathedral, restaurants, tour agencies and government and administrative buildings. The plaza is always bustling with activity, with street peddlers selling food, tour packages and random items (like selfie sticks). We recommend visiting the plaza both in the day and at night, because the vibes are so different! You could also consider having dinner at one of the restaurants overlooking the plaza.
The plaza at nightWe had some drinks at a cafe on the second level of one of the buildings facing the plaza. Nice ambience 🙂
5. Main Cathedral / Basilica Cathedral of Arequipa
Situated right next to the plaza is the Main Cathedral, which, in all its splendour, is exceedingly beautiful. Check out this photograph we took as the sun set and cast its golden rays against the cathedral’s exterior.
Absolutely gorgeous, sans filter!
The cathedral is open in the evenings, and we highly recommend a visit. Having been to so many cathedrals in Europe and South America, we must admit that we were getting a little bit bored of them… but this cathedral was really special. The interiors were warm and bright, and very well-lit, unlike many of the other cathedrals we had been to. There are also statues of the saints lining the main hall of the cathedral, which we found very beautiful and intricate.
Here’s a sneak peek – we didn’t want to take too many photographs as there were worshipers present
Address: Plaza de Armas, Arequipa 04001, Peru
Map here
6. Museo Alpaca
If you are a fan of alpacas and llamas, we highly recommend visiting this place! The museum houses alpacas and llamas that you can feed, pet and take pictures with! (Children would absolutely love this too)
There is also an educational component to this museum, which provides visual explanations of the camelids in South America, and also a tour around the factory that produces alpaca products. There is also a shop where you can get these products. Free tours are provided, complete with demonstrations of weaving techniques.
Before processing the wool Super talented weaver with very sweet child (not in picture) who kept giving us hay to feed the alpacas! Such talent…
We ended up staying at this place for much longer than we had planned… 🙂
If you are looking to buy alpaca products, Mundo Alpaca and Sol Alpaca have shops here. These are two very popular brands that sell quality alpaca wool. Otherwise, you can take a taxi to Incalpacafor S/ 7 from the main plaza, where there is an outlet store selling past season items for as much as 70% off retail price (You can thank us later!).
Address (Museo Alpaca): Alameda San Lázaro 101, Arequipa 04001, Peru
Map here
Address (Incalpaca): Calle Condor 100, Arequipa, Peru
Map here
7. Museo Historico Municipal
Being history and geography buffs, we decided to visit this museum to learn more about Arequipa. This place is truly a gem of a find – there are loads of interesting stuff to see here, ranging from the topography of Arequipa (including 3D models), its transport history, photographs of volcanic eruptions in the city and of various political leaders in the region.
Seated in the Hall of Fame 😀
The only downside is that everything is in Spanish, but the visual aids do help a lot. Also we had the help of the app SpanishDict, which was a true lifesaver for our trip!
Address: Mercaderes Plaza, 407, Arequipa, Peru
Map here
8. San Camilo Market (Mercado San Camilo)
In every South American city we visited, we felt that the local market is the ultimate place to get cheap and super tasty local food. Arequipa was no exception. Its San Camilo Market was neat, clean, and well-divided into various sections like the fruit section, meat section etc. It is also one of the cleanest South American markets we’ve been to! They sell a variety of items from perishables to textiles, and on the second floor you can get a warm hearty meal for just S./5.
The variety of potatoes in South America is just… mind blowing. Dining area on level two
Address: Calle Nicolas de Pierola, Arequipa 04001, Peru
Map here
9. Monasterio Santa Teresa
If there is one thing that Arequipa is famous for (besides its food, of course), it is the monasteries within the city centre, where nuns live a life of total recluse from the public. The two main monasteries – Santa Teresa and Santa Catalina – have guided tours to certain parts of their quarters. We visited Santa Teresa as it was less crowded than the latter.
First peek into the monasterySmall garden quadrangle
The interior was immaculate. We were shown around and allowed to explore certain parts on our own. However, we never got to meet any of the nuns as they were in their private quarters. What really amazed us was the artwork that adorned the walls – they were painted by the nuns themselves.
Chapel for worship
We got a sneak peek into the daily routines of the nuns (they pray every 3 hours!). The guided tours around Santa Teresa last for an hour. They have English guides available but to be honest it was really difficult to make out what ours was saying. It cost us S/20 per pax and on top of that, a mandatory S/10 tip was given.
One of the museums we truly enjoyed visiting during our trip was none other than Casa de la Cultura, which was a museum that was dedicated to the Incan tradition. In the museum, a short film about the Incan practice of child sacrifice was played (in English). A tour guide also took us around the museum, which contained artefacts of tools and equipment used in Incan sacrifice. Apparently, these were unearthed from the summit of the surrounding Andes mountains.
The tour ended with us seeing the actual preserved body of Juanita, the Inca ‘Ice’ Maiden, a young girl who was sacrificed in the 1500s and whose body was preserved due to extreme temperatures at the summit of the mountains. She was discovered by anthropologist Johan Reinhard in 1995.
No pictures taken here because the mood was very solemn and we didn’t feel like taking photos.
Address: Calle la Merced 110, Arequipa 04001, Peru
Map here
***
If you are considering a trip to Peru, we recommend stopping by Arequipa – it is truly unique and very different from the likes of Lima and Cusco, which are more popular with tourists.
Stay tuned for our next update on our day trip to Aguada Blanco Y Salinas Reserve – another must-see in Arequipa! 🙂
This is part one of our three-part series for Arequipa, Peru. The second post on the highlights and attractions of the city is here.
Arequipa: An introduction
Arequipa is a city in southern Peru. It is the second largest city in the country, after its capital Lima. Popularly known as the “White City”, it was so named by the locals due to the sizeable population of Spanish conquistadors who lived there during colonial times. In addition, the city has numerous baroque-style buildings that were built with the white volcanic rock sillar, giving much of the city centre the appearance of a “White City”.
Arequipa, the White City
Besides being known for its unique appearance, Arequipa is also well-known for the variety of mouth-watering cuisine it has to offer.
After some extensive research on the “must-try” food in Arequipa, we set off on our journey to find these local haunts. These are our tried and tested recommendations – trust us, you will not be disappointed! 🙂
Part One: Local Restaurants & Cafes
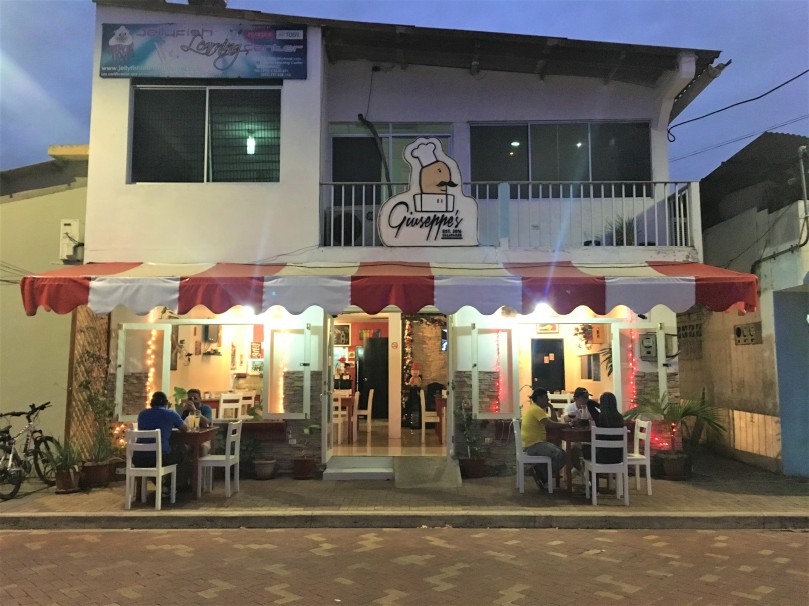
Where the locals go: La Capitana Picanteria
A picanteria is a quintessentially Arequipan eating establishment that locals frequent for affordable and hearty fare. A tradition for centuries, picanterias are usually open for lunch till late afternoon, and serve a variety of local Arequipan favourites. Because they serve so many types of different food and the menus are all in Spanish (super confusing!) we recommend you get a general idea of what you would like to try before heading to the picanteria.
La Capitana is arguably the best picanteria in town. This name is a household favourite!
Entrance to La Capitana
We had our first meal in Arequipa here. When we arrived at noon on a weekday, the picanteria was packed with locals. We were quickly shown to a shared bench where we were greeted with an overwhelming selection of food on a Spanish menu.
Sensing our confusion, a waiter gently ushered us into the cooking area, where we were given a tour of the variety of food available! The entire introduction was in Spanish (which didn’t help much) but the waiters and cooks were SO FRIENDLY and trying their best to show us what each dish was. There were stews, potatoes, meat, vegetables, dough fritters… the options were endless. We politely pointed to the dishes we wanted and were promptly served with a smile 🙂
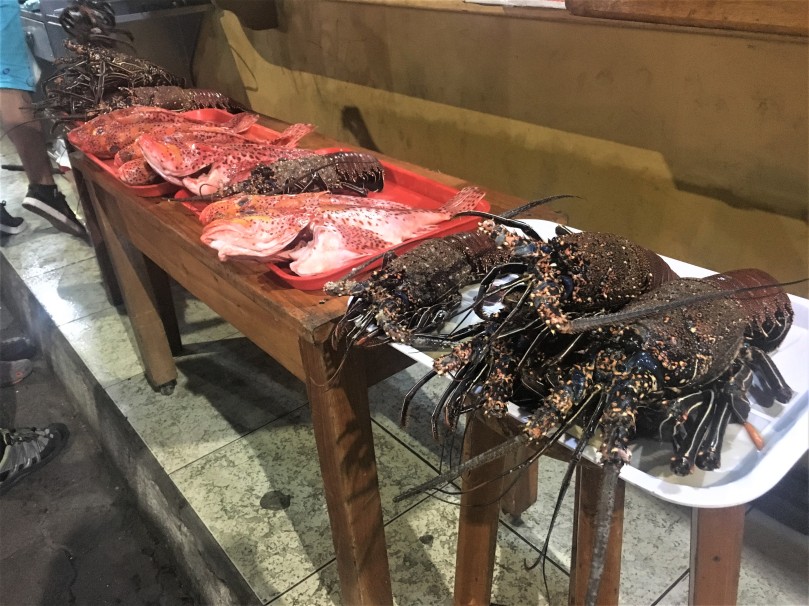
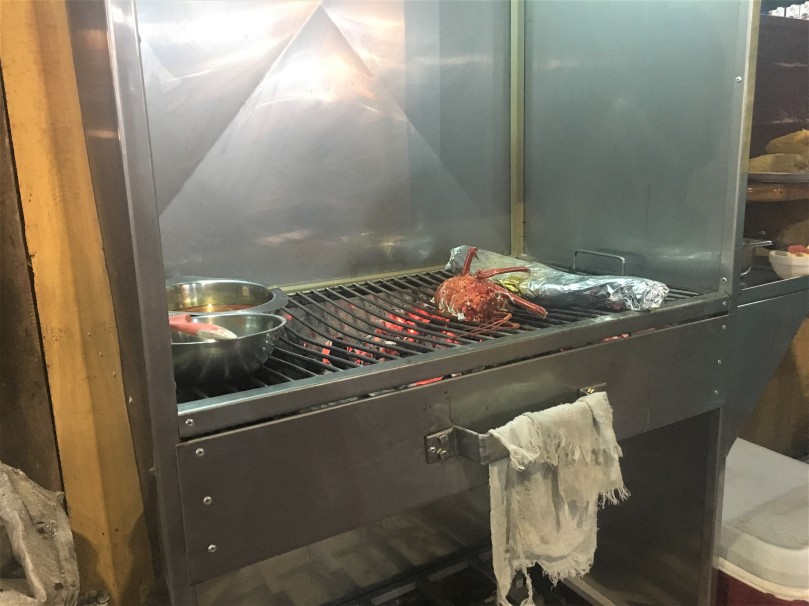
So, here’s what we had, and absolutely loved: Chupe de Camarones (S/. 35)
Local crayfish/huge shrimps in a traditional stew with a milk base, and a generous serving of other ingredients including potatoes, eggs, beans and the works. The camarones are in season from late March to late November. This dish is perfect for a warm and hearty meal. The serving is substantial for an average-sized Asian.
Doble, Triple or Americano (S/. 15)
This is a newer item on the menu, which is really a combination platter of mixed dishes, where you can pick 4-5 dishes to form a complete plate (much like buffet style). This platter is popular with tourists and first timers to the picanteria since you can have a sampling of different types of dishes at one go! We tried the soltero de queso (a classic Arequipan starter made of a mix of olives, beans, cheese, Andean corn, onion and tomatoes and garnished with local herbs and vinagrette), Estofado (rich and flavourful stewed beef cooked with garden vegetables and chica de jora juice), locro de papa (thick stew comprising potato, cheese, vegetables and herbs like mint and cumin), and arroz (white rice). It was so good.
Chicha morada or chicha de jora
Chicha, or purple corn, is used to make two of the most popular drinks in Peru – chicha morada and chicha de jora. The drinks are therefore purple in colour. While chicha morada was very common in Lima, we found chicha de jora more unique – it was sweet but also had a tinge of sour aftertaste due to the fact that it was fermented for 1 to 2 more days. These drinks are commonly brewed in-house in picanterias.
Dining at La Capitana was one of the most memorable dining experiences we had in Arequipa because it really ignited all our senses! The visual feast, sounds of social chatter, saliva-inducing aromas and rich taste of food were just so overwhelming! We also met some very helpful locals who offered to take photographs for us, and attempted to explain the ingredients in the food we ordered. They also gently reminded us to keep our belongings safely. 🙂
Ended our meal with Queso Helado (cheese ice cream) which was at the entrance of the picanteria 🙂 YUM!
Though it can get quite crowded during lunch time, we recommend visiting this place during lunch hour to experience what it is really like to dine with the locals.
Address: Calle los Arces 209, Cayma 04014, Peru (we took a taxi there) Opening Hours: Sun 8:00 AM – 6:00 PM, Mon – Wed 8:00 AM – 12:00 AM, Fri – Sat 8:00 AM – 12:00 AM
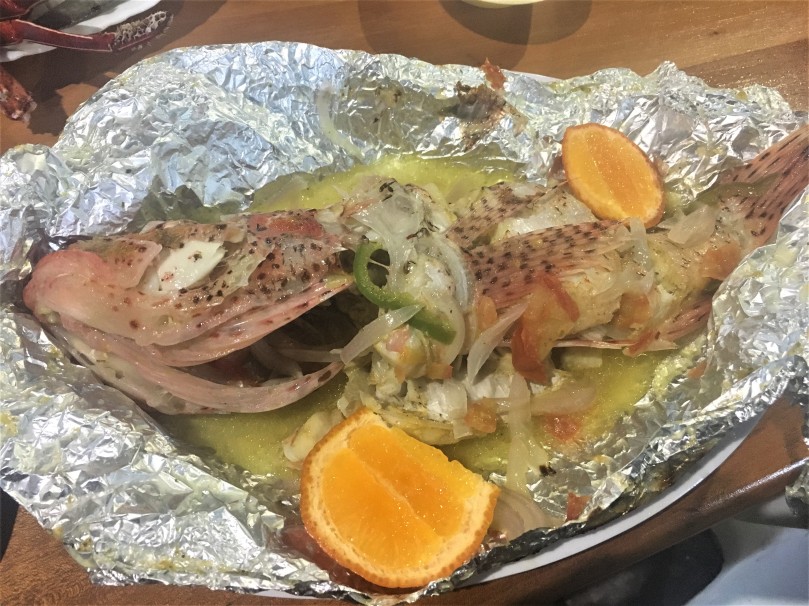
This place is famous for its Adobo Arequipeno, which refers to pork loin marinated in Chicha de Guinapo, a type of fermented black corn. The loin is then seasoned with grated chilli peppers and local spices like oregano and mint. Adobos are typically taken as “hangover stew” and therefore, usually available on Sundays (I guess the assumption is that most people party and drink till late on Saturdays).
The famous Arequipan hangover stew
Another dish that we tried here was Rocoto Relleno con Pastel de Papa. A rocoto bell pepper (or capsicum), is stuffed with ground beef, nuts, raisins and olives and served with Peruvian Pastel de Papa on the side. The latter is made of alternate layers of cheese and potato and then cooked in an egg mixture. This dish was very rich and filling.
Rocoto Relleno con Pastel de Papa
Address: Calle Alfonso Ugarte 214, Yanahuara 04017, Peru
Opening Hours: Mon – Fri 8am to 5pm, Sat 7am to 5pm, Sun 5am to 5pm
Best Steak for meat lovers: Zig Zag Restaurant
Seats on the 2nd level of the restaurant
A visit to Arequipa is never complete if you haven’t dined at Zig Zag Restaurant, which is famous for serving the BEST STEAK in town. And… the steak does not just refer to beef steak, but also includes lamb and… alpaca! This was one of the meals that we painstakingly saved up for, and it was seriously worth. every. penny. ❤
These are what we had and would absolutely recommend:
Starter: Albondigas de tres carnes (Meatballs of three meats)
Made with freshly ground meat, the meatballs are served piping hot and literally MELT IN YOUR MOUTH. They are served together with Aji sauce (spicy) and garlic sauce, as well as some roasted baby potatoes. These were the best meatballs we had ever tasted in our lives. Seriously.
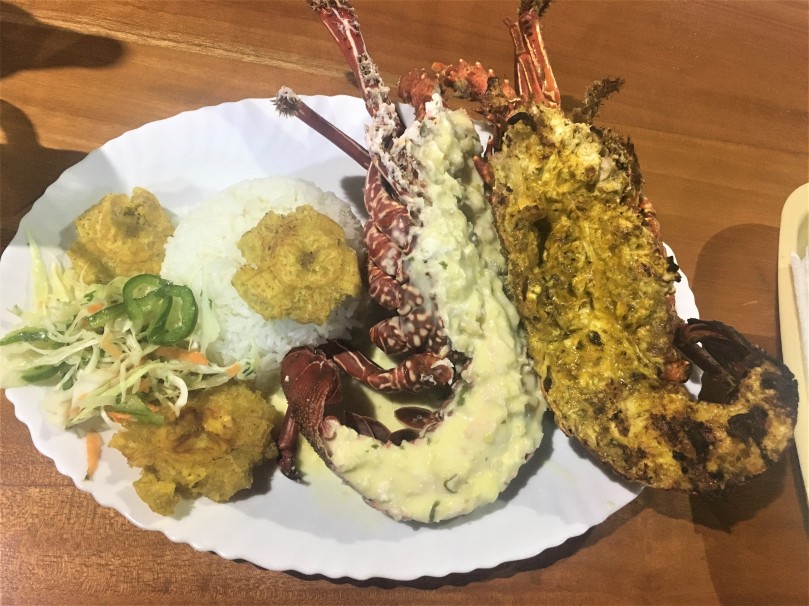
Main: Trio especial de carnes (beef, alpaca, lamb)
Highlight of the dish: The three meats are served on hot volcanic plate! Specific mention for alpaca and lamb steak, which were grilled to absolute perfection. The beef was so-so but the other two steaks totally made up for it. This dish comes with a choice of sides – we had Ratatouille with quinoa, which we felt were light and refreshing accompaniments to the red meat. And of course, perfectly paired with a bottle of Malbec 🙂
Cheers!
Dessert: Apple Tart
This tart was recommended by the waiter, who said that it was the restaurant’s star dessert. It truly did not disappoint. It was served with a scoop of vanilla ice cream, which was the perfect ending to our foodgasmic dining experience at Zig Zag!
I desperately needed this to keep me sober by this point in time LOL
Tip: Due to its insane popularity and limited space, reservations are necessary at least two days before. Zig-Zag usually operates at its maximum capacity.
Address: Calle Zela 210, Cercado De Arequipa 04001, Peru Opening Hours: Mon – Sun 12pm to 11pm
Light Refreshing Meal: Nikkei Food at El Buda Profano
After stuffing ourselves silly for days, we decided it was time for us to take a break and opt for a lighter meal instead. We settled on Nikkei (Japanese) food, and El Buda Profano seemed like the perfect choice because we had read super rave reviews about them (plus, they were conveniently located in central Arequipa).
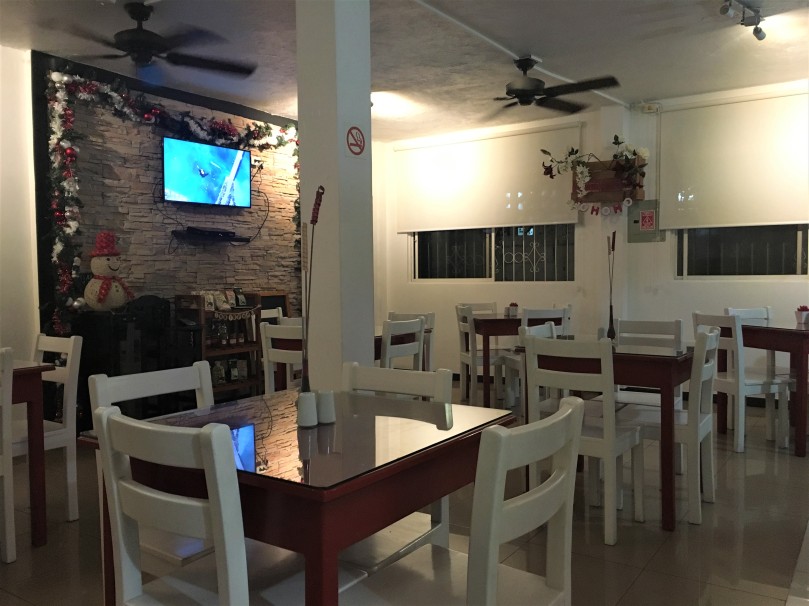
With its rustic feel, the restaurant is clean and equipped with a simple open concept kitchen. It houses about 6 tables and has a decent selection of Japanese fare like sushi, soups and fried items.
The cooking is done in front of youThe entire setting just gives off a minimalistic zen vibe
We tried their Miso soup, Degustacion for two (assortment of Sushi) and Gyoza (fried meat dumplings).
Started our meal with a serving of miso soup
The Miso soup was a hot favourite (no pun intended!) and had a hint of ginger which we found super refreshing. We also appreciated the sprinkling of sesame seeds which added flavour to the soup.
Gyoza platter
The Gyoza was so-so, nothing much to rave about. But it was served hot and was filling.
Degustacion for two
The sushi platter was special, and our favourite was the mango sushi with sweet sauce.
The entire dining experience was pleasant, but we found the servings a tad small for the price. Still, it was a nice change from the usual grilled meat and stew we had in Arequipa.
Address: Calle Bolivar 425, Cercado De Arequipa 04001, Peru Opening Hours: Mon – Sun 12pm to 10pm
For Vegetarians: Cafe Verde
Let’s face it – if you are a vegetarian travelling through Arequipa, or South America for that matter, decent vegetarian options may be hard to find. After all, meat and fish feature in almost every main dish! So we were pleasantly surprised to come across Cafe Verde, which sells vegetarian and gluten-free food and drinks.
Vigo Chia
We tried the vigo chia, a shake made of mango, plant milk and chia seeds. Super delicious! It was served in a glass jar with a metal straw – this place was all sustainable even before the trend of using reusable straws began. 😀
Avenopotencia
We also tried the avenopotencia, which was a shake made of banana, oats and algarrobina. Filling and yummy!
Finally, we tried the carrot, quinoa, beet, chestnut and linseed cake. It was served warm. The cake was grainy yet moist, and not too sweet. It was surprisingly filling.
Despite not being vegetarians ourselves, we actually enjoyed this wholesome vegetarian dining experience, and would recommend you to try this place!
Address: (We’re having some issues contacting them at the moment, please bear with us while we fix this!)
Part Two: Street Food
Anticuchos
Before we left for South America, we had read many (horror) stories about food poisoning from street food. So being cautious travellers on a budget, we tried to steer clear of not-so-clean-looking street food as much as possible. When we walked past this anticuchos stall one cold night, however, the smell was too enticing for us to resist. Y caved – and paid the hefty price of food poisoning for it over the next few days. Still, anticuchos are worth the try if you have a hardy stomach! They are basically thin slices of beef heart on skewer and come with a serving of boiled potatoes. Just make sure that yours is well-grilled and cooked fresh on the spot.
Another popular street snack is the Salchipollo, which refers to fries mixed with sausages in a tangy brown sauce, then topped with a serving of shredded pollo (chicken). Sometimes the shredded chicken is omitted and you get your Salchipapa. We tried ours from a local fast food outlet and it was sinfully good.
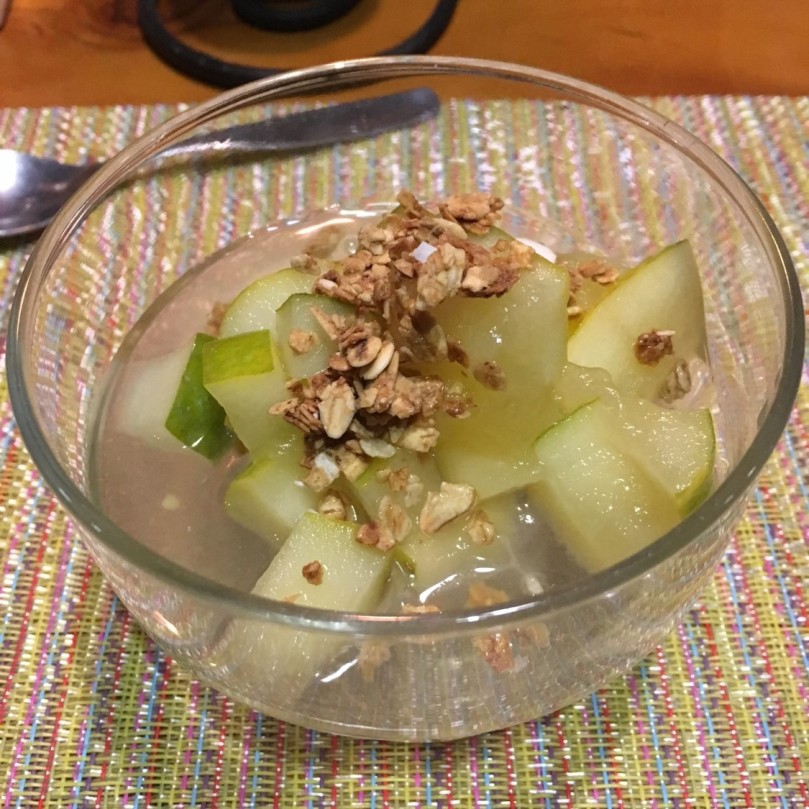
A traditional dessert of Arequipa, Queso Helado means “cheese ice cream”. However, don’t be fooled as this dessert does not contain a single bit of cheese! It is made of milk, corn starch, coconut, egg yolk, cinnamon powder and sugar. Instead it is named queso helado because it looks like melted cheese! This yummy dessert can be found all over Arequipa, with pretty cholitas in their traditional garb selling them by the streets. However, our favourite was still the one we had right outside La Capitana (see above), which cost us just S/. 2.
We also recommend heading to Bitute Cafe at Yanahuarra, which has developed their signature Queso Helado con Pisco (with a dash of Pisco sour) and is worth a try!
Address for El Bitute Cafe: Calle Miguel Grau 570 Tienda 10 – Plaza de Yanahuara, Arequipa, Peru (disclaimer: we recommend them only for the ice cream – we haven’t tried the other dishes)
Bunuelos
Random street stall selling freshly made bunuelo
Bunuelo refers to wheat flour rings deep fried with baking powder, sugar and anise. They are then stacked on a plate and drizzled with sugar syrup. The dish may look simple but they are seriously delicious. This is a very popular street snack that can be found almost anywhere in the city centre.
Light and fluffy, the perfect dessert!
Churritos
While we were familiar with churros, it was the first time we came across churritos, which are soft deep fried baguettes filled with cinnamon sugar on the inside, then sprinkled with sugar on the outside. At first glance, it looks like a normal baguette, but the bread is surprisingly chewy AND soft!
It is truly amazing how the Arequipans can use such simple ingredients but make these snacks taste so good. Be sure to get yours freshly made to enjoy this snack at its best!
After our trip to Arequipa, we gained a few pounds just from all the eating (despite the insane amount of walking we did). Well, no regrets though! It was a truly fulFILLING experience. Haha. 🙂
Stay tuned for more updates on Arequipa! (We are sorry we haven’t been updating much lately, parenthood beckons… 🙂 )
*Our Salkantay Trek was from 23 to 26 October 2017.
Machu Picchu: A Brief Introduction
When we first decided to backpack around South America for our honeymoon, we knew thatMachu Picchuwould be one of the places that we would definitely visit. We had read up quite a bit on Machu Picchu, and were super excited to finally set foot on this 15th century Incan wonder. Situated 2430 m above sea level, Machu Picchu was only revealed to the world in 1911. It has since become synonymous with Peru, and its status as a UNESCO World Heritage Site further accentuates its iconic status.
Journey to Machu Picchu: Salkantay Trek
The only question on our minds, was, how would we get there? We could take a train from Cusco or try out theInca Trail… but we wanted something more adventurous and that would take us on a journey – maybe even pilgrimage – to this world wonder. We also read that the Inca Trail was becoming way too populated and commercialised, and we really wanted to avoid that. After much research and deliberation, we finally settled on the Salkantay Trek, a 5D4N trek that would lead us through various mountain ranges, ecosystems and forests, before bringing us to our final destination: Machu Picchu.
Despite overwhelming anxiety on my part (that I would be the weakest link of the group or die halfway during the trek – and I almost did), J encouraged me and we eventually decided to sign up with Salkantay Trekking for this once-in-a-lifetime experience.
Salkantay Trekking
Now that we have successfully completed the entire trek, I can summarise the experience in one statement – this trek is seriously no joke. It is by far the most challenging trek I have ever done, both due to the altitude and the number of hours we trekked each day. I found myself wanting to give up every 30 minutes… When we finally reached Machu Picchu on the 5th day, we were exhausted; but the trek made the entire experience all the more sweet.
Here’s a day-by-day guide of the Salkantay Trek to Machu Picchu!
Day One: Canal Inca, Soraypampa, Humantay Lake and Sky Lodges!
On the first day, we were picked up at 345 am (yes, you read right…) from our hostel in Cusco, and after picking everyone from the group, it was a comfortable 2 hour drive to Mollepata. Situated at an elevation of 2900m, Mollepata is a mountain town and a common stopover point for breakfast for those who are embarking on the Salkantay Trek. We had a complete meal of fruit salad, omelette with ham and cheese, bread with jam and butter, orange juice and coffee, which turned out to be much-needed fuel for our trek. It was also during breakfast that we got to know our group a tad better (we had only met them once during the pre-trip briefing the night before), which comprised 3 Germans, an Austrian, two Australians, a Swede and us! Most of them were backpacking around South America as well.
After buying the entrance tickets to the Salkantay Trail (S/ 10), we drove to Challacancha (3600masl) where the trail head was situated.
The first part of the trek was a steady incline to Canal Inca (1700masl) and this marked the end of the first tough part. We were catching our breaths due to the high altitude and I felt like a hyperventilating llama!!!
Our guide, Ramiro, pointing out interesting plants along the way 🙂Random view from Canal Inca
We then continued for another hour to Soraypampa(3920masl), which was our first campsite for the day, or ‘base camp’ of sorts. There, we were greeted by our much anticipated sky lodges, which looked as beautiful as they were on pictures! We got a slightly larger lodge ‘cos we had asked for a matrimonial suite 😊 The lodges were covered in the day to prevent light from reflecting off the glass onto the glaciers and thus melting them. Soraypampa is located at the foot of the glaciers. At night, the covers are unveiled and we literally lie under a blanket of stars. Psst… it is FREEZING inside the dome and no matter how many layers of clothing you put on, you will still feel cold. Haha.
View of the glacier from inside our sky lodge! Sky lodges – our accommodation for the night!
We then proceeded to the Salkantay ‘restaurant’ for our lunch – which was really a small cosy eating place where we were treated to a sumptuous home-cooked meal of freshly made passionfruit (maracuya) juice, fried rice, macaroni chicken soup, avocado salad, baked chicken, vegetable patties and potatoes with beans stew. Pair that with a stunning view – O M G.
This was part of our meal… can you believe it?!
After lunch, part of the group continued for the optional acclimatisation trek to Humantay Lake, which was located at 4200masl. The view was impressive as the lake was nestled between snow-capped mountains.
By then, our guide, Romario, had quickly earned himself the reputation of ‘Speedy Gonzalez’, leaving dying llamas like me struggling to keep up with his lightning speed. After dinner, we had a good rest for day two of what seemed like an eternal concentration camp… I was beginning to seriously regret coming on this trek.
Goodnight from our sky lodge!
Day Two: Salkantay Pass, Wayramachay, and Andean Huts
We were warned that day two would be the most challenging day of the hike. Our camp commander (Haha ok, I mean Romario our guide) woke us up with some hot coca tea at 430am – the best drink in the world when you are at such high altitudes is a hot cup of coca tea (it’s also the only place where it’s actually legal!) You just keep wanting more.
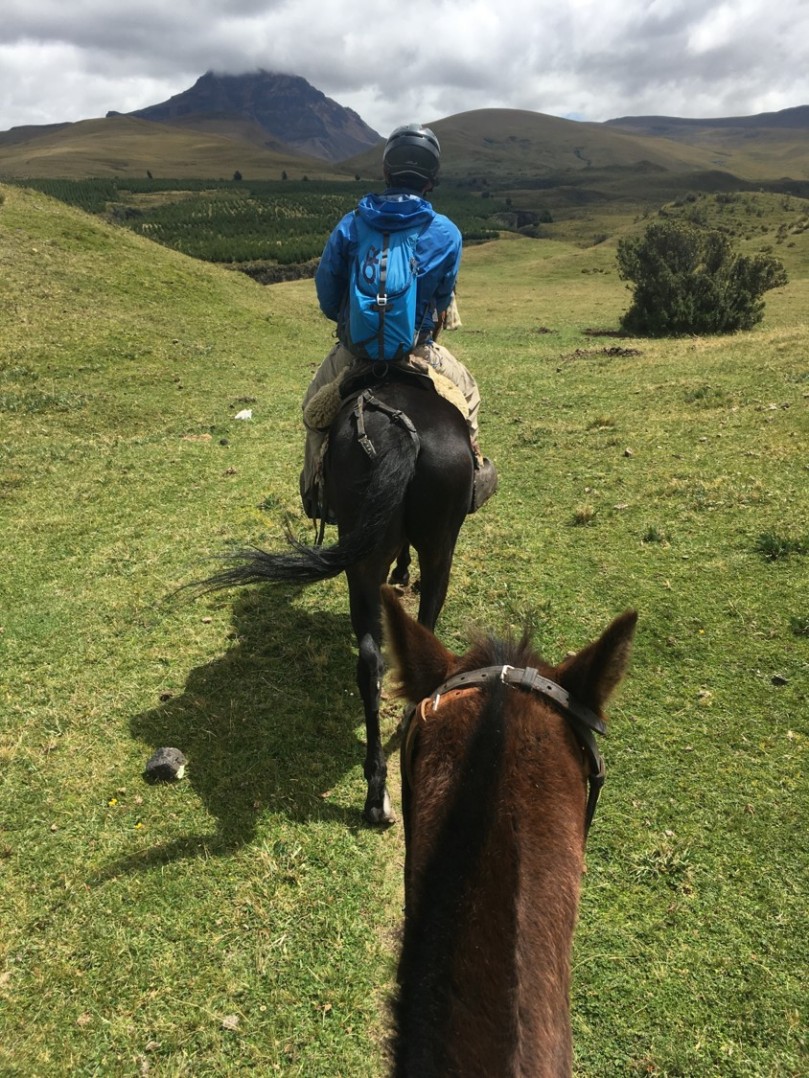
By the time we were having breakfast, it was clear that most of the girls were sick/down with altitude sickness, and it would be humanly impossible for us to climb to Salkantay Pass (4620masl). Hence, we opted to take a horse up to the Pass, and the men continued the hike up to Salkantay Pass (goodbye, J… ☹) We paid S/100 each for the horse… I don’t know what would have been worse, the horse ride or trekking up on foot. The horses had such awful temperaments and with every step up the mountains, we felt like we were hanging precariously off the edges and were either going to fall off/ die of heat stroke (the sun was crazy hot)/ die of motion sickness (the horses were seriously wild…) My horse had a particularly mean streak and would start picking a fight with any horse that attempted to overtake him. He basically made use of every opportunity he could to bite their heads off and nearly threw me off the mountains in the process. Needless to say, I eventually became quite an experienced ranch gal by the end of the ride, complete with a splitting headache that threatened to rip my skull apart, no less.
The blazing heat T.T
Anyway, after 3.5 hours of gruelling riding, we finally reached Salkantay Pass and were surrounded by amazing views of Salkantay mountain and its lakes! I was overwhelmed and even happier to be reunited with the love of my life (J, of course, after all it’s supposed to be our honeymoon) and soon forgot how I felt. 😊 However, the effects of altitude sickness started to set in again, and I had the most throbbing headache that would not go away… It got so bad for one of our fellow group mates that she fainted and needed an oxygen mask once we reached Salkantay Pass!
Check out these amazing views of Salkantay Pass and its surroundings:
One for the album… ❤ J climbed all the way from the base camp to Salkantay Pass! ❤ One with the group at Salkantay Pass!
We then started our descent into Wayramachay, a tiny rural village, where we found ourselves entering a very surreal cloud forest (Yes, we were literally in the clouds!) as we navigated on slippery snow, ice and gravel. J slipped and fell (I just had to add this in 😊). After about an hour, we finally reached our lunch spot but by then, my altitude sickness had gotten so bad that I collapsed on the bench after taking some medication.
Starting our descent into the cloud forest…
We then continued our trek to Chaullay, where our camp site for the second night was located. As we descended, we entered a tropical forest and temperatures became warmer. Commando mosquitoes started attacking us and we found ourselves in the way of a mama wild boar and her baby!
Mama wild boar and baby wild boar 🙂
Soon, we arrived at our Andean huts, and had the option of paying S/10 for a hot shower, which was exactly what we needed… At last, the dreadful 2nd day was over… Strangely, we felt happy and accomplished… 🙂
Very cosy Andean Huts! Loved them!Check out the cute lil chicks right outside our huts!!! ❤ ❤ ❤
Day Three: Visit to a Local Coffee Farm, Lucmabamba and Jungle Domes!
The third day started early, at 5am, with our daily ritual of Romario bringing us hot coca tea. We then had breakfast and took an easy 18 km hike which took us on gentle slopes, undulating hills and river crossings. By then, my thighs were aching like crazy. ☹
This local happily posed for a picture… only to demand money afterwards. Seriously enjoying this part of the hike!Thirst quenchers 🙂
We hiked through largely the tropical rainforest, and came face to face with different species of birds, butterflies, flowers and fruits! Our guide also took the time to explain each of them to us – we saw many varieties of wild orchids, strawberries and elderberries. A most unforgettable sight was the pollination frenzy of monarch butterflies!
We continued hiking and reached a local organic coffee farm, where we learnt about how Peru harvests its own organic coffee beans and then sells them to its neighbours (e.g. Colombia) to be processed. We also had a round of coffee tasting – the coffee was strong and had a mild acidic taste.
After the visit to the farm, we continued trekking to our lunch spot (which was also our camp site) at Lucmabamba (2000masl), where the chefs prepared a sumptuous lunch for us. We were greeted by three little pigs (for real) and our very own jungle domes!
Jungle dome – so super spacious inside!!!
Note: The mosquitoes here were merciless. J went for a shower and the moment he turned off the tap, he was literally attacked by them. A group of trekkers also decided to visit the hot springs at Cocalmayo, but soon regretted the decision when they became feasts for the obnoxious mozzies camping there for their next meals. There was also a stomach bug going around in the camp.
After dinner, we retired for the night, but not before admiring the stars, which were dazzling like diamonds in the night sky.
The night sky was literally littered with stars
Day Four: Final Lap – Road to Aguas Calientes
On the fourth day, we were woken up at 430am (notice the trend? Haha) for the longest day of the trek. By then, I couldn’t feel my legs. The hike started with an ascent to Llaqtapataand then to La Playa, our lunch spot. The skies were clear and it was possible for us to catch a glimpse of Machu Picchu from a distance. After that, we took a three hour hike to Aguas Calientes, which involved us largely walking along railway tracks and gravel paths. There was virtually no shade for the entire trek and we were fodder for uninvited insects. When we finally reached Aguas Calientes, I squealed in glee. Finally, a hot shower and some much needed rest!!!
Peru Rail – if you decide to take a train direct from Cusco!
We had our last dinner as a group at La Lena Grill. Then, we bought bus tickets to Machu Picchu. It cost us S/40 for a one way trip (we decided to hike down after that).
Day Five: D-DAY – Machu Picchu Unveiled!
Finally, we were down to the highlight of our 5 day trek! We woke up at 315am to queue for the bus to Machu Picchu. By the time we reached the entrance gates to Machu Picchu, it was already flooded with tourists. – ____ –
This is the crowd at the entrance of Machu Picchu at 6am
Our guide brought us around Machu Picchu and provided brief explanations of the site. The route was a one-way route, with marshals to control the crowd. With each ticket, you get to enter Machu Picchu twice. When we entered, the fog had yet to clear so we couldn’t see anything for a good two hours.
Machu Picchu covered by the fog LOL
After the guided tour, we re-entered the site to take photos and explore the place at our leisure. There were two circuits and we managed to cover both! Circuit one is higher and slightly tougher, but it gives you an aerial view of the entire Machu Picchu. Circuit two allows you to walk inside Machu Picchu and get up close to the structures. You can also enter the Condor Temple and homes etc. Here are the pictures we took on both circuits!
Fog, fog, go away… come again another day…
Finally the fog started to clear… Ta-daaa! Machu Picchu in all its splendour!
It was so difficult to get this shot… there were so many tourists and unintended photobombs. The place was seriously crowded.
We also managed to complete a separate trail to the Inca Bridge, which was a 45 minute return hike and was not as popular and crowded as the other main circuits. The view on the trail was beautiful, with vertical granite columns resulting in dramatically steep cliffs.
Steep granite cliffs!
The Inca bridge itself, which was the highlight of this trail, was rather uninspiring though – it was a small wooden bridge that was locked behind a gate and visible only from a distance.
The Inca Bridge. ZZZ.
As visitors to Machu Picchu are only allowed into the area in two batches (AM and PM batches) we had to leave the place by noon. We hiked down a flight of never ending steps and slopes and reached Aguas Calientes in about 1.5 hours, which was just in time for lunch 😊 By then, I was dead sweaty and tired… I slumped into the seat and devoured everything on my plate.
Our journey out of Machu Picchu was much simpler – we took a night train via Peru Rail to Ollantaytambo, then a connecting bus to our hostels.
This marked the end of the 5D4N journey – happy we got to try something new, and even happier to visit Machu Picchu! 😊
***
Thank you for visiting our humble travel blog! Stay tuned for our next update on the rest of our South American trip! 🙂 To read our previous entries on our 2017 backpacking trip around South America, click here.
*Our trip to Salar de Uyuni was in late November 2017. All our photos were taken with the iPhone 6, and have not been edited in any way.
Introduction to the Largest Salt Flats in the World
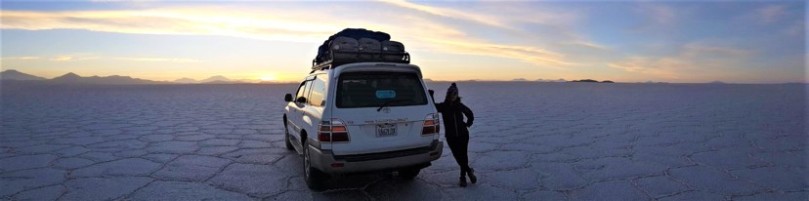
Spanning Bolivia’s southwest is an environment that is so harsh and unlike any other, that it almost looks like a landscape found on some foreign planet. The Salar de Uyuni – or Uyuni Salt Flats – are the world’s largest salt flats, with a size of 11,000 square kilometres. It is an expanse of dry, bright white salt (except during the rainy season, where pools of water form) that was formed due to the complete evaporation of a prehistoric lake. The salt flats are the main attraction of Bolivia; no visit to the country seems complete without spending a few days here. In fact, National Geographic has named the flats as “one of the most extreme and remarkable vistas in all of South America, if not Earth”.
View of the parched salt flats during the dry season
Getting to Uyuni and Finding the Right Tour Agency!
There are several ways to get to the flats, but the most popular starting point is from Uyuni, a city located in southwest Bolivia. From La Paz, we took an overnight bus to Uyuni. We arrived at Uyuni at 6 in the morning, and had a hearty breakfast at a café nearby as we waited for the tour agency to open. We also walked around Uyuni for a bit.
Uyuni is a small and walkable city – very easy to navigate due to its grid pattern.The sky was the most brilliant blue!
We settled on Salty Desert Aventoursas we had read lots of rave reviews about them. We booked a 3D2N tour to the salt flats, which cost us Bs/800 (~USD120) per pax (inclusive of all meals, accommodation and transport) for a 6-person group tour with a Spanish speaking guide. We had read that the Spanish guides are able to converse in English too, and by then we had brushed up quite a bit on our Spanish language so we figured that it would be fine. Besides, we did not want to pay an extra Bs/1100 per pax for an English guide, and no English guide was available on that day anyway! Good for us – our guide cum driver, France, proved to be excellent! We were driven around in a 4 by 4 for the whole trip, and were happy to be part of a fun group comprising an English couple, a Swiss couple, and us! Seriously, we have no idea how France navigates – there is no GPS signal and he does not use any maps – through this endless landscape of pure white salt. Legendary.
France securing our backpacks to the top of the 4 wheel drive!Our 4×4 for the trip!
Highlights of Day One: Train Cemetery, Colchani Village, Salt Flats, Incahuasi Island
Our first stop was the Train Cemetery, or Great Train Graveyard, where 25 abandoned trains, that were once used to transport minerals like silver nitrate to Chile thrice a week, found their final resting place.
This is a popular spot for tourists, and you can get creative here by taking all sorts of photographs by climbing all over the trains!
Psst… there are also newly-built toilets here so it is good to use them.
After about 30 minutes here, we visited Colchani Village, which was really a small village with roads lined with makeshift stalls selling souvenirs and handicraft such as woven bags, hats etc, as well as salt sculptures.
Colchani Village
There was also a tiny Salt Museum displaying life-sized sculptures made entirely of salt, such as this cute llama!
Any uncanny resemblance? 🙂
It was then time for us to visit the salt flats – the highlight of our tour! According to France, the collision of the Nazca and Pacific Plates led to the formation of the Andes Range, and a salt water lagoon was formed in the process. Due to the absence of a water source, the lagoon eventually dried up to form the world’s largest salt flats. The endless white landscape has since become a favourite spot for taking perspective pictures! Here, France proved how awesome he was – he opened his car boot, which was full of props and started directing us for photographs – he even helped us produce our own short film! He was so patient and excited, perhaps even more than us when we started getting tired due to the hot sun! Haha. 😊
Don’t worry guys, I’ve got this all sorted! Says France. Haha.
And… here are our masterpieces!
Series 1: Crouching humans, crazy dragon
Series 2: The mini people of Pringleland!
Series 3: The six musketeers
Series 4: The giant and the dwarves
J & I also had fun taking our own perspective photos! ❤
We then proceeded to have lunch at the Salt Hotel (Hotel de Sal Luna Salada), the only such hotel built right on the salt flats. Incidentally, this is also where J fell down and suffered a huge gash on his hand while attempting to climb a llama salt sculpture. LOL 😀
After lunch, we made our way to Incahuasi Island (Isla Incahuasi), an island that is located in the middle of the salt flats. It is basically a cactus island, with cacti and coral fossils that are over thousands of years old! Apparently, the island is what remains of an ancient volcano that was partially submerged in the prehistoric lagoon before it evaporated. The entry ticket to Incahuasi cost us Bs/30 (USD 0.50) and we found it extremely cool, especially when we managed to climb to the top of the mound.
Scale: Check out how colossal these cacti are!
Our last activity of the day was to catch the sunset on the salt flats. Absolutely stunning. ❤
❤ ❤ ❤
Our accommodation for the night was a salt hotel with private rooms and a shared bath. Hot showers were available at an additional Bs/10 (USD 0.20) per pax. Sleeping bags were provided and proved extremely useful for the subzero temperatures at night. Dinner was cooked by France, our guide – it was delicious and substantial! 😊
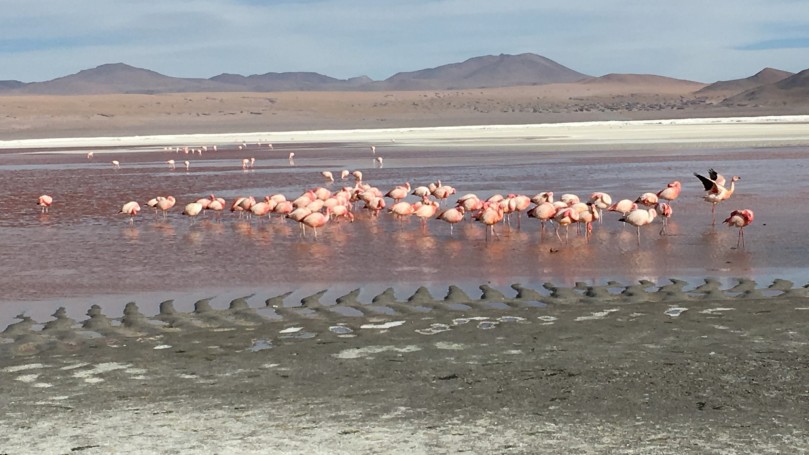
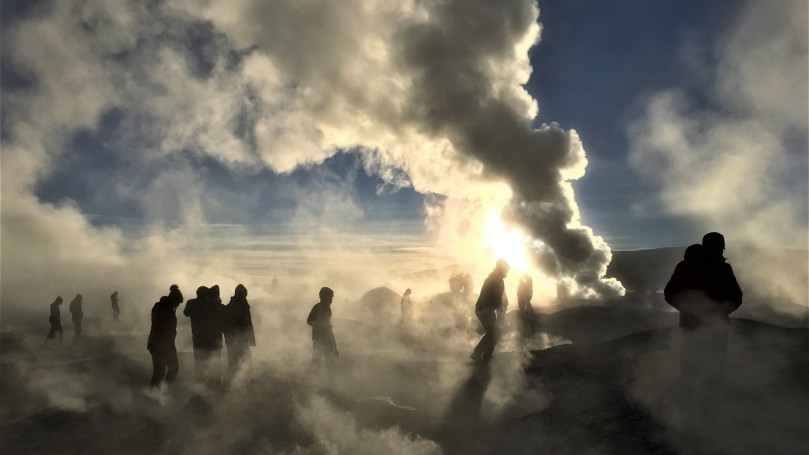
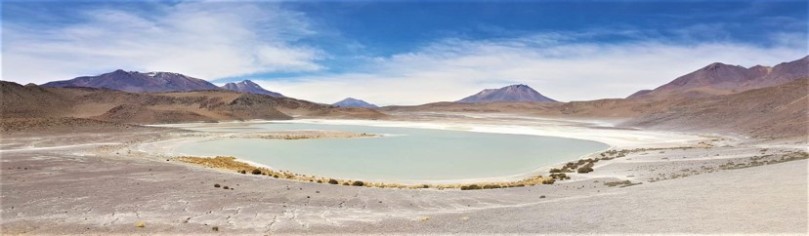
Highlights of Day Two: Salvador Dali Desert, Red Lagoon, Lots of… Flamingos!
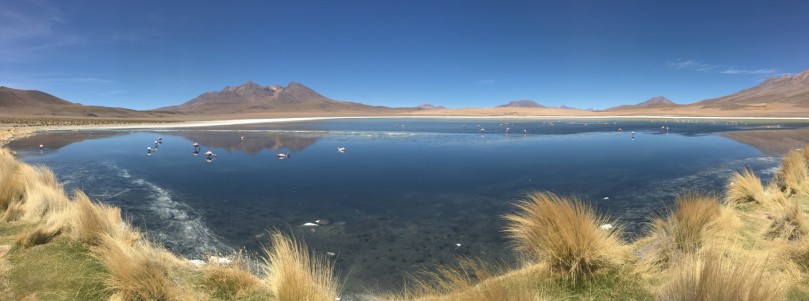
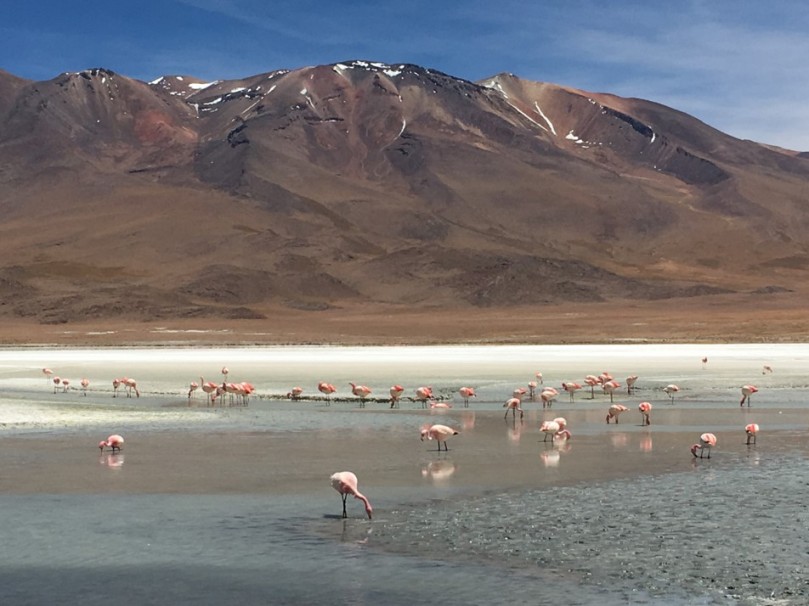
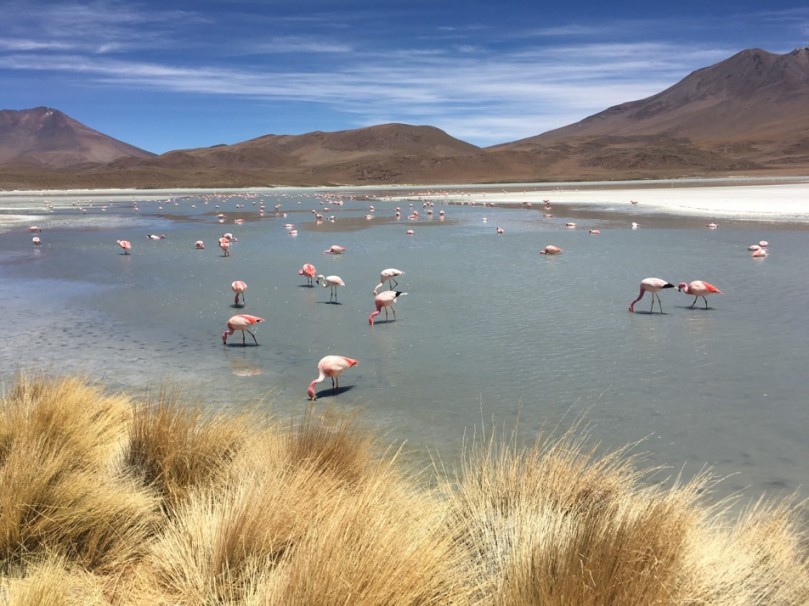
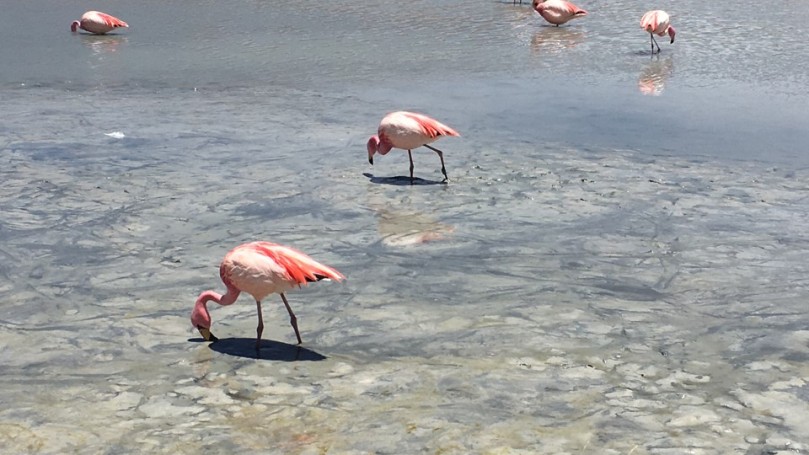
The day started early with breakfast at 7am. Our first highlight of the day was seeing wild flamingos (LOTS and LOTS of them) in the many lagoons we visited.
France explained that there are 3 types of flamingos in the Salar: the Andean, Chilean andJames’ Flamingoes. The Chilean has bright red feathers, the Andean has a black tip at the edge of its tail, and the James is a lighter pink shade. Can you tell the difference?
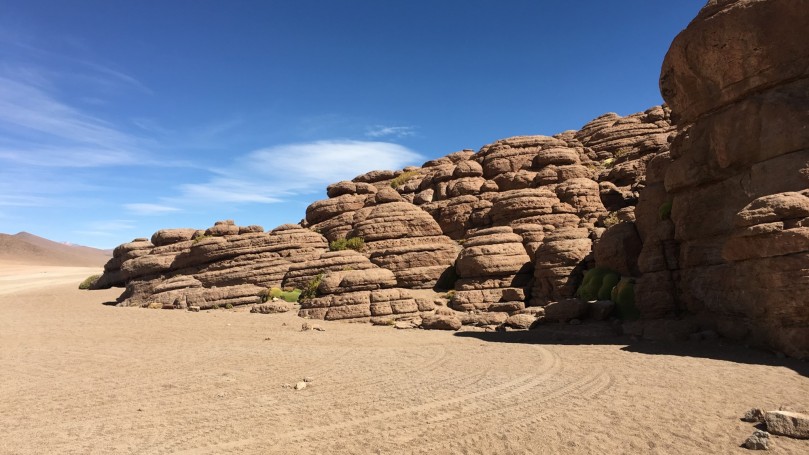
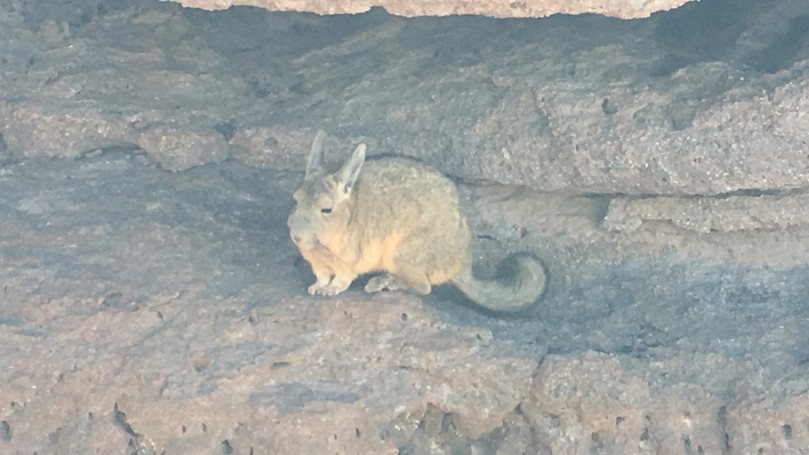
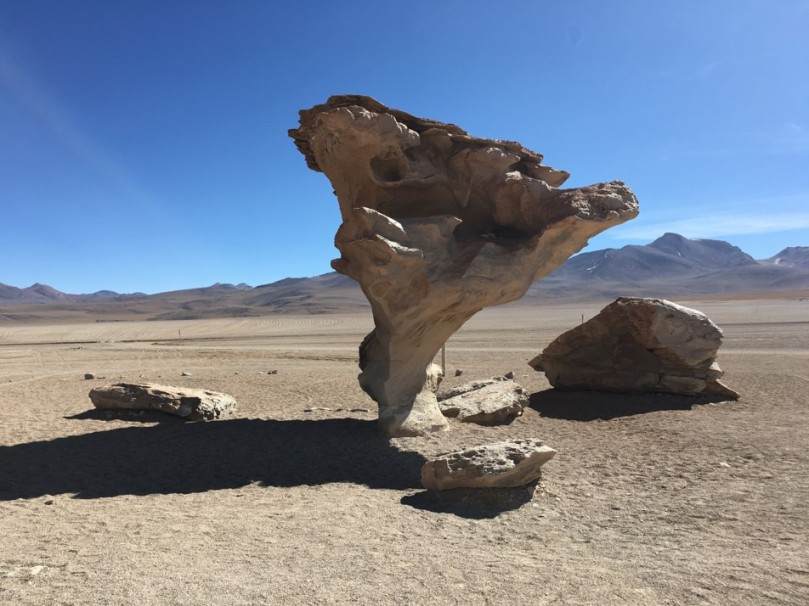
Andean Rabbit! Kinda looks like a cross between a rabbit and a chinchilla, don’t you think?The famous Stone Tree
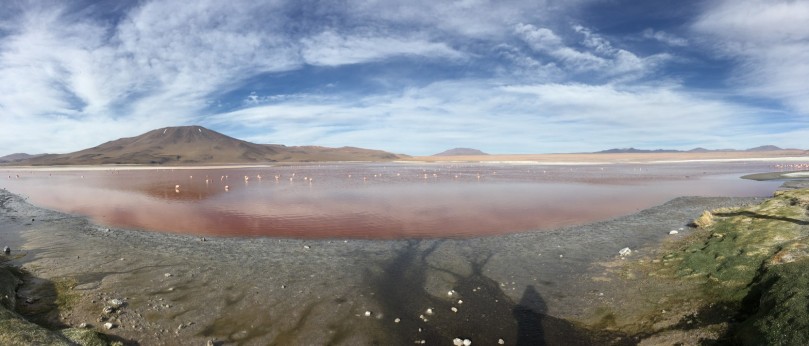
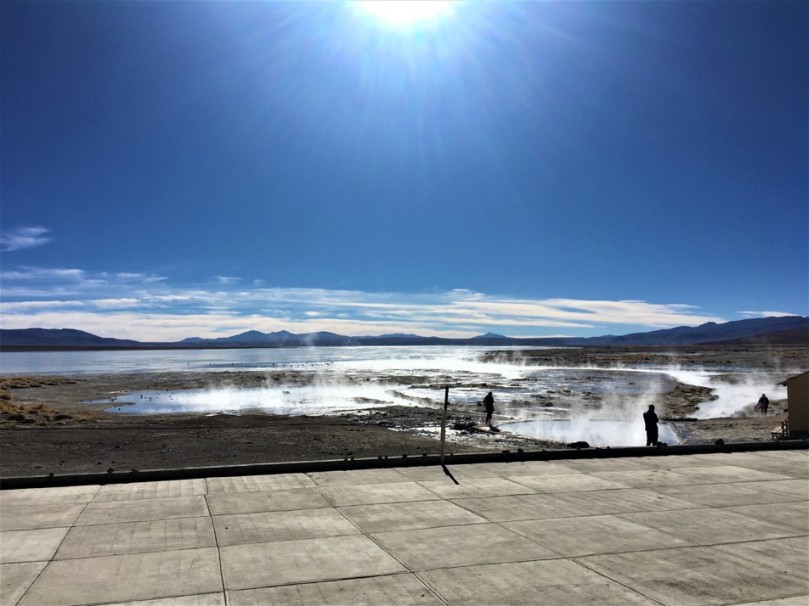
After lunch, we stopped by the Red Lagoon (Laguna Colorada), which is red due to the deposits of microscopic algae in the lake. There were lots of flamingos here too!
The beautiful Red Lagoon… Flamingoes galore!
For the night, we slept in a shared accommodation with 6 single beds in a room. The bathroom was communal as well. The night was very, very cold…
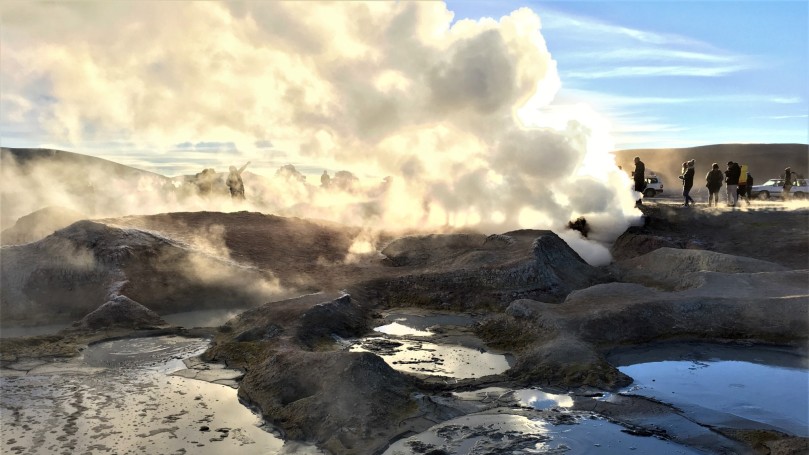
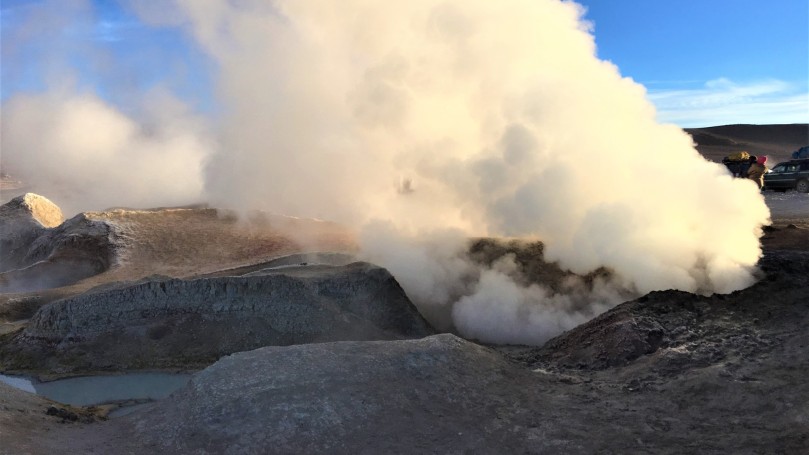
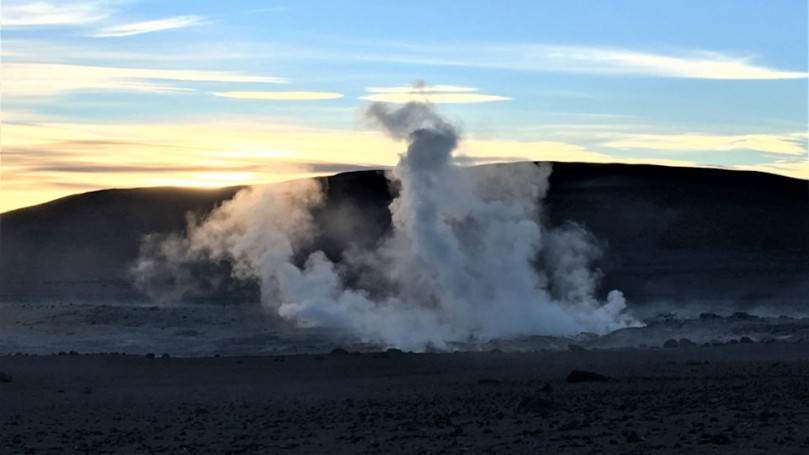
Highlights of Day Three: Sol de Manana Geysers, Hot Spring, Laguna Verde, Laguna Blanca, Valley of Rocks
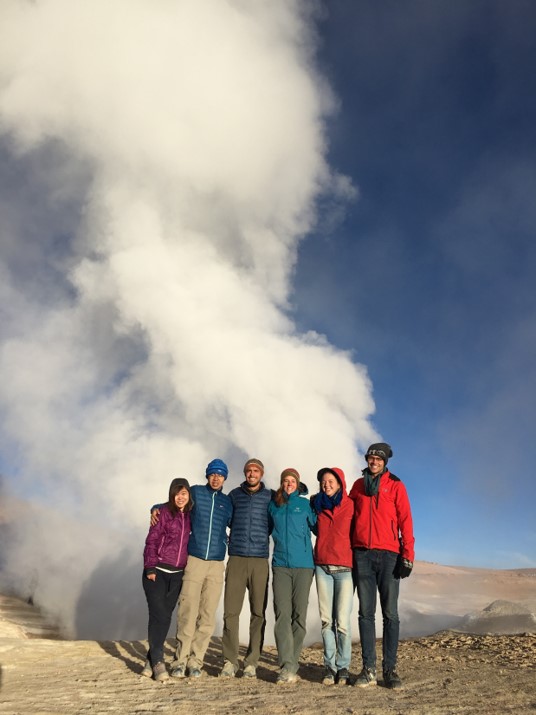
On our final day, we woke up at 430 am (yes… that early) and left the hostel at 5am to catch the sunrise. Our first stop was at the Sol de Manana Geysers, which were nothing short of impressive! The geysers are located in a geothermal area that stretches more than 10 square kilometres. There were different coloured pools everywhere. The first geyser we saw was an artificial one for photo shots – where tourists could have fun ‘jumping’ through the geysers as it spouted water every few seconds.
Man-made geyser for fun shots!
After we had our fun shots, France carefully guided us around the natural geysers. We were seriously impressed by his concern for us – he was one of the only few guides who was with the group as we walked around because he was very concerned for our safety… apparently a few years back, an Israeli tourist fell to his death while trying to take photos next to a geyser. France was also busy reminding tourists doing dangerous stunts to be careful… sadly, some simply dismissed him. (How rude!) Anyway, the geysers were really beautiful, bubbling and simply out of this world. Our first thought: moonscape!
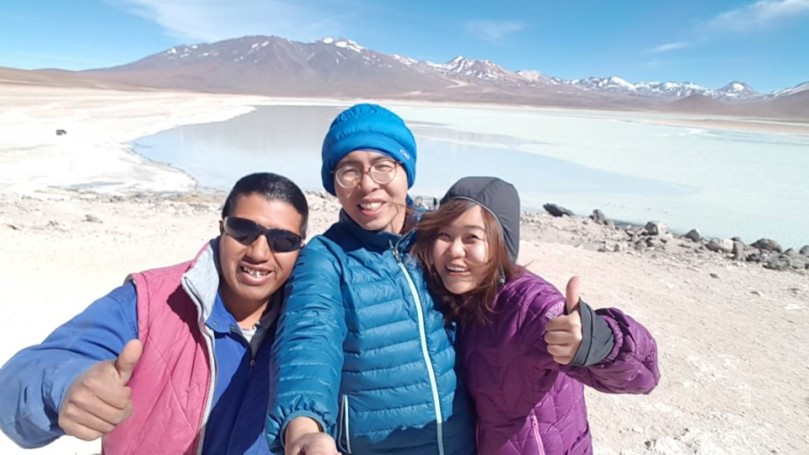
With our travel buddies for the trip!
We then headed to the hot spring for a dip, before having breakfast at a café there.
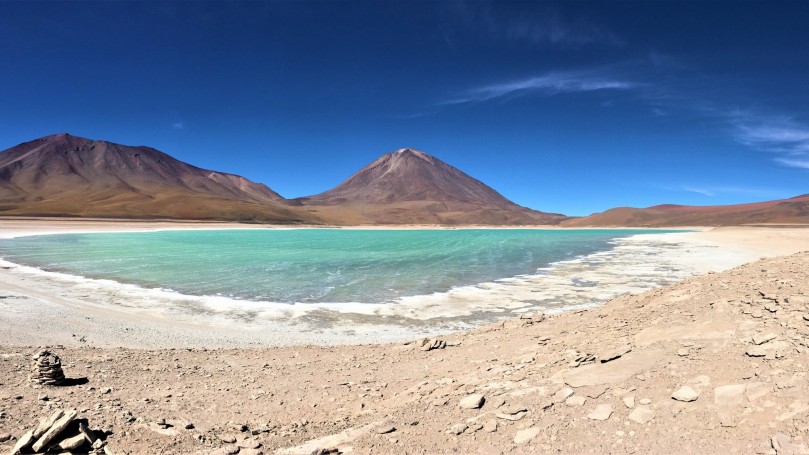
Our next stop was the Green Lagoon (Laguna Verde), that got its colour from copper deposits in the lake. It was very beautiful. Next to it was the White Lagoon (Laguna Blanca), so named due to the high amount of borax deposits suspended in the lake that gives it a whitish appearance.
The Green Lagoon (Laguna Verde)
The White Lagoon (Laguna Blanca)
One for the album with France, our awesome guide!
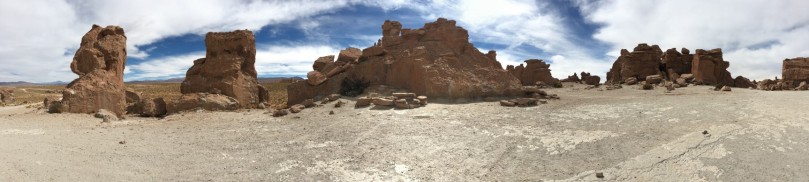
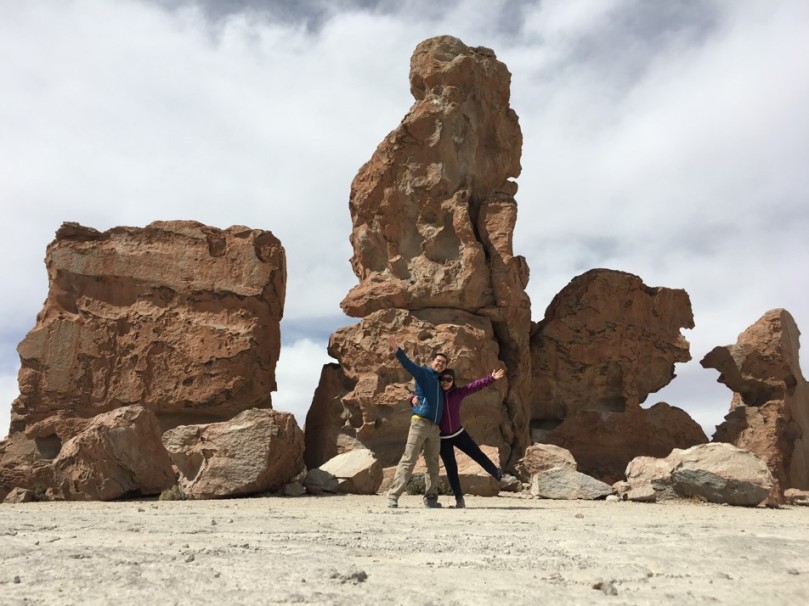
We then bid the rest of our group members goodbye, as they were headed to Chile while we were going back to La Paz. So the last leg of our trip was just France and us! We got to know him much better and he shared lots of personal stories with us about his work, family and life in Bolivia. After our simple lunch with France, we headed to the Valley of the Rocks (Valle de Rocas), which is formed by pyroclastic remains from the explosive eruption of a prehistoric volcano.
Could this be the South American equivalent of Stonehenge? No offence, but we kinda like this version more! Haha. It was a lovely ending to our trip to Salar de Uyuni.
Salty Desert Aventours Information Contact: uyunisaltydesert@hotmail.com Address: Av. Ferroviaria (between Arce and Bolivar) Website: https://saltydesert-uyuni.com/en/
Final Meal: Minuteman Pizza Uyuni
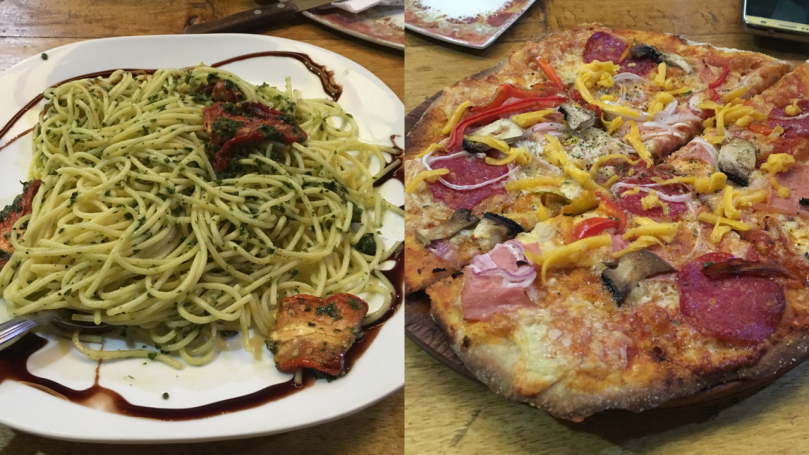
To end off our trip, we decided to have a good meal at Minuteman Pizza Uyuni, which was highly raved about on TripAdvisor and various travel forums. We ordered ‘The Works’ (Pizza with ham, salami, roasted peppers, mushrooms and onions) and Pesto Spaghetti and finished our sumptuous meal with moist chocolate cake!
YUM 🙂
The food was great, and was a refreshing change from the lacklustre fare we had in La Paz, but serving sizes were pretty small…
Minuteman Pizza Uyuni Information Address: Avenida Ferroviaria next to Army base (Inside the Tonito Hotel), Uyuni, Bolivia Verdict:
Some Very Useful Tips…
If you are planning a trip to the salt flats, here are some useful tips you may wish to take note of:
Bring ample small change for toilets – toilets are few and far between, so when you do see one, you should use it. None of the toilets are free of charge and the attendants do not carry much loose change.
Bring your own toilet paper – there is no toilet paper available in the toilets.
Layer well – it is hot in the day but super cold at night (think sub-zero temperatures).
There is an option to shower on the first two nights for Bs/10.
Do some research before signing up with a tour agent – there are loads of them – as they make or break your trip. You want a good and well-maintained vehicle, a good guide, a good cook who is particular about hygiene, and someone who cares about your safety and balances this with enthusiasm! We highly recommend France from Salty Adventours!
Enjoy! 🙂
***
Thank you for visiting our humble travel blog! Stay tuned for our next update on the rest of our South American trip! 🙂 To read our previous entries on our 2017 backpacking trip around South America, click here.
*We visited Cotopaxi National Park from 11th to 13th November 2017. Because some of you asked, all our photographs were taken using the iPhone 6 Camera – that’s all we travelled with for our backpacking trip around South America (on top of our GoPro for underwater shots)!
The volcano started showing signs of eruption in 2016, such as the occurrences of multiple earthquakes and tremors, as well as smoke being emitted from its vent. This caused surrounding villages to be evacuated. However, it quietened down in 2017 and climbers were once again allowed to visit the park. We stayed at the Cotopaxi National Park for 3D2N, and are excited to share our experience with you!
Getting to Cotopaxi National Park
There are many ways to get to Cotopaxi from Quito, but the most cost-effective way is to catch the local bus from Quito to Machachi. We took a taxi from the Old Town Centre to the local bus stop at Quito and it cost us USD 3 (Tell the taxi driver you want to take the Transporte Mejia bus to Machachi and he will know where to alight you). We then boarded the Mejia bus to Machachi, which took us an hour. The bus journey cost us USD 1 per pax, and was comfortable – there was an undercarriage to store our huge backpacks so it was convenient. The bus soon got crowded, with passengers and peddlers hopping on and off the bus with ice cream, finger food, chips and the like. It was an interesting and very local experience!
Once we got off at Machachi, it was another 45-minute taxi ride to our accommodation, Chilcabamba Lodge, which was situated within Cotopaxi National Park itself. The taxi ride on a 4 wheel drive cost us USD 20 (this is the standard rate). The road to the lodge was very steep and rocky, and we were lucky enough to be on an empty stomach or we would have totally thrown up! (Tip: Eat after you reach the lodge.)
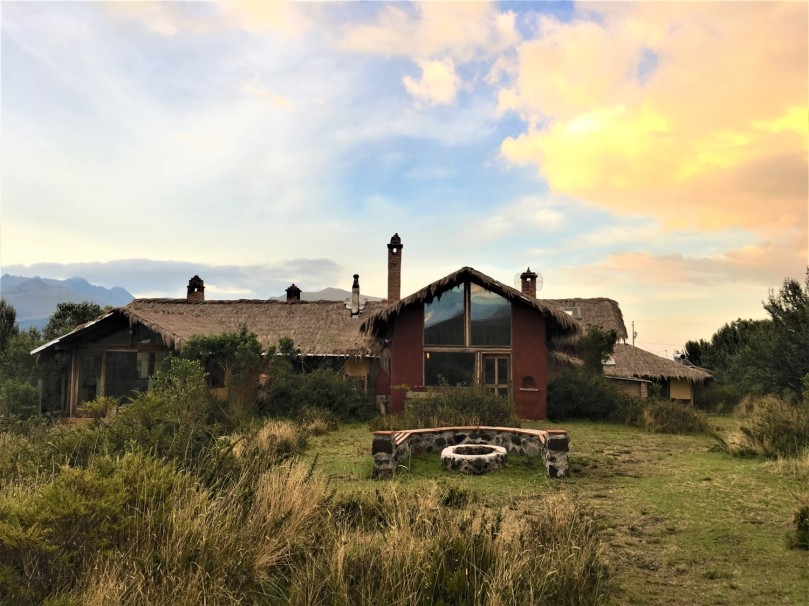
Arrival at Chilcabamba Lodge
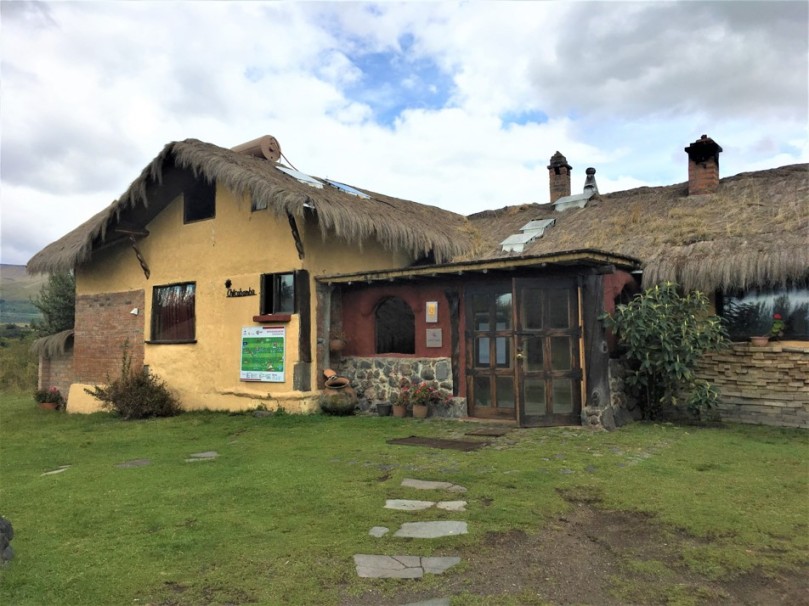
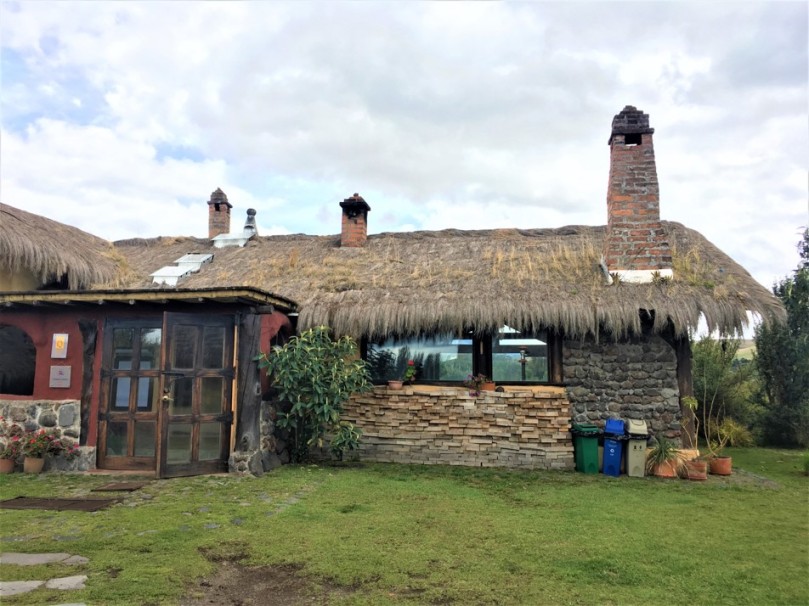
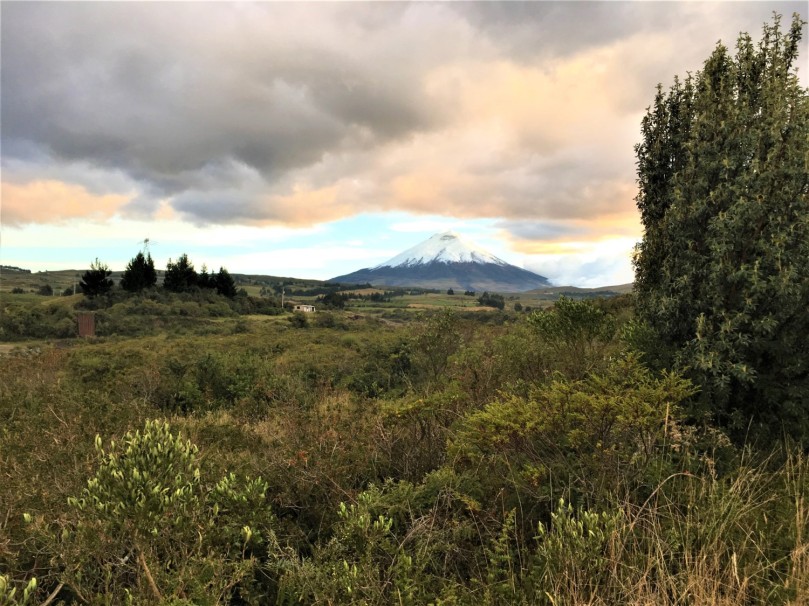
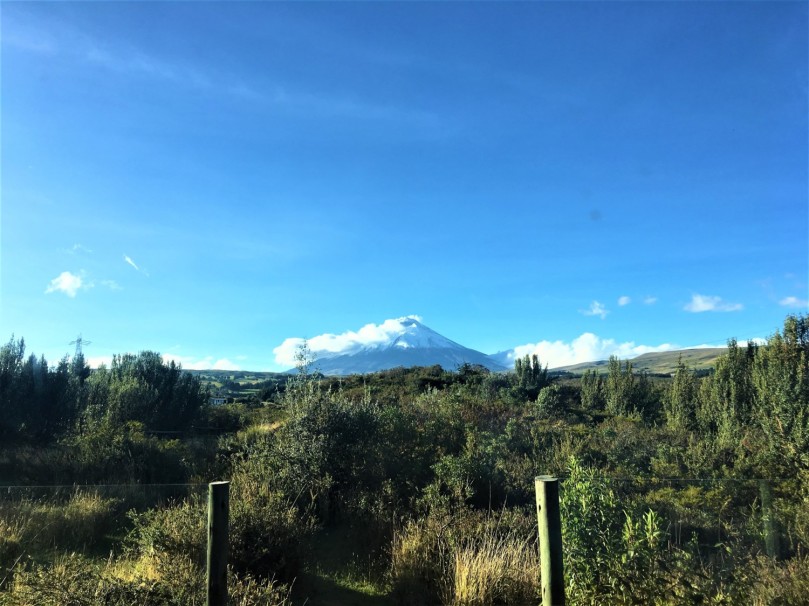
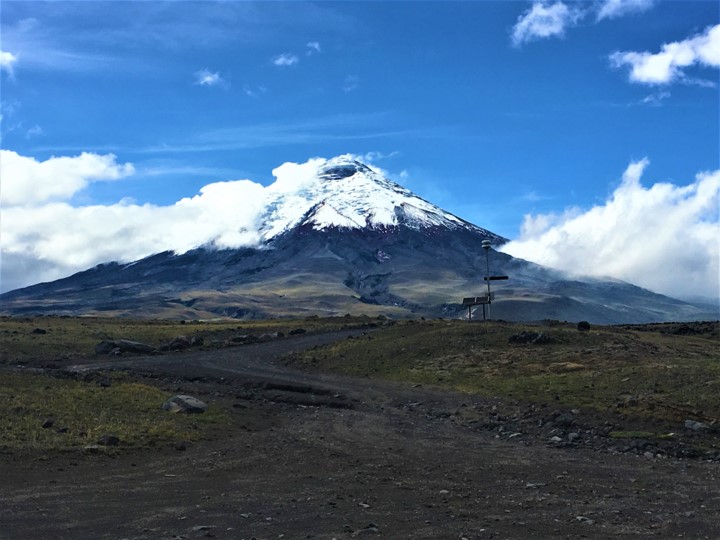
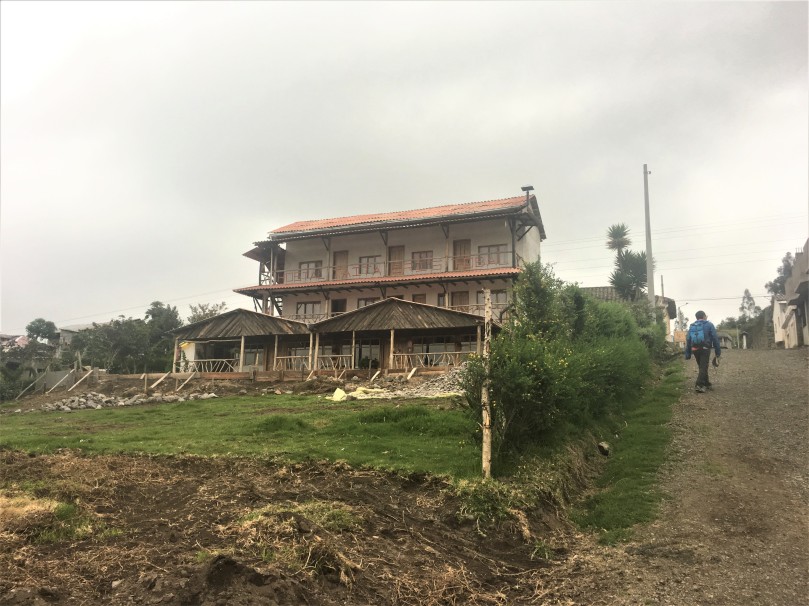
As mentioned, Chilcabamba Lodge is situated within the national park itself. The surroundings are really beautiful, especially if you arrive on a clear day, where you will be treated to an astounding view of Cotopaxi volcano in the distance.
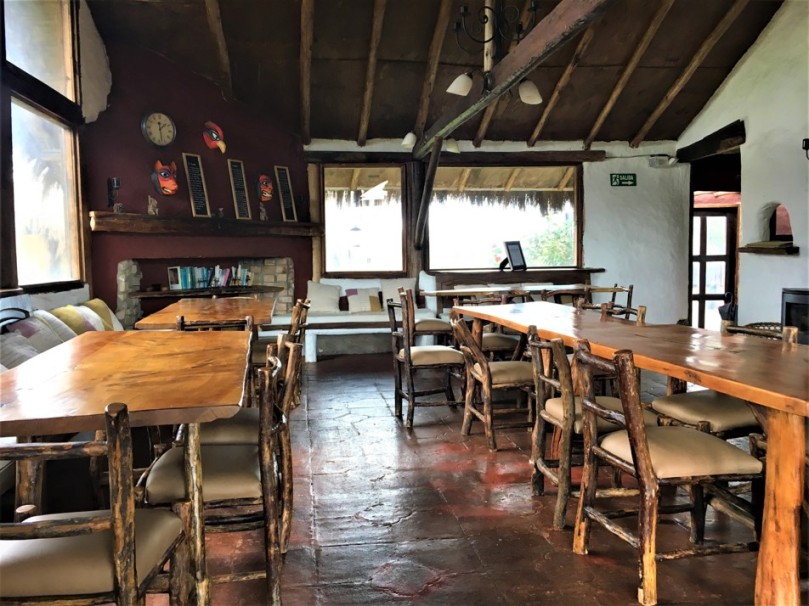
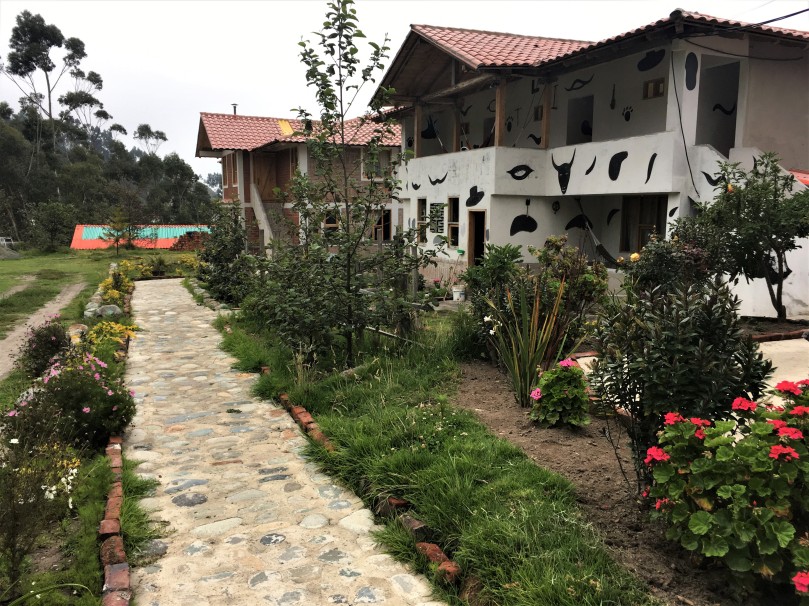
View of Chilcabamba LodgeMain entrance to the lodge – reception areaLodge extension: in-house restaurant (super in love with the thatched roof and stone walls!)
The majestic Cotopaxi in the distance! View from Chilcabamba Lodge
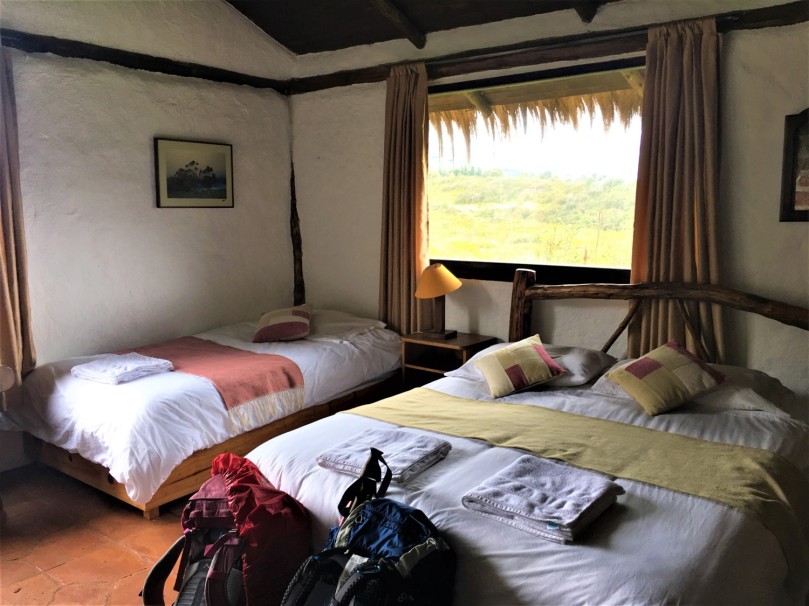
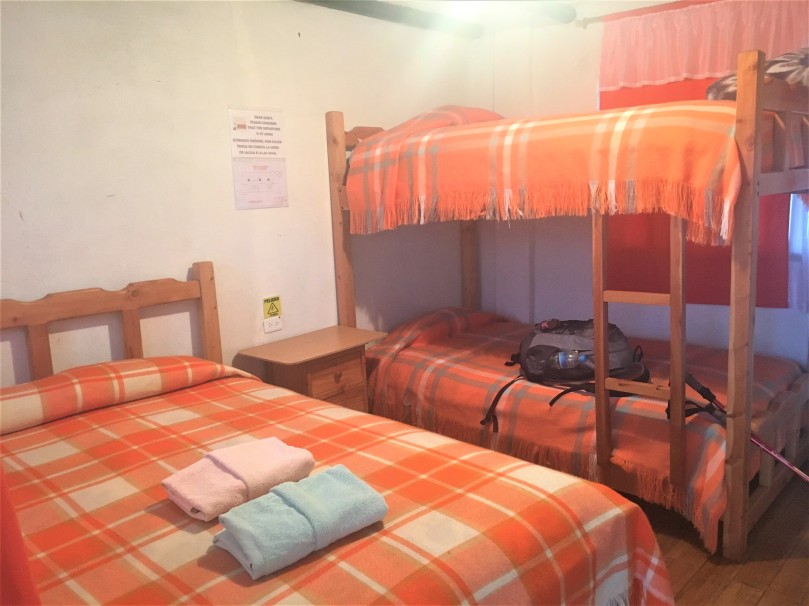
We quickly checked in and were shown to our room, which was cosy and complete with an electric fireplace. The walls were made of stone and very ornately decorated! The room had a private en-suite bath with hot shower (the shower was so good), and came with two beds (one single and one king-sized). The best part was that our windows were facing Cotopaxi!
Snapshot of our very cosy room 🙂Total lifesaver!
Being at 3900 m above sea level was indeed a real treat – we felt totally detached from the outside world. By then, we had already acclimatised to the altitude so it wasn’t a problem for us. Besides another American couple who were due to leave on the day we arrived, we were the only ones there!
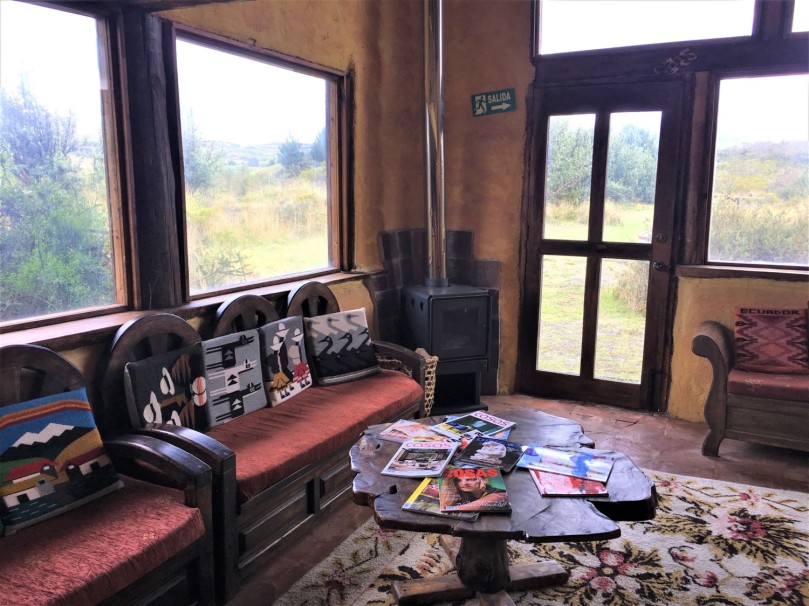
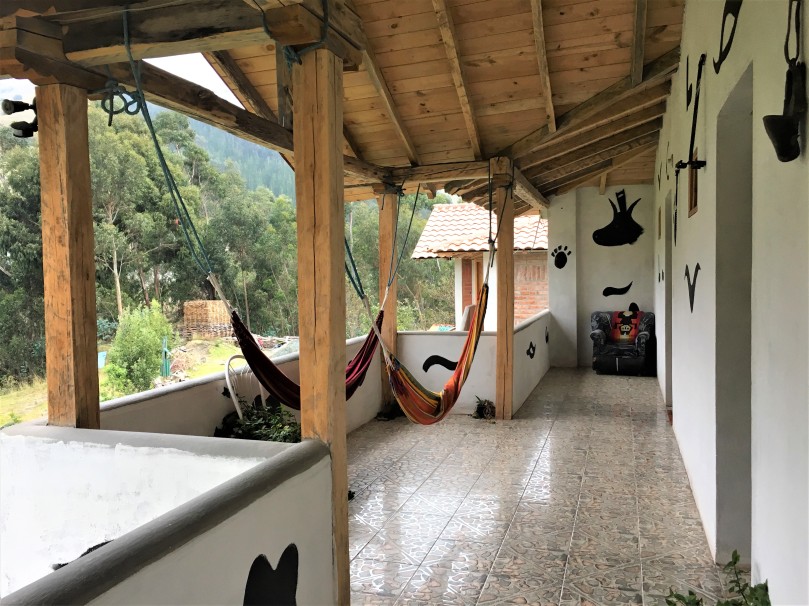
The lodge also came complete with a fully equipped library (with board and card games as well), a lounge area with 2 large bean bags, an in-house restaurant for meals, and an outdoor fireplace for s’mores! Oh, and of course, it was well-connected with free wi-fi. Haha.
Dining and lounging areaLibrary
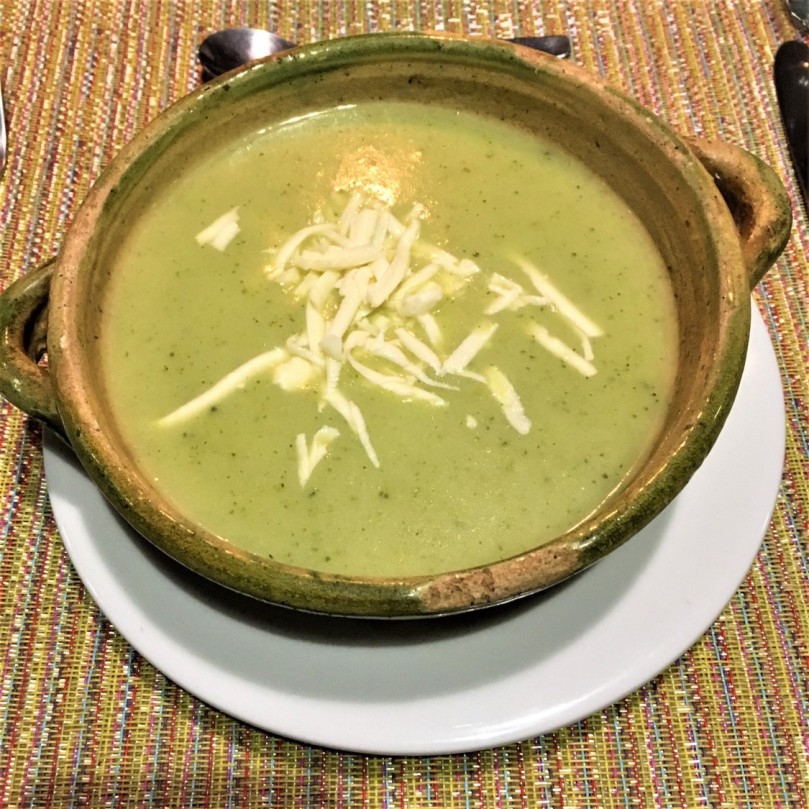
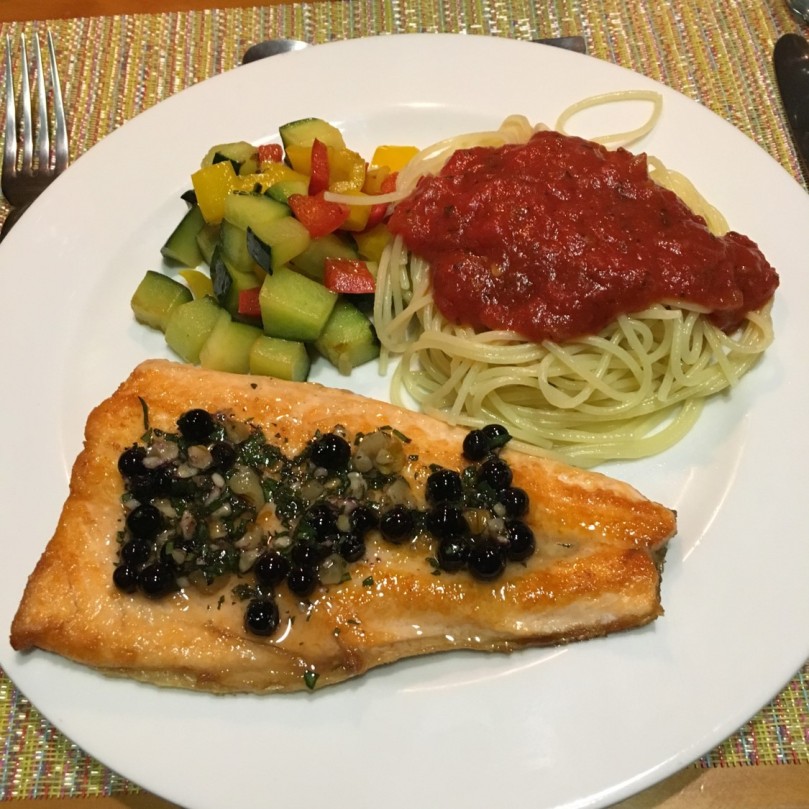
The only drawback was that the food and guided activities were expensive. One meal, for instance, cost us USD 20 per pax. We probably paid more for the atmosphere and setting than the food itself… but it was a lovely experience altogether. Here are some pictures of our meal on the first night!
A shot of the mister ❤And of me 🙂Soup – cream of broccoli (menu changes daily!)Mains – grilled fish with pastaDessert – some alcoholic green apple thingy haha
Full day Pasochoa Hike
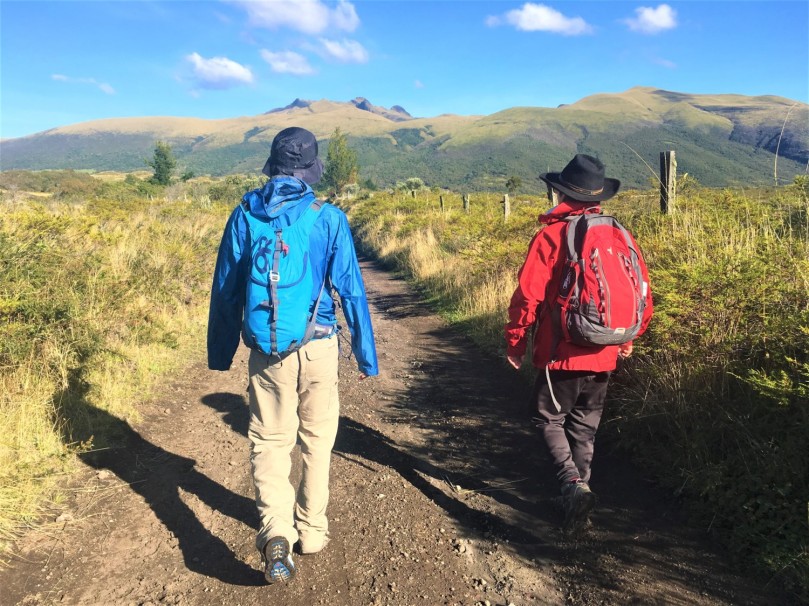
For our 2nd day at Cotopaxi National Park, we signed up for a full day Pasochoa hike, which cost us USD 52 per pax. The Pasochoa hike ends at the peak of Pasochoa mountain, which is about 4200m above sea level. Many hikers start training for higher altitude climbing (such as climbing Cotopaxi itself) by starting off with this hike.
We started the day early at 7am and had a sumptuous breakfast, before embarking on the hike with our English-speaking guide, Johnny.
It’s a beautiful day!J with Johnny, our guide (in red) and me struggling to catch up from behind LOL
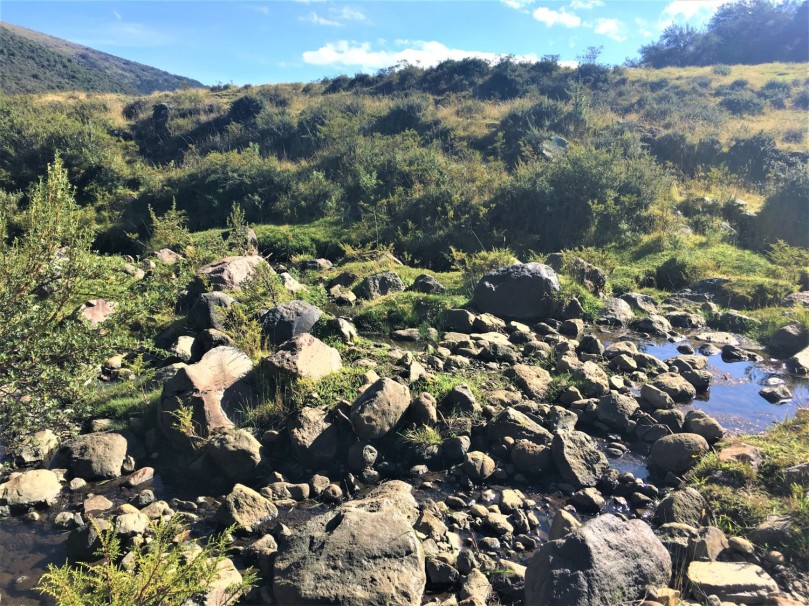
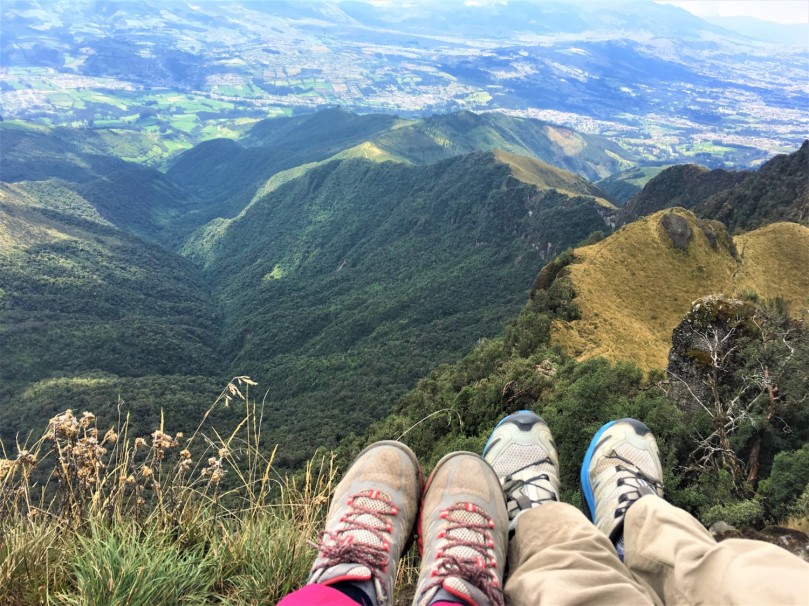
The round trip took us 8 hours in total and was no mean feat! There was LOTS of climbing and traversing through waist-high grasses and thorny shrubs, and also crossing rivers and hiking up mudflats and boulders.
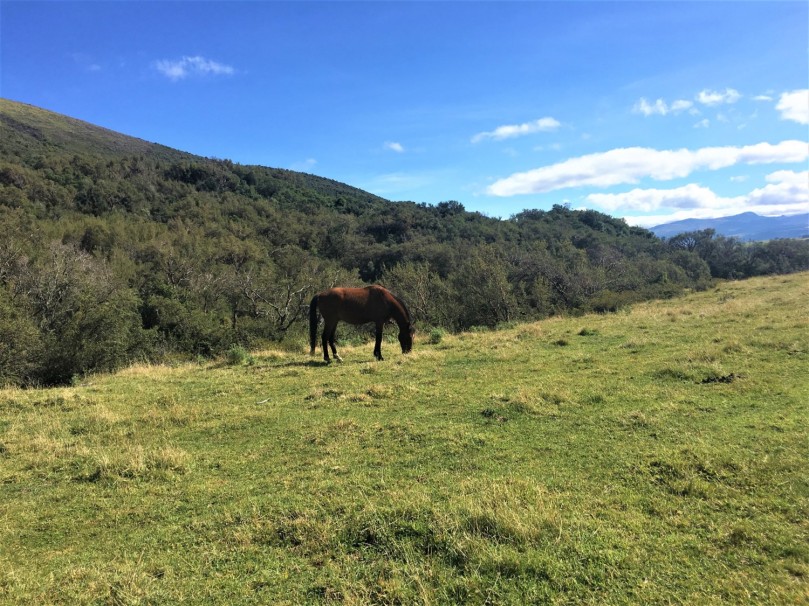
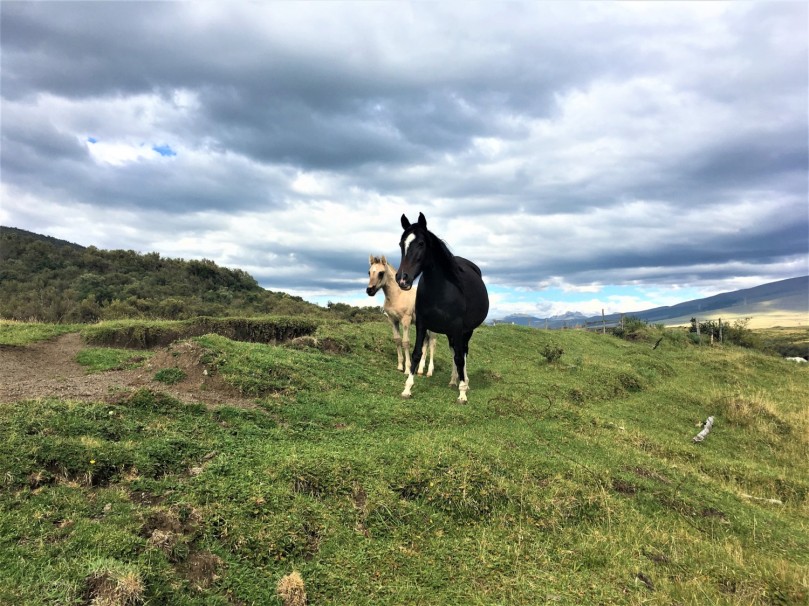
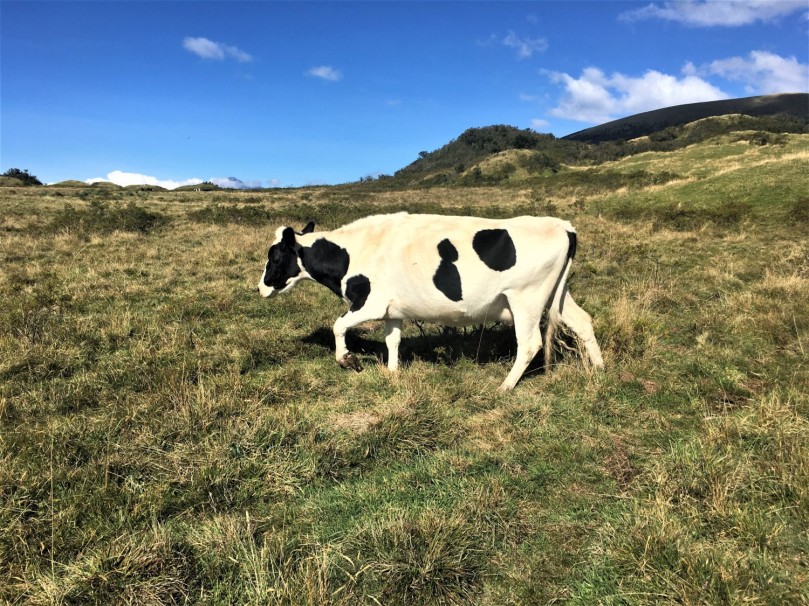
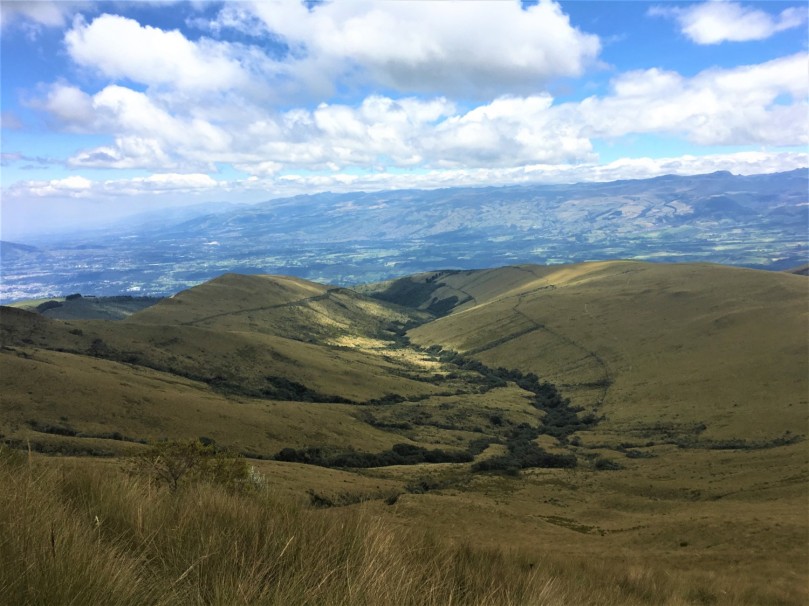
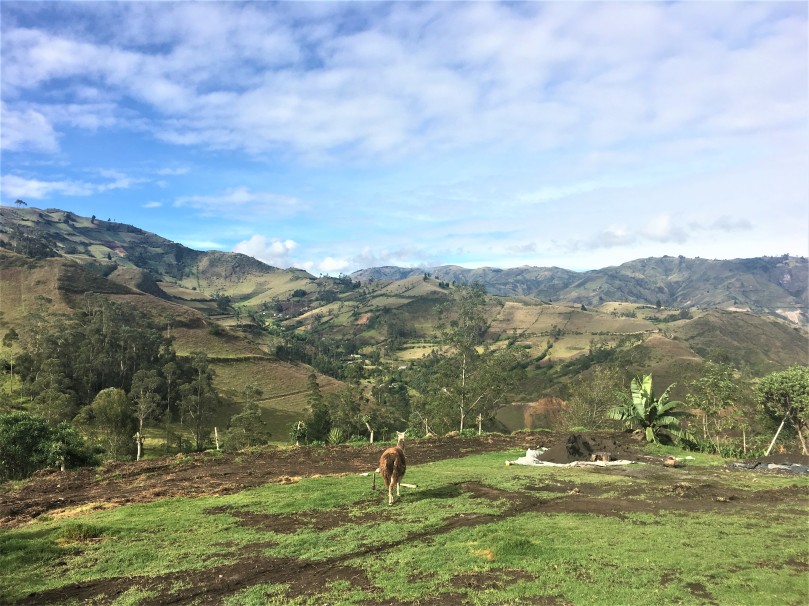
We saw many cows and horses along the way, and even some unique bird varieties, including the Andean Condor! I stopped to take lots of photos, but that was really just an excuse for me to catch my breath while the two men happily trudged on way ahead of me ☹
We sat down for a while, admiring the breathtaking views around us (and also to take a much needed break) and munching on our simple snacks, which tasted like delicacies, really. The entire experience was just magical.
Tired feet, happy feet! 🙂SO BEAUTIFUL ❤Hunger takes over 🙂
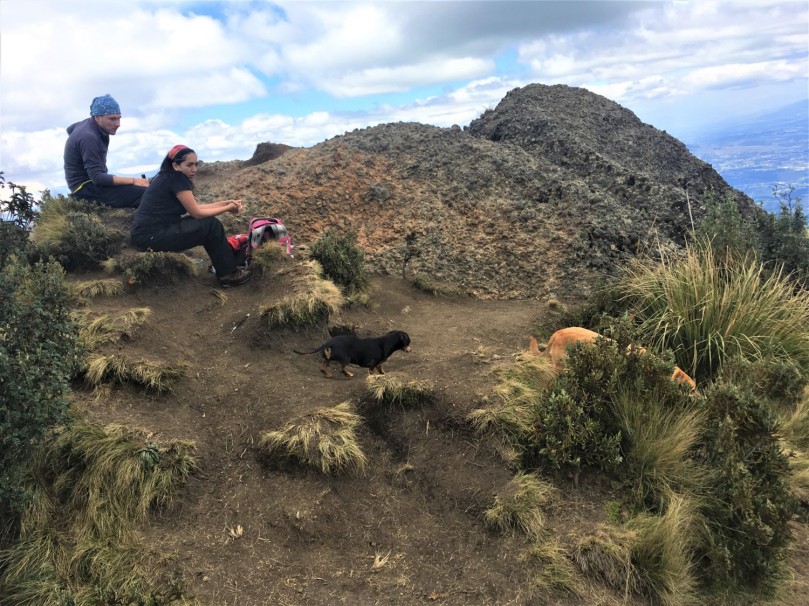
There were some locals at the summit (with their pet dogs) enjoying their lunch, so we also spent some time attempting to converse with them in our limited Spanish. 😊
Hola! Que tal?
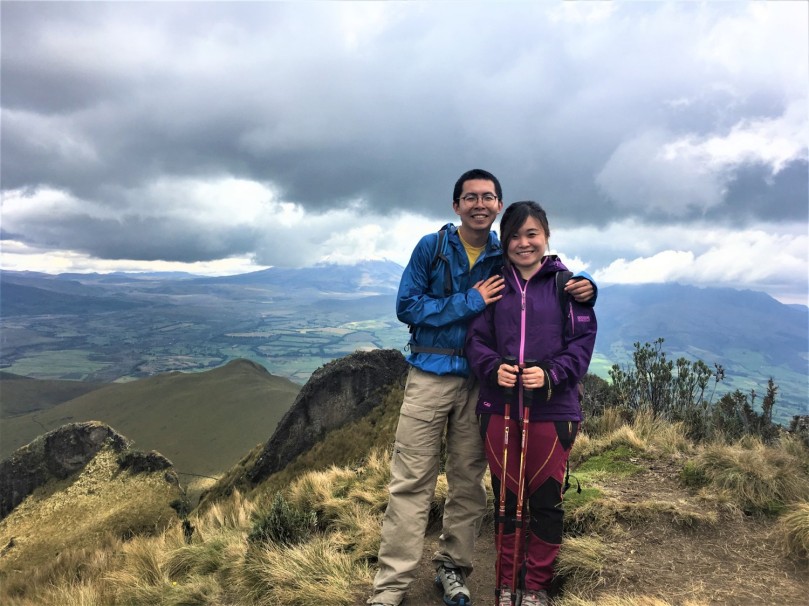
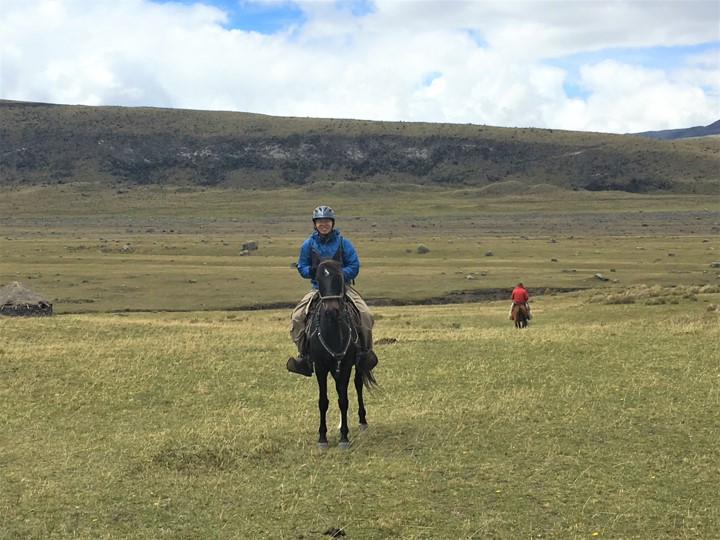
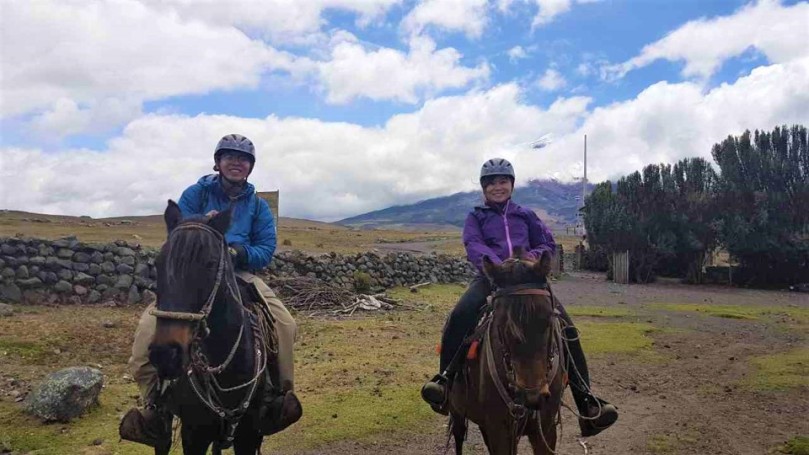
Horse-riding at Cotopaxi National Park
Since our epic horse-riding adventure at Patagonia in 2016, we have made it a point to do the sport whenever we get the chance. We were delighted (and super excited) that the lodge offered the option for us to do this on our 3rd and final day! After checking out at 9 am, we booked a 2 hour horse riding experience at Cotopaxi National Park. It cost us USD 37 per pax, inclusive of transport to and from the site.
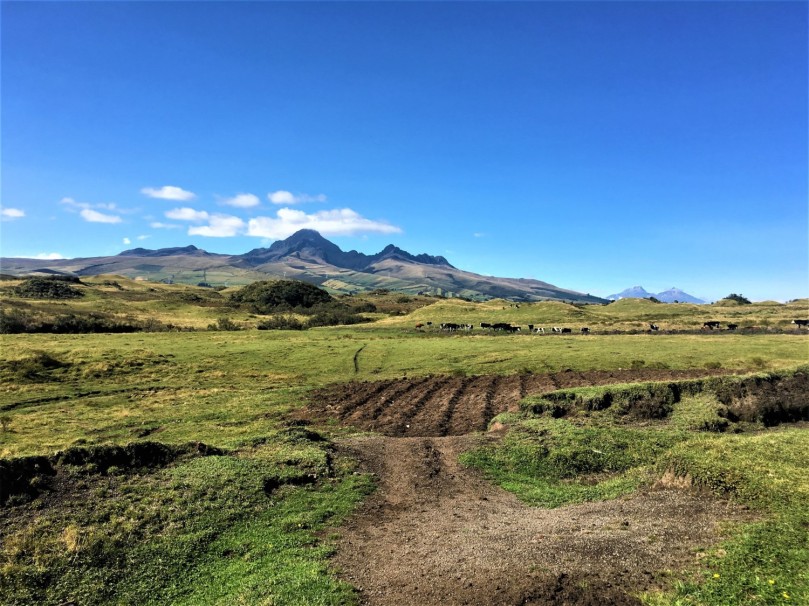
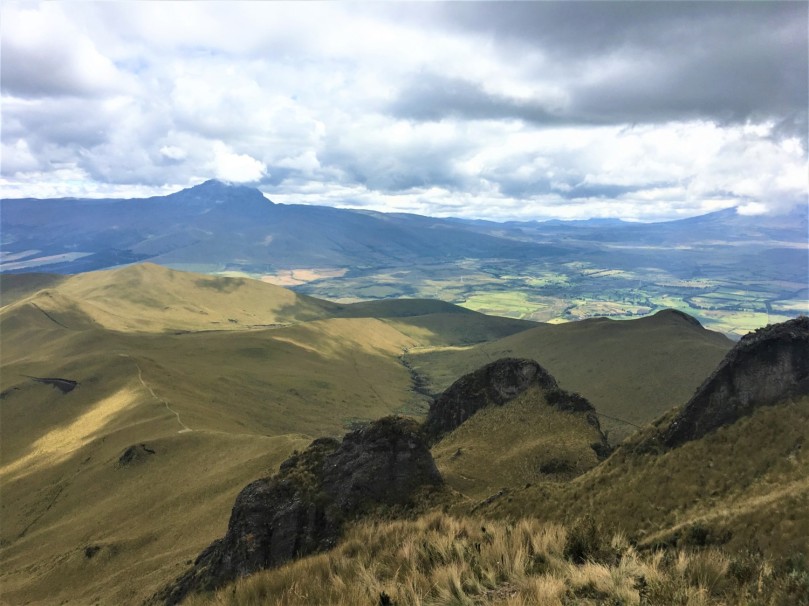
But first… a picture of the elusive Cotopaxi Volcano. It’s amazing how the volcano looks so different every single day.
The peak of Cotopaxi eludes us on some days…
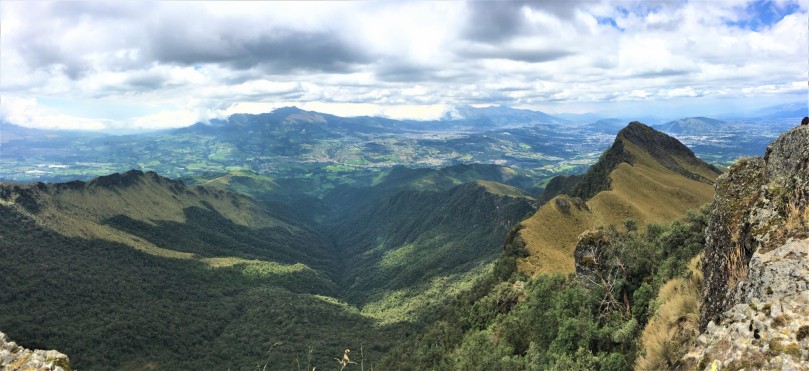
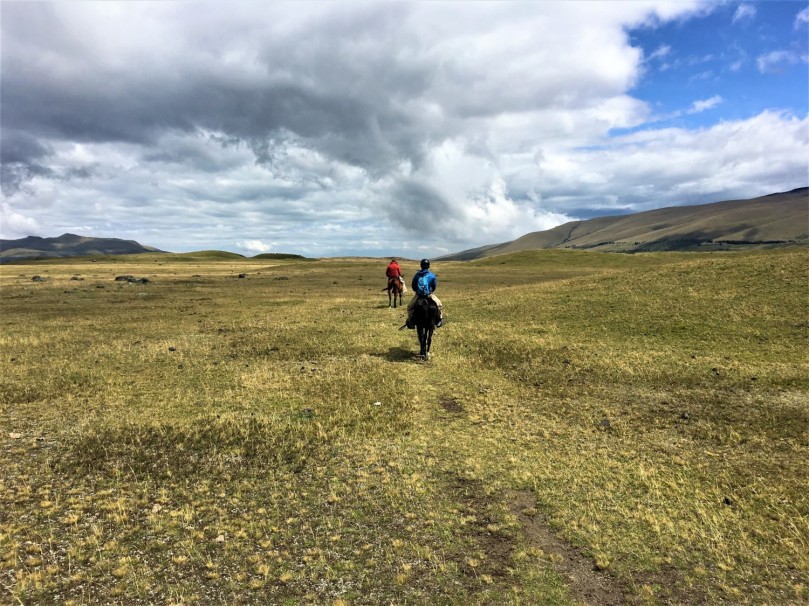
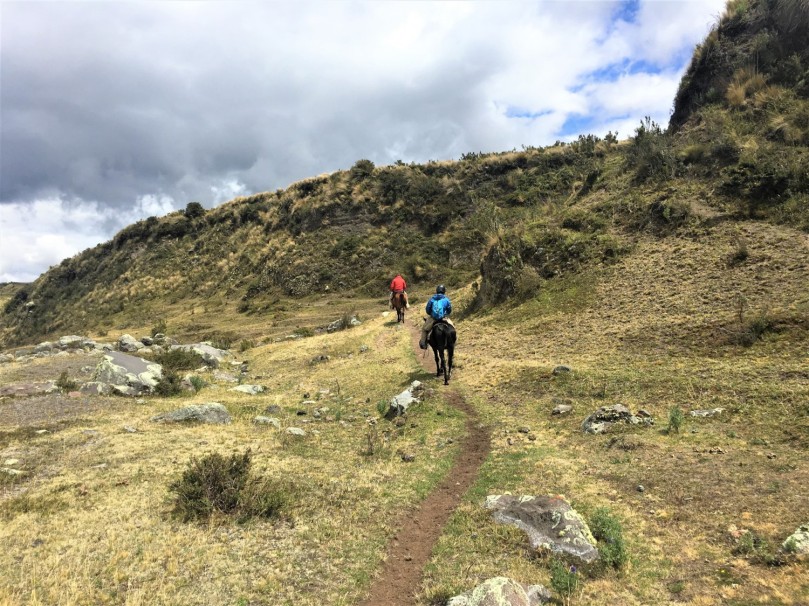
Our driver arrived to pick us up, and we were driven to a small ranch located within the park. The views around us were so lovely – the Cotopaxi volcano stood tall in the distance, and there were mountain vistas, vast plains, grassy fields, valleys and even river crossings!
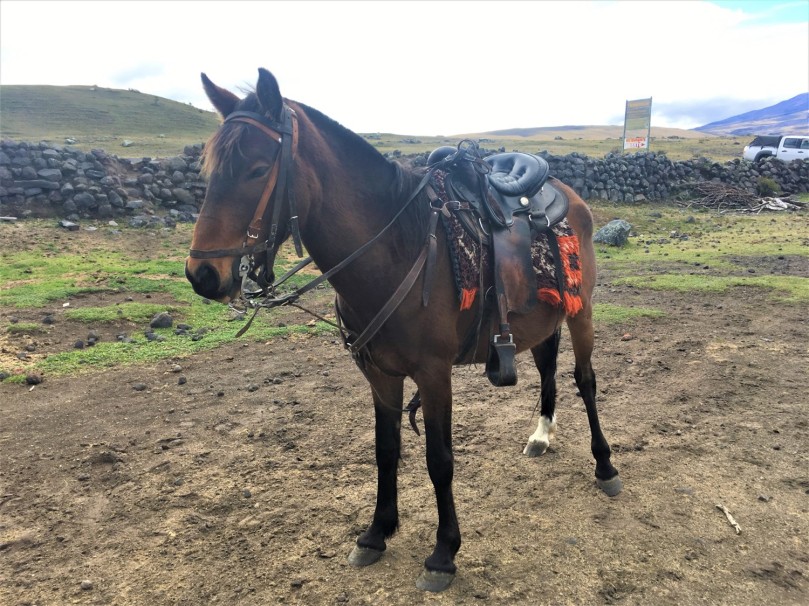
We were quickly assigned our companions for the day – a black horse for J and a brown one for me – and our guide in his gaucho gear with his crazy wild horse that had an extremely awful temperament. Haha.
My tame and very loveable brown horse! ❤J all geared up and ready to go!
And here are some highlights of the horse-riding experience:
Vast meadows…Rolling hills…My cute horse’s head. Couldn’t stop patting her… she was so docile and sweet ❤Going uphill! With a stream beside us.Entering a small valleyJ disappearing into the distance. Sob!One for the album! And the guide in the background still attempting to tame his wild horse.Made it back safely! ❤ (this is an ultra grainy shot because it was taken using J’s phone that was practically falling apart LOL)
And that, friends, concluded our 3D2N stay at Ecuador’s Cotopaxi National Park! 🙂
***
For the record, we spent a total of USD 480 for our 3D2N stay at Chilcabamba Lodge – our greatest expenditure thus far for our 2017 South American leg (besides the Galapagos and Amazon, of course) – but we would say it was worth the once-in-a-lifetime experience despite being way out of our budget.
Thank you for visiting our humble travel blog! Stay tuned for our next update on the rest of our South American trip! 🙂 To read our previous entries on our 2017 backpacking trip around South America, click here.
*We did the 3D2N Quilotoa Traverse from 14 to 16 November 2017. Because some of you asked, all our photographs were taken using the iPhone 6 Camera – that’s all we travelled with for our backpacking trip around South America (on top of our GoPro for underwater shots)!
Before we started on the Quilotoa Traverse, we were very wary of how hikers would get lost on the trek, as there are no proper trails or signage. Plus, as the areas are remote, people do not speak English at all. Even after preparing ourselves thoroughly by reading through other travel blogs, we got lost… BIG TIME. So if you are intending to go on the traverse and are afraid of getting lost, our only piece of advice is to enjoy the journey – getting lost is the key to an unforgettable experience on the Quilotoa Traverse! Don’t worry, you will definitely make it back alive (like we did), in one way or another😊
Just kidding (well, partly). At the end of this blog post you will find a step-by-step guide on the routes to take so that you can greatly minimise your chances of getting lost. We hope it will be of use to you – you can thank us later! 😊
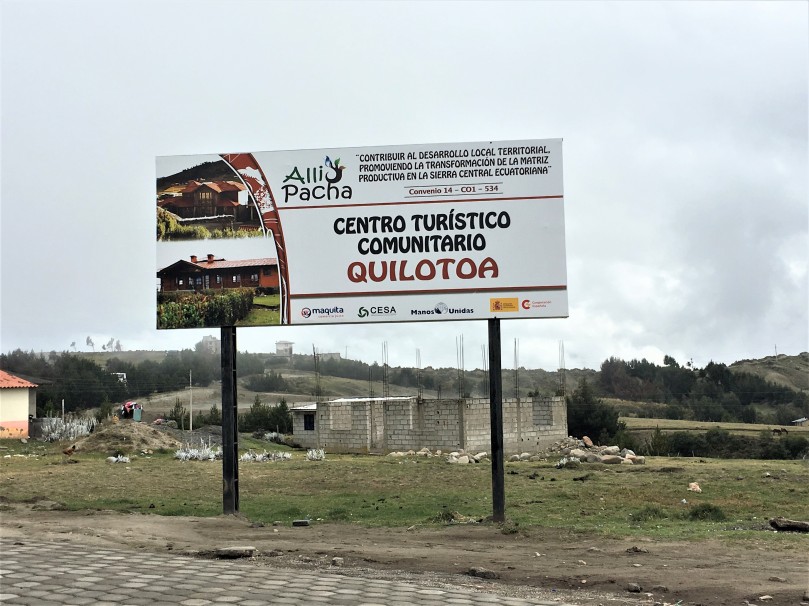
Quilotoa Traverse: An introduction
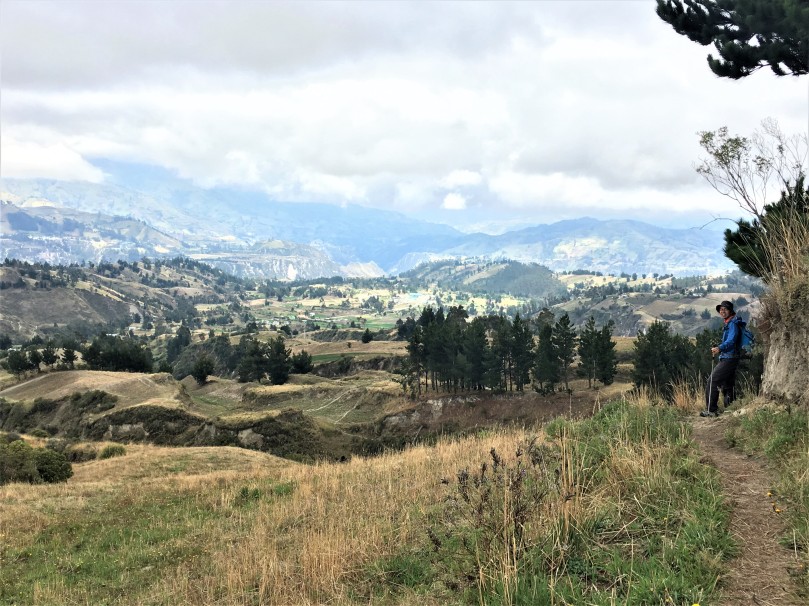
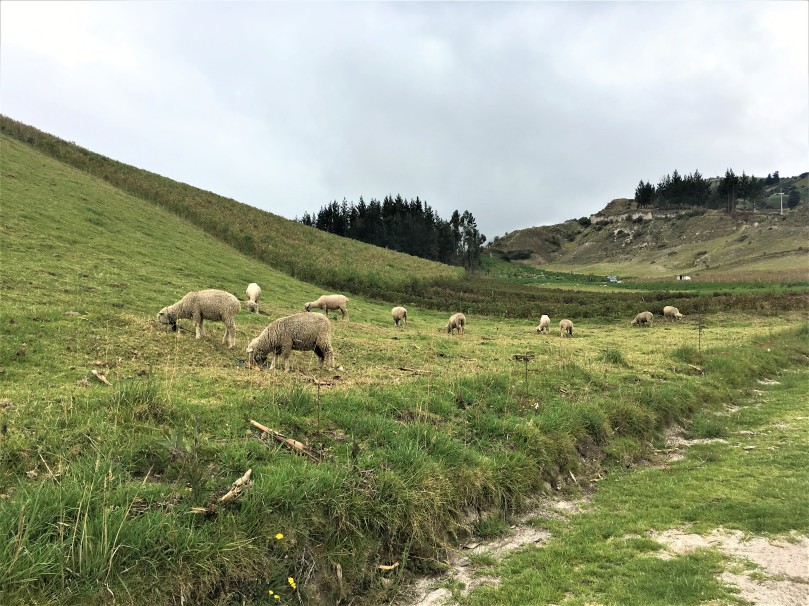
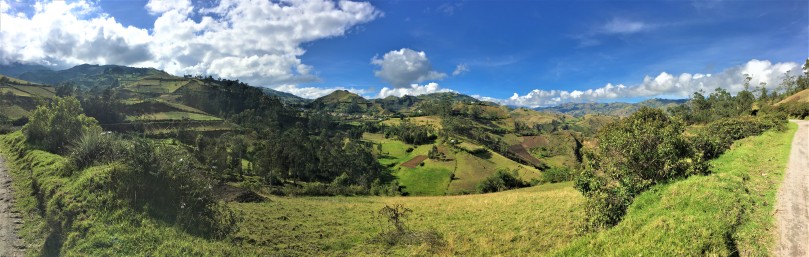
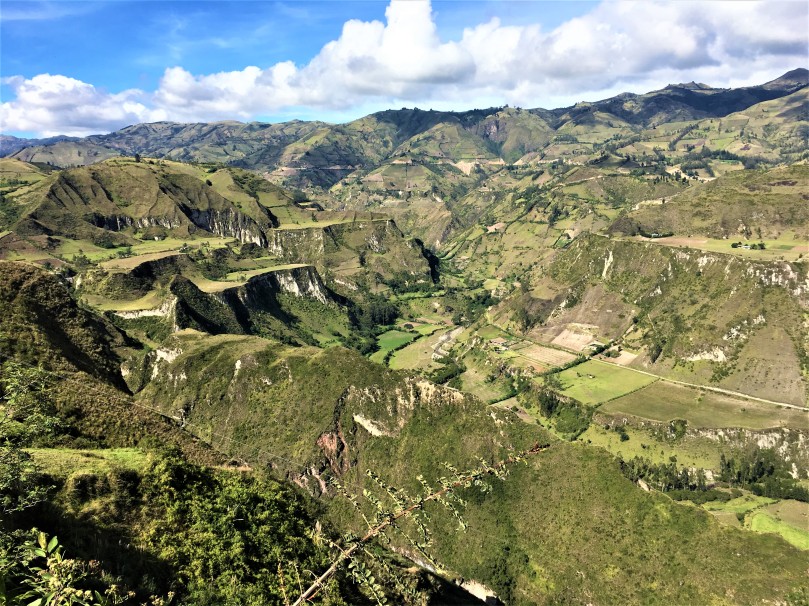
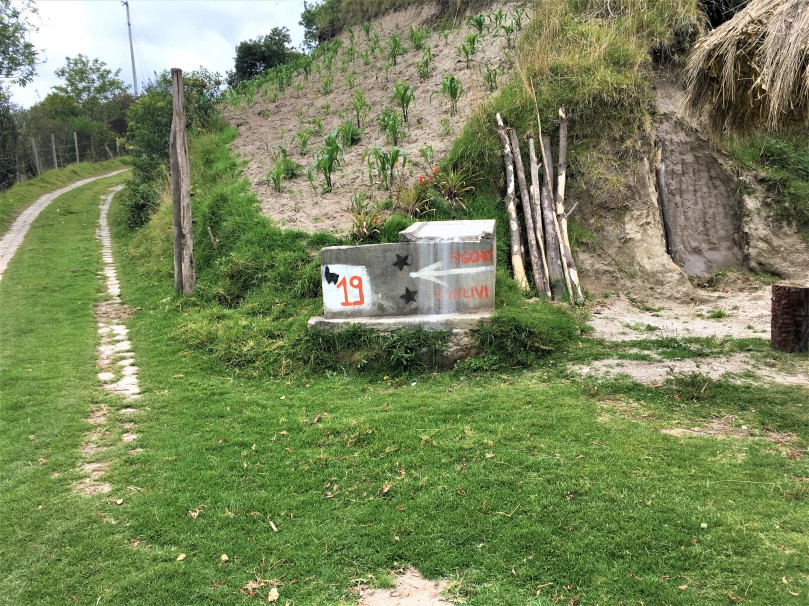
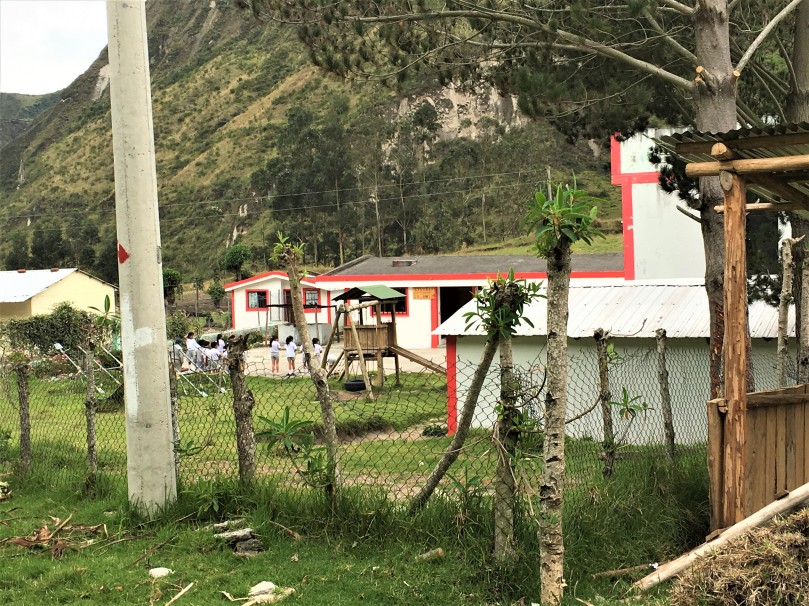
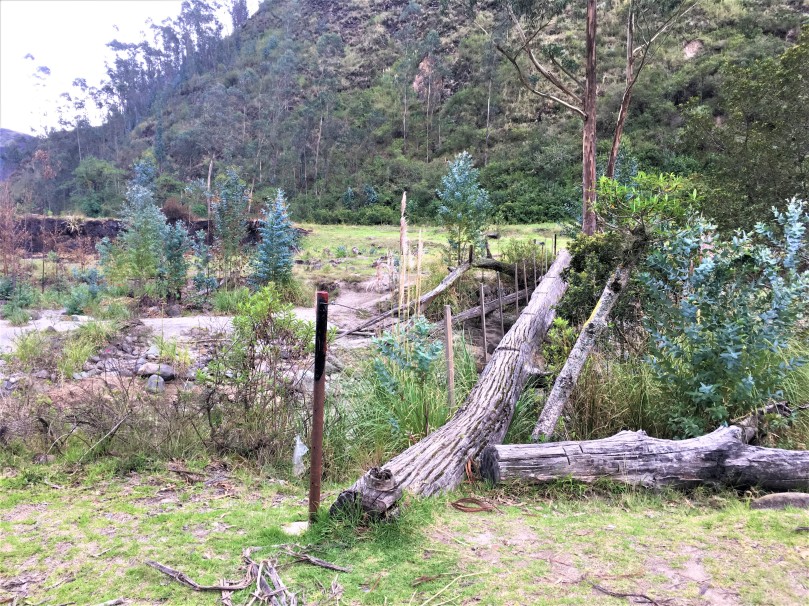
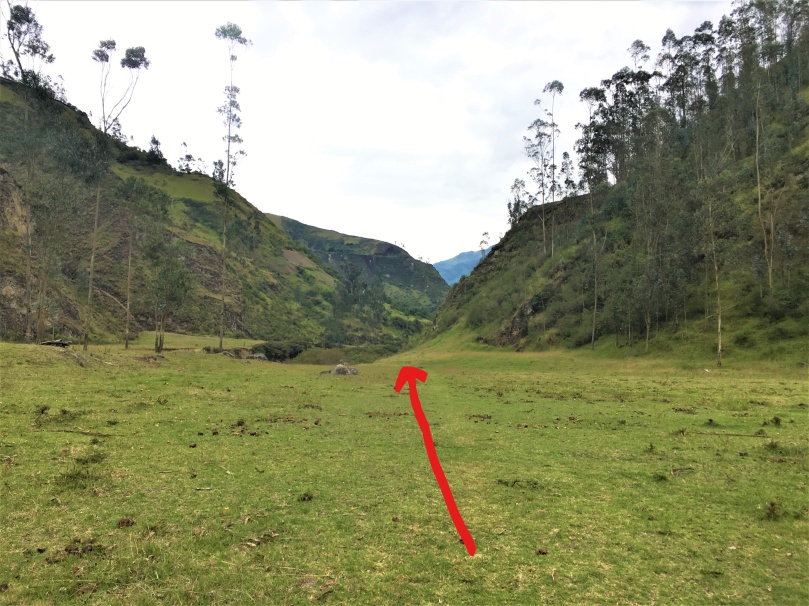
The Quilotoa Traverse is a mountainous route that links several remote Andean villages in Ecuador’s central highlands. The traverse can be done from north to south from the village of Sigchos to Quilotoa (which is more common) or from south to north. Along the way, hikers can expect to encounter beautiful sceneries and wild/farm animals. Routes are generally not well-marked, so novice hikers would do well with hiring a local guide at Latacunga. Also, since few services and facilities are available, hikers should always carry enough water and food for the day, as well as cash to last the entire traverse. Budget accommodation is available at the bigger villages of Sigchos, Isinlivi, Chugchilan and Quilotoa. These accommodations typically provide free wi-fi, breakfast and hot water showers as well.
Our Journey: The Reverse Traverse (South to North)
Unlike the common hiker who would probably choose to do the traverse from Sigchos to Quilotoa and then ending at the highlight – the Quilotoa crater – we chose to do the loop in reverse, in this order:
We chose to do the traverse in this direction because we were still aching really badly from our Pasochoa Trek. It also gave us the option of just doing a day trek around Quilotoa if things got real bad and we decided to give up after the first day. LOL. Looking back, that was probably the best choice we made for this trek, because we faced little pressure and were able to enjoy the hike at a more leisurely pace. On hindsight, we also realised that there are so many other benefits of doing the trek backwards! Here are a couple:
You will never miss the highlight of the trek (the Quilotoa Crater) because that’s the first thing you’ll see! 😊
You will focus more on other beautiful sceneries along the trek, instead of being fixated on reaching the end point and missing out on these little treats along the way…
If something bad happens along the way (e.g. you slip and break your leg, or get lost – which is highly likely), you wouldn’t feel so bummed that you had to end your trek early.
When you meet other trekkers who are headed past you in the opposite direction (since they are going on the trek the conventional way), you get assurance that you are on the right track (which is very important on this trek). Plus, you get to ask for directions too!
You don’t have to hike up the slippery and steep sides of the volcano on the last day, and though the traverse would entail uphill and downhill climbs, there is a general decrease in elevation from Quilotoa (3914m) to Sigchos (2800m).
You will definitely get a seat on the bus back to Latacunga from Sigchos, as not many people will be on the bus anyway.
So… have we convinced you yet? 🙂
Getting to Quilotoa
From Machachi, we took a public bus to Latacunga (it cost USD1.50 per pax for a one hour ride). At Latacunga, we spent the night at Hotel Central – fantastic location and service for just USD 20 per night for a room with a private bath. We left our big backpacks there for free and took just what we needed for the trek – the owner of the hotel was very kind to let us use her space even though we would not be returning to stay after the trek! The only downside was that the hot water shower was not working (the water was ultra cold… brrr) and it was quite noisy at night due to the hotel’s central location. No complaints though – at this price, this was a steal!
Address: Sanchez de Orellana y Padre Salecedo, Latacunga 050150, Ecuador Verdict:
The next day, we took the 8 am bus to Quilotoa from the central bus station. It took us 2 hours and cost us USD 2 per pax (As a guide, for public bus fares, every hour on the bus equates to about USD 1). The buses from Latacunga to Quilotoa depart once every 2 hours, starting from 6 am. Taking the public bus and doing the traverse on your own saves you a lot of money. We budgeted USD 100 for 2 pax for accommodation, food and transport for the entire traverse, but ended up spending way less than that. 🙂
Anyway, here are the highlights of our 3D2N trek (complete with pictures!!) 🙂
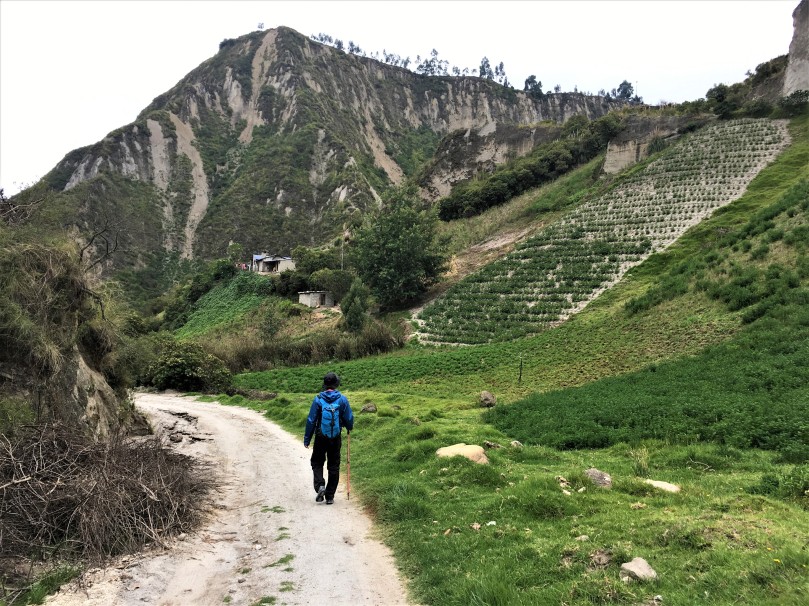
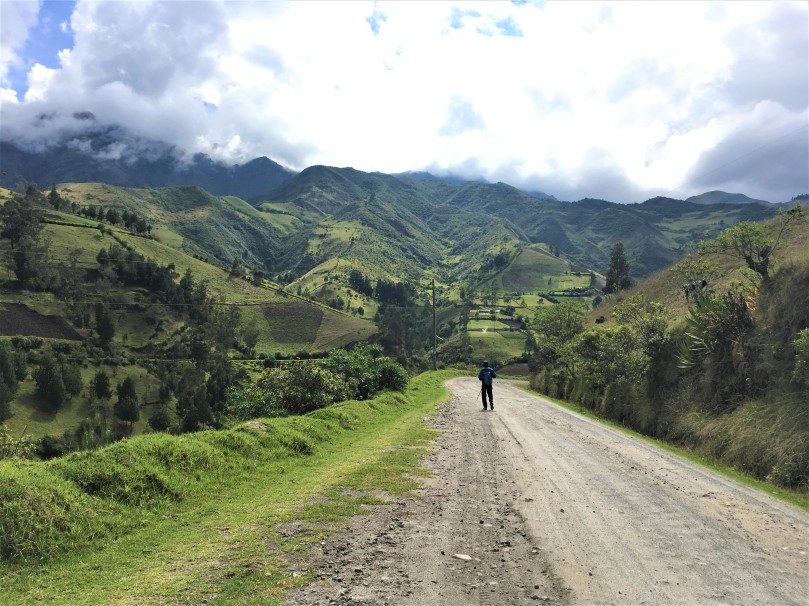
Day One: Quilotoa to Chugchilan
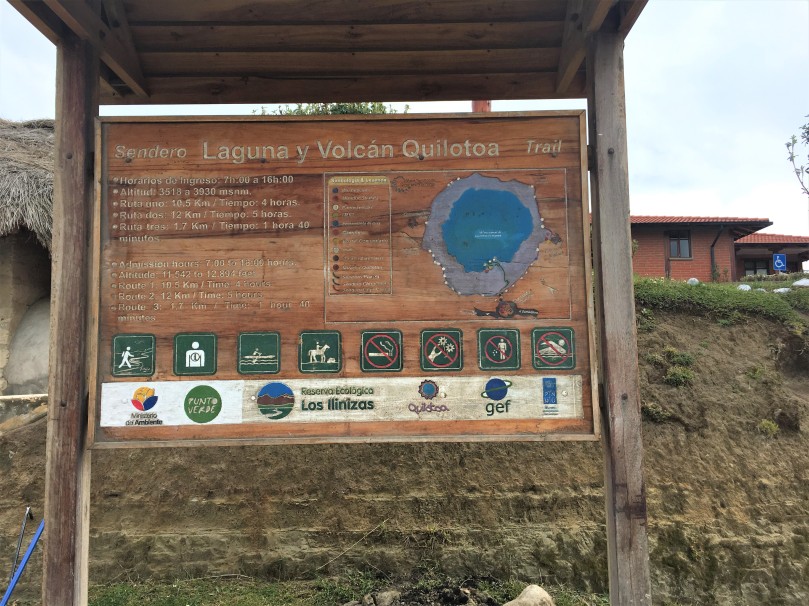
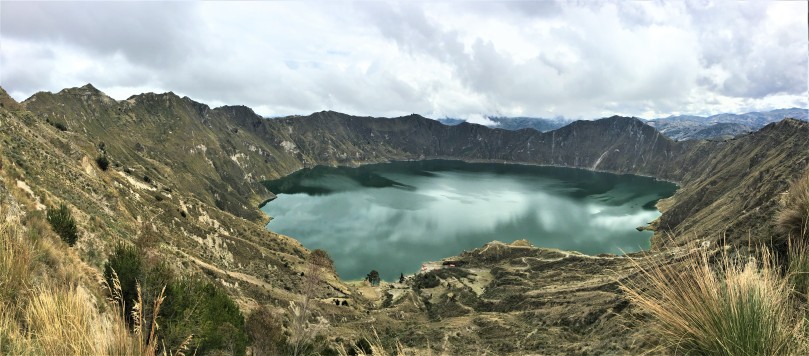
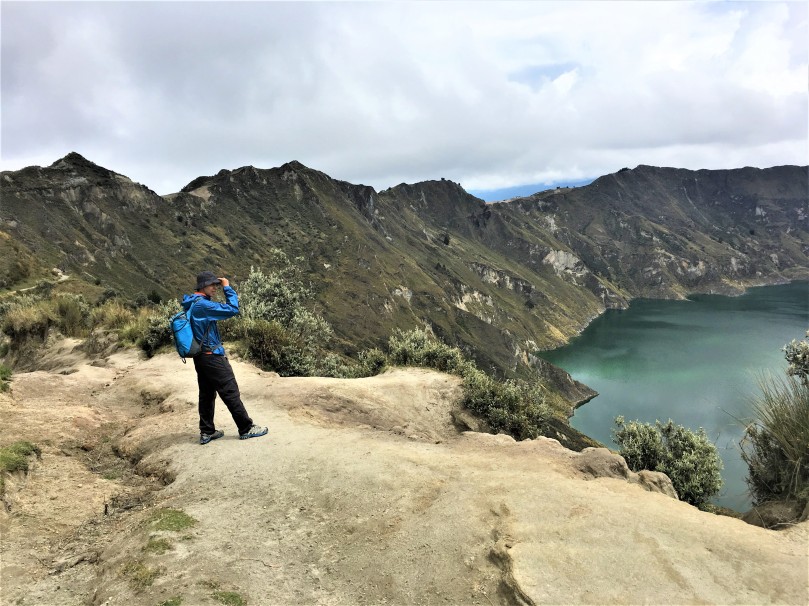
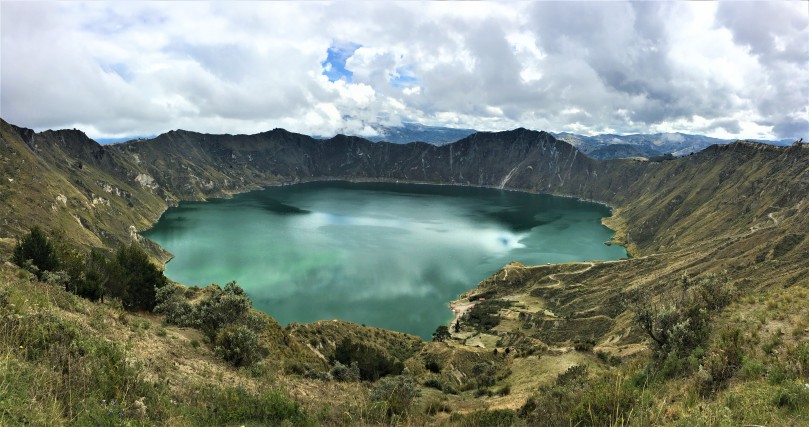
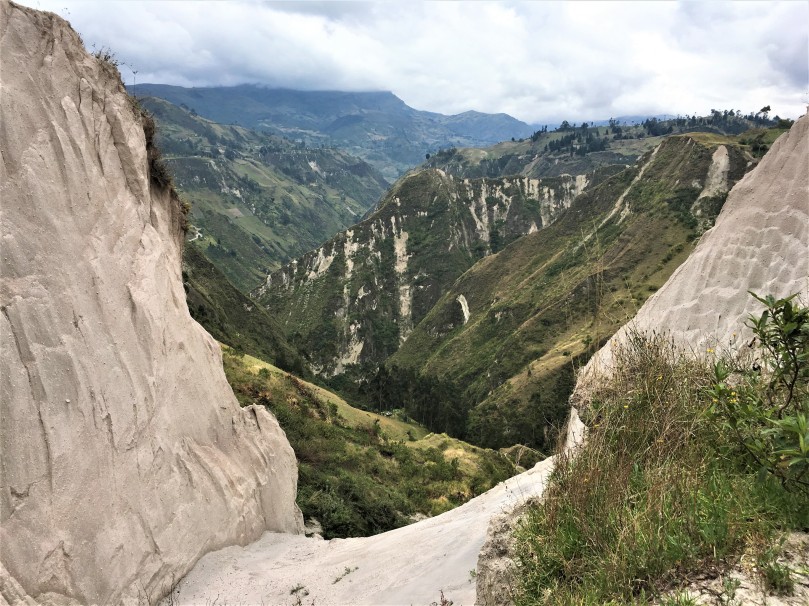
When we arrived at Quilotoa, we walked for 10 minutes and reached the highlight of the trek – the Quilotoa Crater Lake. The lake was formed after the crater of Volcan Quilotoa collapsed.
The lake was absolutely breathtaking. It was the first crater lake that I had seen and it was nothing short of spectacular.
No filter – taken using an iPhone 6! Candid shot of J 🙂So. darn. beautiful!!! ❤
We stayed at the lake for about 30 minutes before starting our 6 hour hike to Chugchilan, our rest stop for the night. The trail to Chugchilan is not well marked – you are bound to get lost at some point along the way. Anyway, we started our trek by making some cute furry friends – a feisty puppy that charged at some alpacas to bark at them, only to whimper and run to us when the alpacas started walking towards it! Lol. 😊
Why you so cute!?
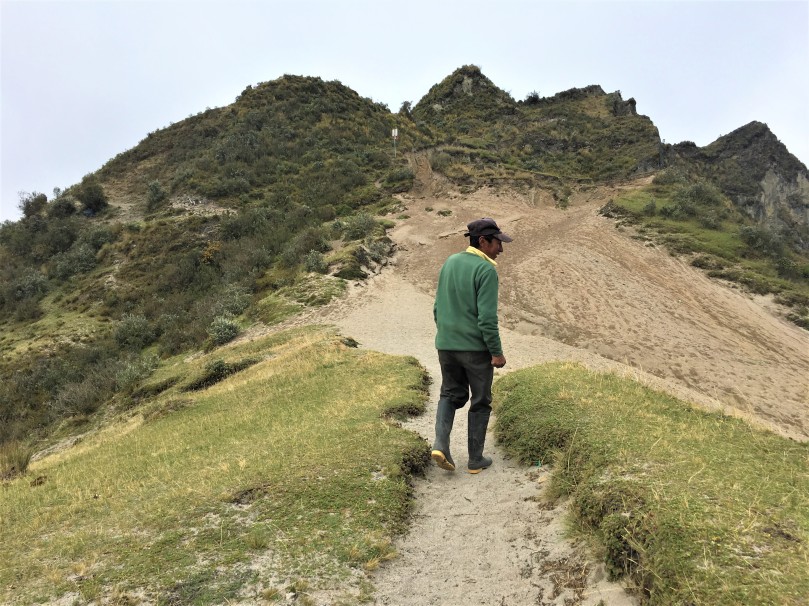
We followed the main dirt road and our keen sense of direction – or so we thought – and ended up completely lost. A kind local lady pointed us to the right path, before an elderly man suddenly appeared out of nowhere and offered to take us back to the right route. We climbed back up to the crater lake (it was SUPER tough), and walked for about another 10 minutes before the elderly man came to an abrupt stop, and demanded USD 20 from each of us! We were appalled because we had thought that he was a kind Samaritan who was just helping us find our way! We vehemently refused and he immediately blocked the path, refusing to let us cross. So Y sat down and refused to budge. He finally gave in, but not before scooting off with a good portion of our snack stash 😦
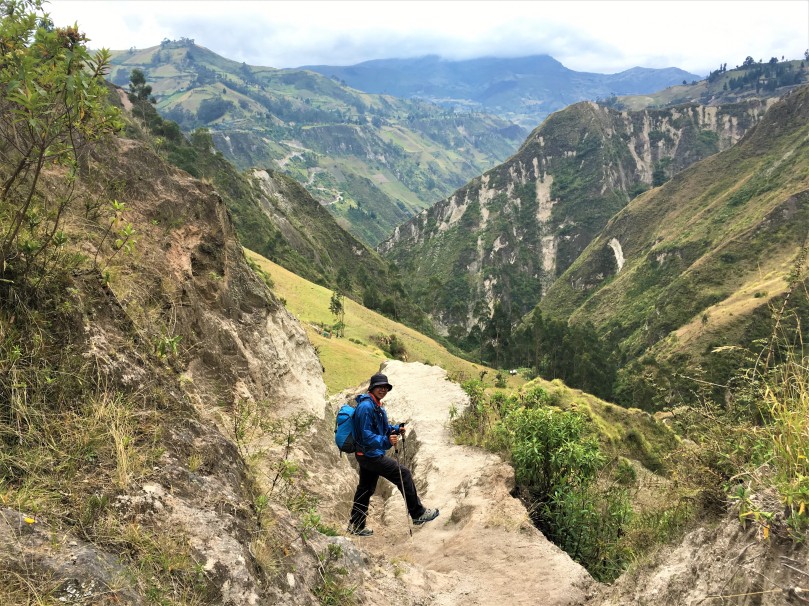
After what we would consider a bad start to the trek, we started our descent down the steep sides of the Quilotoa Volcano. The paths were formed by loose volcanic sand and there were LOTS of sandflies. The trek was mostly downhill and interspersed with short but steep uphill climbs. Whenever we reached a fork, we would use these guidelines to choose the correct path:
Follow path with footprints.
If no footprints are present, follow more defined track.
If both 1 and 2 are not discernable, descend.
It worked pretty well! We also made it a point to check with every single passer-by we met, that we were headed in the right direction, though there weren’t many passers-by in the first place. Haha.
Another tip is also to keep your eyes peeled for red markers and spray-painted signs to “Chugchilan” or “Hostel Vaquero”, which has done some pretty good advertising on stones and boulders strewn along the paths.
Anyway, here are some lovely snapshots we managed to capture along the way.
Halfway through the trek, J suddenly yelped and jumped back. Apparently, he saw something brown moving in the bushes and had thought that it was a bear. Lol! Turns out it was just a harmless horse grazing. What a wimp. – ___ –
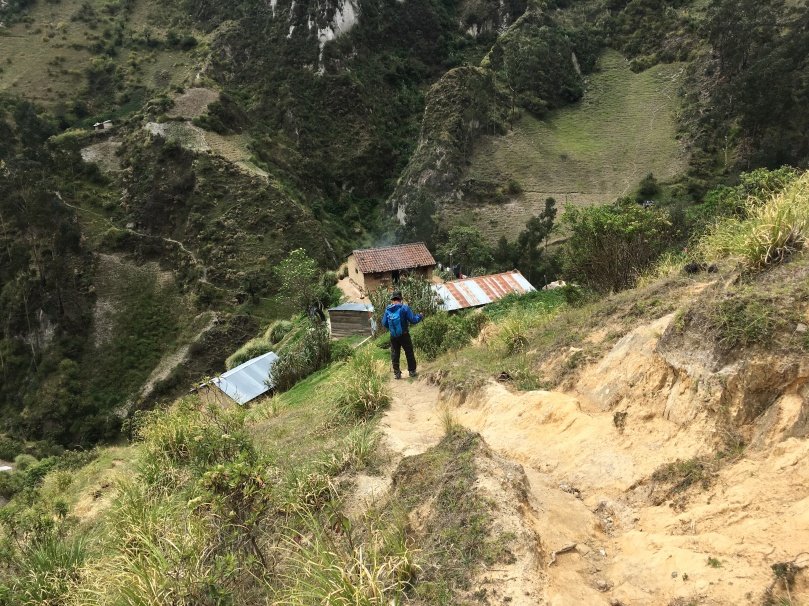
After about 3 hours, we reached our first village – Guayama Grande.
We then descended to a beautiful valley. J had intended to walk along the valley floor to take a short cut (horror of horrors) but obviously this was nota good idea – if it rains, the water levels will rise very quickly and there will be no way to escape since you are surrounded by steep valley walls! Plus, there is the danger of rock falls! (Till today, I remind him to thank me for saving his life. 🙂 )
View of the valley before descent
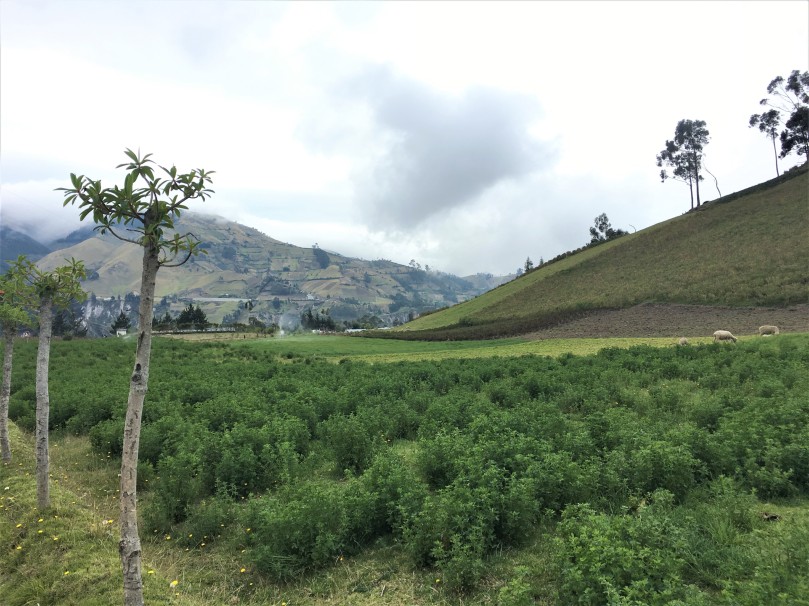
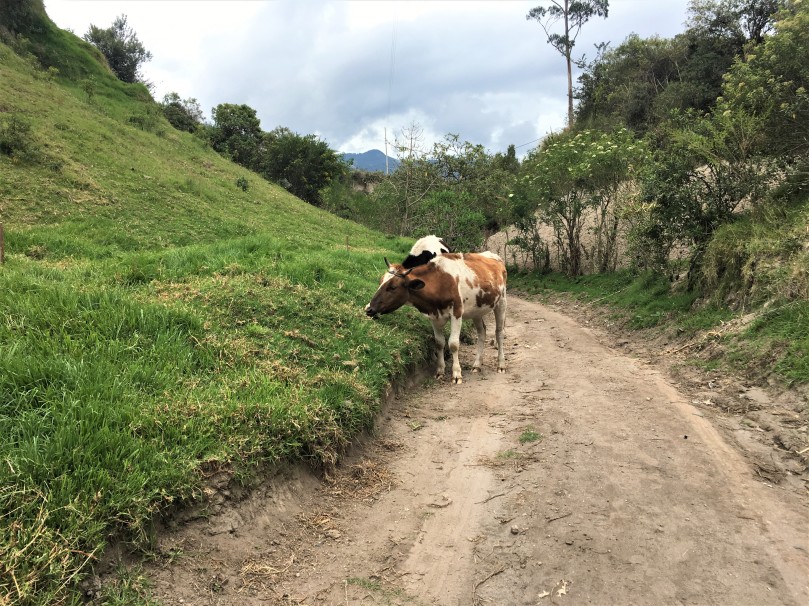
We continued walking and reached La Moya Village, where we saw huge agricultural fields with rotating sprinklers and grazing livestock. We had a fun Super Mario moment trying to evade the sprinklers 😊
Evading the rotating sprinklers hahaha The beautiful agricultural village of La Moya ❤
We also quickly learnt that children in the village are very friendly, and will greet any tourists they see along the way. Often, they would come up to us and ask for chocolate or money. We even had a child asking us for alcohol (What!?!). Sometimes, the children would say, “Photo?” and, in return, ask for money. It is up to you how you wish to respond, but we prefer to be friendly and not oblige.
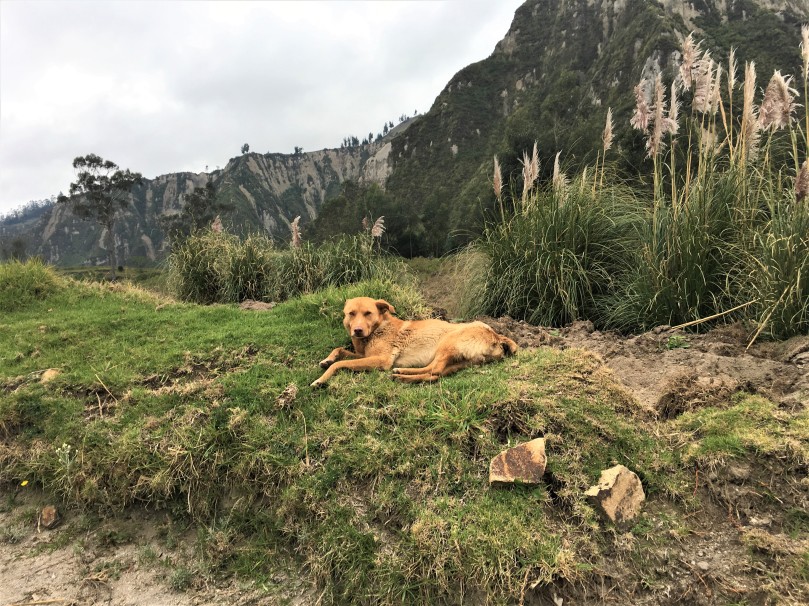
Random photo of a dog here – made me miss my dog back at home so much!
After what seemed like eternity, we finally saw a town at the end of the uphill climb! We had finally reached Chugchilan! *throws confetti in the air* 🙂
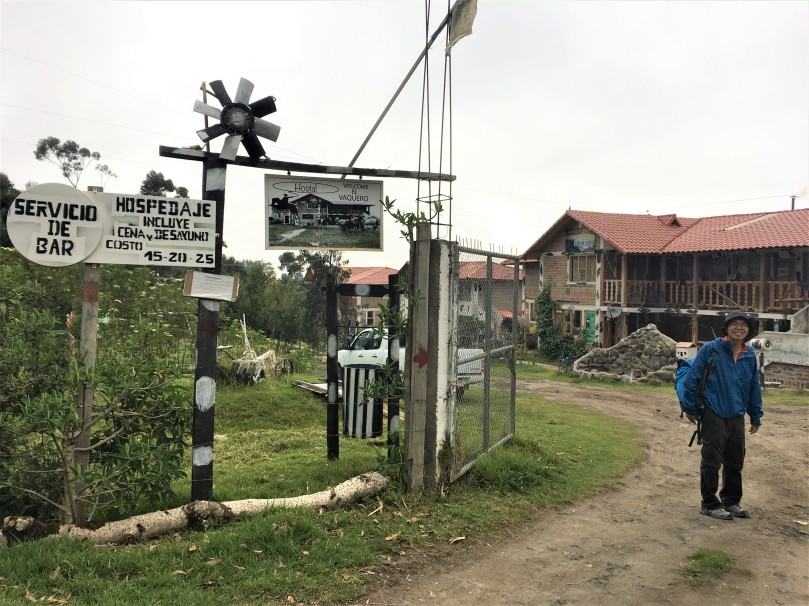
We hadn’t made any prior bookings for accommodation, so we decided to give Hostal El Vaquero a try, since their painted signs helped us find our way to Chugchilan anyway. Haha.
Finally reached our destination for the day!
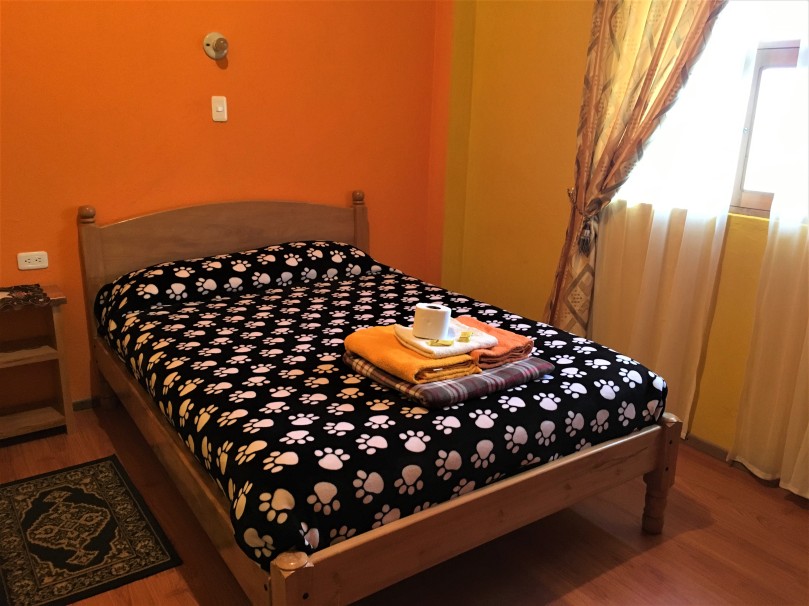
For USD 20 per pax, we had a bedroom with private bath (and hot water – A MUST after a long day trekking and the cold weather!), dinner and breakfast for the next day. The hostel was very clean and well-kept – and though the wi-fi was not working and the water wasn’t that hot… we didn’t really care! Service was excellent and it was worth every penny.
Our cosy room for the night
We also loved how manicured and well-kept the gardens were. There were hammocks which would have been perfect for summer, but the weather was just freezing cold so we decided to give that a miss and head for the fireplace at the lounge area instead. ❤
Address: Barrio Goteras (from the church of Chugchilan, follow up until “Mi Buen Pan” and take the left way for 3-4 min)Chugchilan CE05040, Ecuador Verdict:
Weather-wise, we were very blessed, as the moment we reached the hostel at about 4 pm, it started to rain and the fog started coming in, greatly reducing visibility. As we turned around to look for the path we had just walked, it was no longer visible (Eek!).
View of the fog descending from our bedroom window
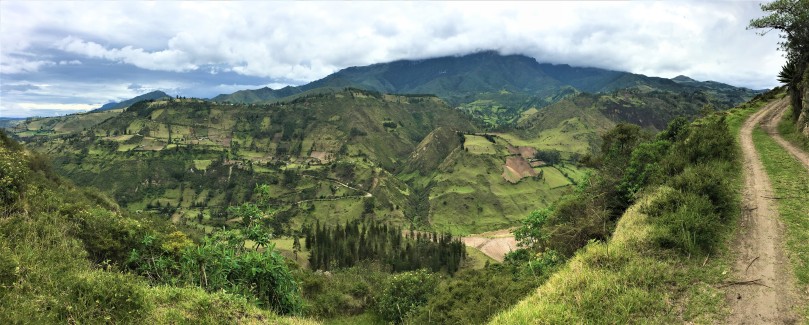
Day Two: Chugchilan to Isinlivi
Figuring that the worst was over and that we wouldn’t get lost (again), we started our day a little later at about 9am. We had read from other travel blogs that the trek on the 2nd day would be much easier than the 1st, with just about 4 to 6 hours of hiking. Plus, the hostel owner had given us very clear directions and instructions! With all these in place, what were the odds of getting lost again, right? Boy… were we wrong.
The 2nd day turned out to be worse than the first. We got lost THRICE, and ended up taking 8 hours for what would otherwise have been a 5 hour trek. LOL. Needless to say, we were tired and hungry, because I overestimated our navigation skills and decided to be generous by distributing snacks to some cute village children along the way. Greatest mistake of my life.
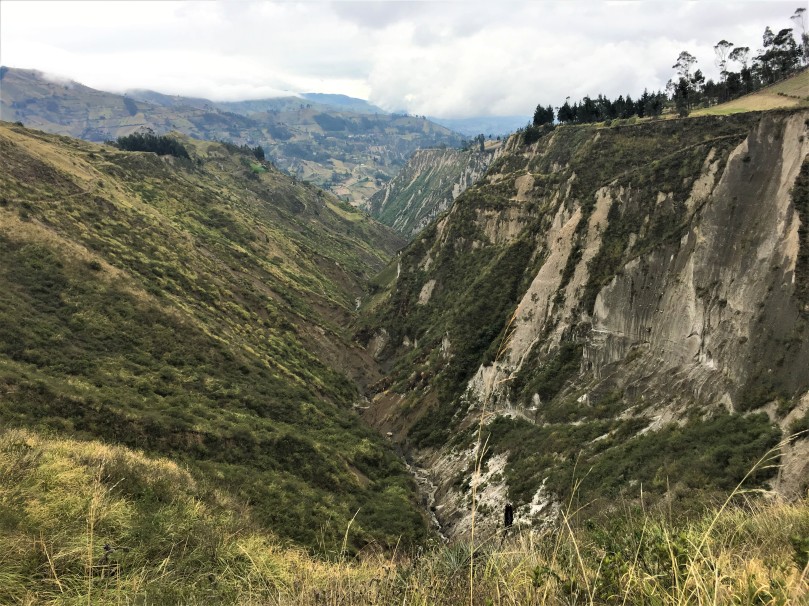
Anyway, let’s focus on the positive things. Not surprisingly, the scenery was so beautiful… we were rewarded with breathtaking views of interlocking spurs, valleys, rivers, chalk cliffs and lots of animals!
Here are some highlights of our journey:
In case you are wondering why there are so many photos of J, that’s because he is always ahead of me! So I need to have a good excuse for being slow(er), right… 🙂One of the wrong routes we took… this time I was smart. I waited for J to check it out so I wouldn’t have to climb up the steep slope. HAHAHA
SOOO PRETTY ❤
The experience was enjoyable on the whole, but we also had quite a few harrowing experiences along the way:
As mentioned, we got lost thrice. Each time either of us came to the realisation that we were *probably* lost, our conversation went like this:
J: I think we are lost.
Y: I think so too. *Awkward pause for 3 seconds.* *Look at each other blankly, look at the sky, look at the ground, look around……*
We had to walk very precariously on a log bridge without hand support to cross a fast flowing river. Just reliving this experience makes my heart pound like crazy.
We had to walk through mud flats and earth walls as tall as me (that’s 1.6m).
This was just the beginning of a 30 min ascent up mud flats and between earth walls that just grew deeper and deeper
A snake dropped in front of me, looked at me, and slithered away before I could react. LOL why does this sound so funny now!?
And the ultimate life-threatening experience…
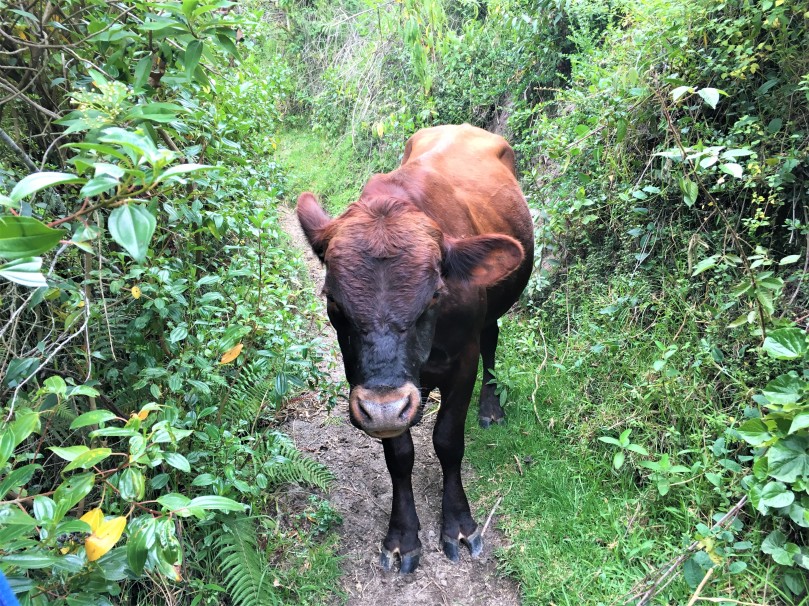
WE CAME FACE TO FACE WITH A BULL. A FREAKING HUGE-ASS BULL.
How on earth did I even manage to capture this photo without being killed???! It is a mystery that baffles me till this very day, and one that never fails to remind me of my utter stupidity.
Anyway, here’s the story. We had finished climbing up a steep slope and walking through disgusting mudflats. Just as I thought the toughest part was over, J, who was in front of me, stopped dead in his tracks.
J: Guess what.
Y: *In an irritated voice ‘cos I was super tired* What.
J: There is a cow in front of me blocking the way. It’s looking at me.
Y: *Instantly perks up and takes out iPhone* Oh wow! *snaps a few photos*
Say cheese! Can’t believe we did this. Soooo stupid.
J: What shall I do? Walk past it? (Note: There was no other way – barbed wire on one side, steep valley walls on the other, path was super narrow…)
Y: *Finally finishes snapping some pictures and starts to examine said cow* Hmm… this cow looks angry. It is an angry cow. It is looking at you…
And HERE COMES THE MOST RIDICULOUS CONVERSATION EVER.
J: *Turns to face the cow* Hola! I come in peace, please let me pass. *Cow continues glaring and starts to SNORT*
J attempting to talk to the “cow”…….
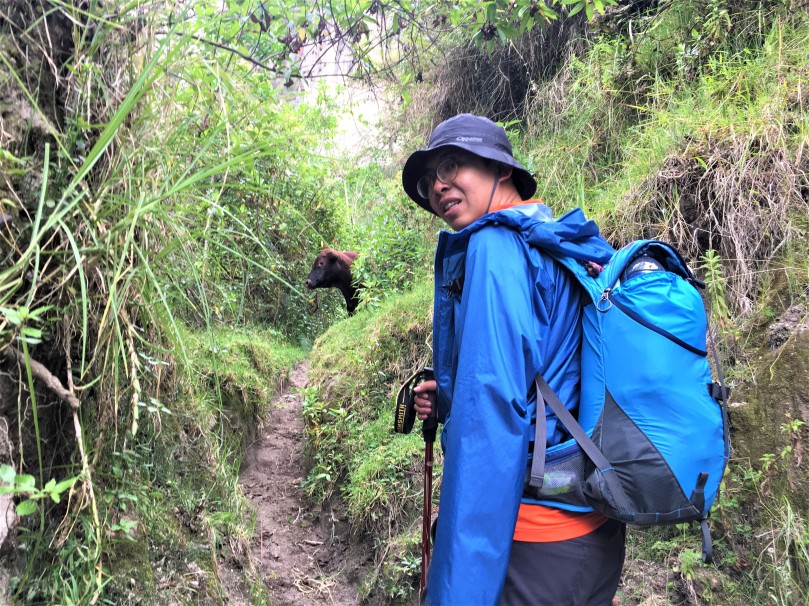
Y: *Senses danger* I think we are in a dangerous situation. We need help! *Screams* Senor! Hola! Moo! Moo! (Because my Spanish sucks)
Thankfully, a villager heard us and shouted back in Spanish, but we had absolutely zilch idea what she was trying to say.
Y: *Repeats screams for help at least 70,000 times more*
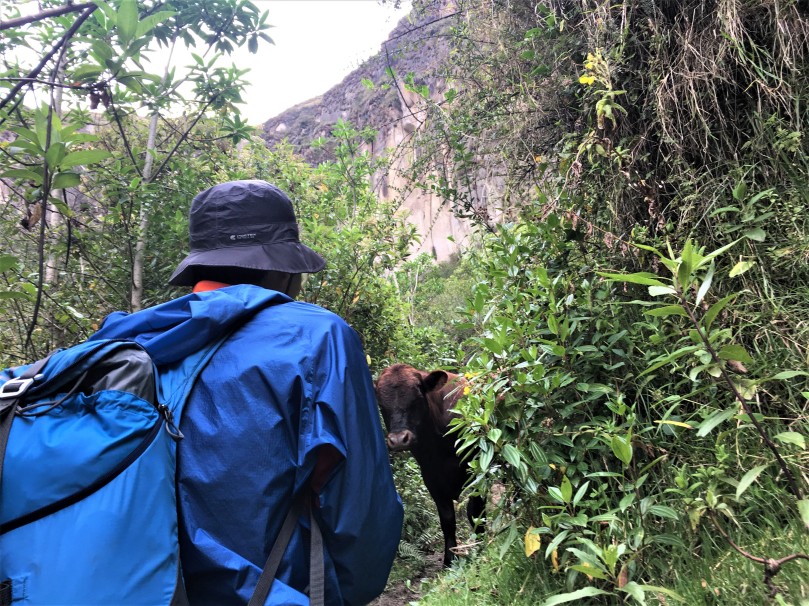
Finally, the villager walked over, peeped through the barbed wire and bushes and got a shock upon seeing the cow. She beckoned us to step back and used a stick to drive the cow back upslope.
The cow turned… and FLASHED ITS BALLS.
I’m now cow, y’all!
HOLY COW, IT WAS A BULL!!!!!!!!!!
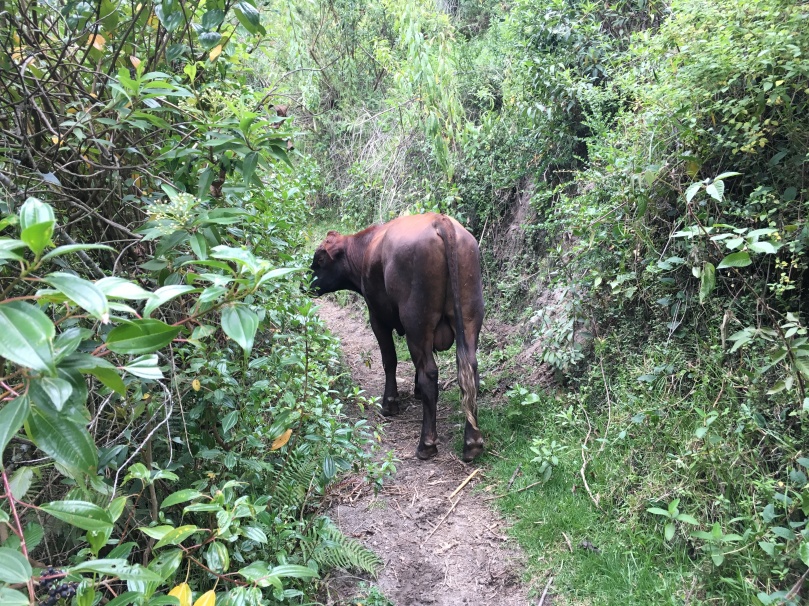
We were absolutely shockedbeyond words. Thank God our lives were spared. The villager shouted at the bull and it moved an inch upslope every… 3 minutes. Half an hour later, a male villager appeared and saved the day.
Well… the hike thereafter was very easy. On hindsight, this was probably the most memorable part of our hike. Haha.
For the second night, we stayed at Hostal Taita Cristobal, which had wifi, dinner and breakfast, complete with an en-suite bath with hot shower. The lounging area was also very cosy, and we made friends with a French couple. The one-night stay (plus food) cost us USD 15 per pax.
Arriving at the hostel just as the weather was about to take a turn for the worse… Our super spacious room for the night. HahaView from the main dining area…
Address: Isinliví, General Morales, Isinlivi 050752, Ecuador Verdict:
Day Three: Isinlivi to Sigchos
On our third and final day of the traverse, we started out early at about 8 am. I had a bad bout of nausea and diarrhea and wanted to pace myself, plus we did not want to miss the afternoon bus to Latacunga. We were told that the route would be pretty easy and take us just about 4 hours, but we were skeptical given the previous day’s experience. Haha.
For this part of the trek, the footpaths and main vehicular path converge at 3 points. Both offer stunning views of the valleys. Since we had too much at stake, we decided to err on the side of caution and follow the vehicular path. Anyway, though it was supposed to be a vehicular path, we only saw about one vehicle every 20 minutes.
The trail was mostly downhill, with 2 steep ascents towards the end point. We took the footpath on the last 1/3 of the trail because we saw a clear sign reading ‘Sigchos’ (like a proper sign, finally!) and many villagers and school children using this route. We double checked with passers-by like a gazillion times to make sure we were on the right track. Haha.
Here are the stunning views of day 3:
We eventually reached Sigchos after 3.5 hours of trekking. Hurray to not getting lost! 😊
If we were to do day 3 again, we would still take the vehicular path. Here are some compelling reasons:
You will never get lost
Slopes are gentler (though route is slightly longer)
Offers the possibility of hitch-hiking if you really get lost
Lots of villagers along the way to ask directions
No flies, mosquitoes and scratches from thorny shrubs
No horse and cow dung (which are EVERYWHERE on the walking paths)
Roads are elevated, offering stunning views of the valley!
Have we convinced you yet? 😊
So… that concludes our experience on the Quilotoa Traverse. The experience was so amazing and allowed us to get up close and personal with a part of the Ecuadorian Andes that is still in its ‘raw’ form, and untouched by tourism!
As promised, here is a step-by-step photo guide if you intend to do this traverse on your own.
Step-by-Step Photo Guide for Trek from Quilotoa to Sigchos
Day One: Quilotoa to Chugchilan
From the crater lake viewpoint (mirador), keep walking along the perimeter of the crater in a clockwise direction until you have reached the point directly opposite where you first started (halfway around the crater). You would have had to walk uphill and downhill for about 15 to 20 minutes to get to this point, as the lake is deceptively huge.
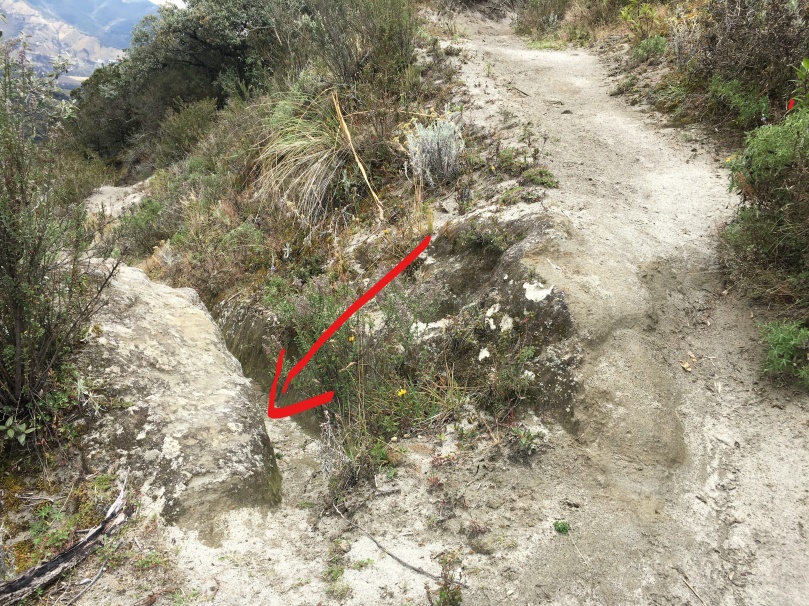
Keep walking until you come to this sign that is situated right in front of an upward slope.
Walk uphill until you see a large sandy path. You would have passed several sandy patches along the way, but to be sure you are at the right one – this appears after the ‘Chugchilan’ sign and there should be a huge slab of rock with horizontal striations on your left.
Start your descent here, and continue following the track.
When you reach the first fork, take the track on the left. You will continue descending.
Keep descending while keeping an eye out for red markers and signs that read ‘Chugchilan’ and ‘Hostel Vaquero’. Follow the signs.
Upon reaching Guayama Village, follow the vehicular path and look out for signs. The paths here are clearly marked.
Some of the distinct brick houses along of Guayama Village
Continue downhill until you reach the bottom of a valley with a river flowing through.
Cross the river to reach the other side of the valley, and start ascending the hill. Do not walk on the valley floor.
Continue uphill till you reach La Moya village.
Follow the well-defined track from La Moya Village and look out for more red signs to Chugchilan.
Once you reach the foot of another valley, it is time to ascend. Keep following the road until you see this ‘white house’ and some weird looking scarecrows.
From here, it is a straightforward 20 minute ascent along the well-defined path until you reach Chugchilan! 😊
Day Two: Chugchilan to Isinlivi
From Hostel El Vaquero, make a right and follow the vehicular road. You will pass by many houses, a market, and other hostels along the way.
The small vehicular road you are on leads to a wider vehicular road that goes towards Sigchos. Walk along this road for about 2 km.
After the road bends to the left, you will see a white house on your right (Note that in the picture it appears on the left because we actually missed it and were walking back). Right behind this house is a dirt path which descends. You will see the sign ‘Isinlivi’ painted very inconspicuously in yellow, on a lamp post behind the white house. Follow this dirt road.
The ultra important white house you are bound to miss unless you consciously keep your eyes peeled for it, on your right
Such an inconspicuous sign, right?
Continue walking on the main path. Ignore all small lanes that branch out from this path. You will pass by white chalk cliffs along the way.
Keep going until you reach a fork in the road. You will see the number 19 painted on a rock. Next to it are two paths – a cobbled path going upwards and another route on the left of the cobbled path, which descends. The upward path leads to a mirador with beautiful views of the valley. It takes only a minute to reach the mirador. After you view the mirador, take the descending path to continue your journey to Isinlivi.
After some time, you will reach a school. Walk past the school and follow the main path.
The road eventually leads you to a river. Continue walking along the river bank.
You will pass by a first bridge that looks clean and nice. DO NOT cross it. Keep walking along the river bank.
When you come to the 2nd bridge made of a simple wooden log, cross it. At the end of the bridge, turn left and continue walking on the path along the river bank.
Cross this log bridge to get to the other side of the river
The path eventually leads you to an open meadow. If you look closely, there is a faint path that lets you cross the meadow diagonally to the left. Follow it.
The path leads you uphill and you will be walking on the edge of the slope along a very narrow dirt path that follows the river course.
Keep going until you see a rock on the ground on your right with yellow spray paint. Walk past it. (Note: On this trail to Isinlivi, look out for yellow markers that indicate you are on the right path).
The red arrow on the left indicates the direction you should be walking towards
Follow the path till you reach a wooden gate. If the gate is closed, open it and continue walking. Do not take the small path on its right.
Eventually the path leads you to mud flats, which you have to (unfortunately) ascend. From here, the paths get very narrow but it is clear that there is only one way up.
After about 30 to 40 minutes of climbing, the path joins a wide vehicular road. Walk on the road. You will pass by some white chalk cliffs.
Keep following the main road, looking out for yellow markers on the way.
Eventually, you reach a fork with the main road going uphill, and another going left. Right before this fork is a less conspicuous dirt path on the left that descends into the valley. Take this dirt path. Note that there are no signs or markers here so you have to be careful not to miss it.
Keep following the path till you reach a white greyish concrete bridge. Cross the bridge.
From here, follow the road all the way uphill and you will reach Isinlivi! 😊
Day Three: Isinlivi to Sigchos
From Hostal Tailo Cristobal, walk straight uphill until you reach the third road on the left, which is a wide vehicular road. Follow this road to the left. You will pass by a church on your right.
You will pass by several road forks along the way, but there will always be a sign that reads and points you to Isinlivi. Head in the opposite direction since you are heading towards Sigchos.
Look out for blue markers along the way to ensure you are on the right track.
Eventually, you will reach a river and a concrete bridge. Cross the bridge.
Continue walking until you see a large grey house on your right. On the left, you will see a sign that says ‘Sigchos’ and pointing towards a smaller footpath that leads away from the vehicular road. Take this path to climb up the hill.
When you reach the top of the hill, turn right. You will come to many farms and pass by this sign.
Keep following the path until you see a church and a sign that says ‘Sigchos’, leading to a wide dirt path up the hill. Take this path.
At the top, you will see Sigchos. Yay, you made it! 😊
Tips for the Quilotoa Traverse
Always wear a cap and put on sunscreen, even if it looks deceptively cloudy. Remember, you are on the equator and at an elevation of at least 3000 m. We use SPF 90+ when we hike at altitudes above 3000 m.
Layer your clothing with a base layer, fleece jacket, puffer jacket and rain/wind jacket. If it gets warm, you can start stripping 😊
Cover yourself well. There are fleas, mosquitoes and insects that bite. Not to mention thorny shrubs that cut you.
Bring enough food and water. You will need it because you will get lost. As a guide, we carried 2 litres of water per person per day. Always refill at your accommodation before you leave for the day – it is tough to find water and food along the trek. It is that remote.
Wear proper hiking shoes and socks as the paths are largely gravel paths and dirt paths, with mud flats and loose sand as well.
Bring hiking sticks, especially if you are prone to falls like J is 😊
Do not show your valuables at all times. The people (and children) are very sharp.
Don’t be afraid to ask for directions.
Bring warm clothes for the night. Even in the rooms, it can get very cold! (Scarves and beanies are highly recommended!)
Start early, as the fog starts to come in at about 3 to 4pm.
If you can, bring a Spanish pocket guide with you. It will come in handy as people do not speak English.
Heading back to Latacunga from Sigchos
From Sigchos, the bus to Latacunga leaves from the bus terminal at 230 pm from Mondays to Fridays, and 1230 pm & 230 pm on Saturdays and Sundays. The journey takes about 2 hours and a ticket costs USD 2.30.
To get to the bus terminal, walk towards the centre of Sigchos, where you will see an outdoor sheltered sports stadium.
From there, turn left uphill, until you see a church. Walk past the church in the uphill direction.
In two blocks (cuadras) you will reach the bus station.
***
The Quilotoa Traverse is a beautiful trek we strongly encourage you to consider during your stay in Ecuador. It takes you away from the hustle and bustle of the city, and is not commercialised (yet!). So get up, get out and start exploring what nature has to offer! 😊
Thank you for visiting our humble travel blog! Stay tuned for our next update on the rest of our South American trip! 🙂
*Our Galapagos trip was from 28 November 2017 to 9 December 2017. The first 8 days were spent on board the Samba Cruise, and the subsequent 4 days on land.
This is the last of our series on the Galapagos Islands! Here, we will highlight places of interest in San Cristobal Island that are worth visiting, as well as the yummy food we tried there, complete with our own experiences and thoughts (including being bitten by a sea lion). 😊
Places to Dine
San Cristobal Island has a good mix of local eateries, western cafes and restaurants/pubs. We preferred trying out places that locals frequent, and here are those that we really loved. ❤
Cabana Mi Grande (Breakfast)
Cabana Mi Grande is a no-frills breakfast place located on the second floor of a building along Av Jose de Villamil, off the main Av Charles Darwin. Look out for this colourful store-front and take the stairs up to the second level.
It is a small and cosy place with just 5 tables for customers to have their meal. This place is very popular with the locals and it is difficult to get a seat in the morning, so it is advisable to avoid peak hour – come after 830am to increase your chances of getting a seat. 🙂
Love the murals on the ceiling! So cute.
We’d researched and found that this place was popular with locals for its yummy bolon and empanada. So, we ordered the Bolon Mixto con Huevos Fritos Y Batido (Bolon with fried egg and milkshake) and Bolon con Bistek Y Café (Bolon with beef and coffee). Bolon is basically a fried ball of potato, plantain, sausage, cheese and lard.
Bolon MixtoBolon con Bistek
It was REAL tasty and soon became Y’s go-to food for breakfast every morning while in Ecuador. The entire meal cost us just USD10.
Address: José de Villamil, Puerto Baquerizo Moreno, Ecuador
Verdict:
Fresco Café (Breakfast/Tea)
Fresco Café is a nice, cosy café that is located right by Playa de Oro, and offers a stunning view of the sea. We headed here for breakfast on our final morning because we wanted to have breakfast with a view. We were happy to find that it was not crowded, and we loved the laid back atmosphere (complete with hammocks!) ❤
Perfect location ❤ Good food + good view = Perfect! ❤
The breakfast menu was quite limited, though, but there were several off the menu items as well, such as waffles. We recommend checking out the daily specials with the barista.
We had the Fruit + Nut Sourdough Bread with Butter and Jam, and a glass of Iced Latte each. Though the servings were pretty paltry, the food was seriously good. The latte was rich and creamy, and the sourdough toast was dense and flavourful – it might even have been the best bread we had on this trip. Absolutely loved it!
Address: Avenida Jaime Roldos Aguilera, Puerto Baquerizo Moreno, Ecuador
Verdict:
Lucky’s (Lunch/Dinner)
Lucky’s is another popular local establishment, which is easy to spot because all the locals flock there for their meals! They have a daily set menu at an affordable USD 4, which includes a main course, soup and drinks. It is not written on the menu though so it is a well-kept local secret. Haha.
The interior of the restaurant – every so often the delicious smell of food wafts through the kitchen window
We had dinner here on our second night but ordered a la carte – we ordered fish on the grill and ajillo fish (fish with garlic sauce) – both were yummy! It cost us USD 17.50 for two a la carte items.
Ajillo fish – the sauce was SO GOODDDDD ❤ Grilled fish – simple and tasty!
Address: Avenida Ignacio De Hernandez,Jose De Villamil. Esquina, Puerto Baquerizo Moreno 200150, Ecuador
Verdict:
Cris’ Burgers (Lunch/Dinner)
As its name suggests, Cris’ Burgers specialises in… burgers. And fries. We hadn’t expected much at first as we were passers-by who caved into our hunger pangs, but were very satisfied with what we ordered! The burgers were superb and meat patties were well-cooked – they were tender and juicy. The caramelised onions were the bomb. The burgers cost us USD 8 each.
Address: Teodoro Wolf, Puerto Baquerizo Moreno 200150, Ecuador
Verdict:
Bakery Cuencan Taste (To go)
Cuencan Taste is a local bakery where you can buy many varieties of bread, pastries and cakes to go. We were lured by the delicious smell from a mile away as we were walking back to the main street from Playa Man. It is tucked away in a corner and not many people walk past it – in fact it was our noses (and greed) that led us there. 😀
We tried a few types of bread, and we must say they were seriously good. The bread is cheap too – cost us just USD 0.50 per piece (and sometimes even less!). You can buy some pastries here and then head over to Playa Man for a day at the beach! These breads and pastries are also seriously good as hiking snacks.
Breads galore!
Address: Avenida Alsacio Northia
Verdict:
Places of Interest and Things to do
Visit Armada del Ecuador’s Museum of Galapagos History
We didn’t originally intend to visit this, but since it was en route to Frigatebird Hill, and it was open (and very empty), we decided to pop by for a while. The museum is small, with information about the history of the islands since colonial times. The exhibits are written in both Spanish and English, making them easy to understand. It took us about 30 minutes to skim through the displays. You can expect to spend about 1 to 2 hours here if you want to view the exhibits in detail. Admission is free.
Observe Sea Lions on Playa de Oro
Right in front of the museum is Playa de Oro, a rocky beach located next to the main pier. The beach is home to a huge colony of sea lions. We often took some time to appreciate the lovely hues of blue (sky and sea!) and watch the sea lions lazing around whenever we passed by. It was also here that we witnessed the territorial behaviour of the adult male sea lions – they would be chasing other intruders away with loud grunts!
Lovely view from Playa de Oro
Visit Centro de Interpretacion, Hike Cerro Tijeretas and Snorkel at Punta Carola
From Playa de Oro, it is a 10 minute walk to Centro de Interpretacion, the entrance to the routes leading to Cerro Tijeretas (Frigatebird Hill) and Punta Carola (a beach and popular snorkelling site). Frigatebird Hill is named as such because it is the nesting site for lots of Frigatebirds during the breeding season. We visited the Hill on two separate days. After registering our visit at the centre on the first day, the park ranger explained the various routes to us and advised us against snorkelling as there was a swell and the waters were rough. We stuck to hiking and returned the next day for snorkelling.
At the start of the route, there was a centre that showed exhibits about the formation of the Galapagos Islands, the life of Charles Darwin and his theories of evolution. It was informative and we spent about an hour here.
Then, it was a leisurely 25 minute walk up Cerro Tijeretas. We spotted a couple of Frigatebirds in the sky, but not the huge nesting ground we had expected to see (probably because breeding season was not here yet?) We then continued our hike to Punta Carola, passing by Darwin’s statue (which was built in honour of his visit to San Cristobal) and Canon de Guerra (a real war canon on display – but decommissioned of course).
Darwin’s statueCanon de Guerra
Punta Carola was a sandy beach littered with – you guessed it – more sea lions, and would have been a perfect place to snorkel or swim!
Can you spot the sea lions under the tree? 🙂
However, the sea lions were quite aggressive so we decided to snorkel at another calm, protected inlet located at the base of Frigatebird Hill instead. There were lots of corals, reef fish and occasional sea lions swimming by. We spent about an hour there.
View of our snorkel spot from the top of Frigatebird HillThe inlet where we snorkelled!
In case you are wondering, we rented our wet suits and flippers from a dive shop for USD 5. We brought our own masks for the trip.
Snorkel at La Loberia Beach, Punta Carola or Playa Mann
Other popular snorkelling spots in San Cristobal include La Loberia Beach and Playa Mann. When we were at La Loberia Beach, the waves were picking up as the swell was coming in so we decided to snorkel at Playa Mann instead.
La Loberia and its sea lions
When we reached Playa Mann, conditions were perfect. The sun was out, waters were clear, and sea lions were frolicking around playfully. Plus, there weren’t many people in sight! Sounds like the perfect setting for snorkelling, right?
… Or so we thought. As soon as J entered the water, he got bitten by a juvenile sea lion.
He came out of the water limping and bleeding at the ankle. It was crazy.
Fearing rabies or seal finger or any other disease for that matter, we headed straight to hospital to get him checked. Thankfully, the bite turned out to be superficial. It also turns out that many locals and tourists have been bitten by sea lions before. The doctor on duty casually asked, “Playa Mann?” to which we replied “Si (yes)”, and he shook his head and sighed. We also learnt that the sea lions in the Galapagos are rabies-free, which was a huge relief for us.
J exclaimed rather wryly, “Sea lions are no longer my favourite animal.” LOL 😊
Awaiting treatment. HAHAHA
And that brings us to a very important point…
Medical Facilities at San Cristobal
There are local pharmacies around San Cristobal, but if you want to get checked by a doctor, it is best to head to the local hospital, Hospital Oskar Jandl.
The facilities are new, and queues are very short (there was no queue at all when we went). The best part? Treatment and medication is completely free of charge (this is the case in all public hospitals in Ecuador!) even for tourists. Just be sure to bring your passport along with you.
A taxi ride to the hospital from the main street takes about 10 minutes, and costs about USD2. It helps if you can speak Spanish, but no worries if you can’t – you can communicate with the doctor via Google Translate. The doctors and nurses were very helpful – we were impressed.
Address: Calle Jaime Roldós y Juan Pablo II Contact: +593 5 2520 332, +593 5 2520 935, + 593 5 2521 210
And that concluded our 12 day trip to the Galapagos Islands. We left with wonderful memories to last us a lifetime… and J brought back something extra from the trip – two scars from the bite of a juvenile sea lion. 😀
Thank you for visiting our humble travel blog! Stay tuned for our next update on the rest of our South American trip! 🙂
*Our Galapagos trip was from 28 November 2017 to 9 December 2017. The first 8 days were spent on board the Samba Cruise, and the subsequent 4 days on land.
After checking out of our hostel, we made our way to Cafeteria Proinsular, a café located along the pier and overlooking the jetty. It was situated on the second storey of a building, right above the supermarket. We spent quite a while looking for it as it was relatively obscure given that there wasn’t any visible banner or signage.
Cosy interior with sea-themed murals.We were one of the first few customers as it was still pretty early 🙂
The view of the jetty from the café was spectacular! It felt wonderful to just look out of the window and admire the scenery… (Psst… outdoor seating is available too but it was drizzling so we decided to be indoors instead)
So dreamy ❤
We shared a Tortuga Bay Breakfast (a Pancake Set) and a Combo (Ham and Cheese Sandwich Set).
Tortuga Bay Breakfast Set!Combo with Iced Mocacino
The pancakes were moist and fluffy, and the sandwiches were well toasted. The only gripe we had was that the servings were pretty small for the price, (though we had gotten used to prices being much more expensive in the Galapagos Islands). This meal cost us USD 12.50.
Address: Charles Darwin y Ninfas,Muelle principal, Puerto Ayora 200350, Ecuador Verdict:
Santa Cruz Fish Market
After breakfast, we took a stroll along the coast and stopped by the Santa Cruz Fish Market. The market is located along the fisherman’s jetty and is very modestly sized, complete with basic facilities like taps and sinks. It’s quite interesting to watch the locals shop for their seafood here. 🙂
We also managed to catch a glimpse of the Resident Sea Lion in action – he was patiently awaiting fish scraps being tossed to him by the fishmongers. That explains his size! Haha. There were also some pelicans waiting by the side. Since the Sea Lion was territorial, they could only wait till he had eaten his fill…
Behaves more like a dog than a sea lion -.-
Check out how ‘obedient’ this sea lion was, patiently waiting to be handed some scraps in the video below… LOL 😀
Ferry Ride to San Cristobal Island: An Unexpected Adventure
At 130pm, we boarded the ferry to San Cristobal Island, situated on the eastern-most end of the Galapagos Archipelago, and a 2 hour boat ride away from Santa Cruz Island. Ferry tickets cost USD 30 per pax from any travel agency, and ferries leave the Santa Cruz Ferry Terminal for San Cristobal at 7am and 2pm daily. Our advice is to get your tickets the day before.
So… how was the ferry ride?
Well, all we can say is that the ride itself was an adventure of its own. We had literally signed ourselves up for a 2 hour rollercoaster ride. The ferry, which was basically a small 20-seater diving boat, went full speed, crashing head on with the oncoming waves. Each time it landed (which is about 30 times per minute, or once every two seconds), we heard loud crashing sounds from the impact of the waves with the bottom of the boat. You know that gut-sinking feeling you get when the rollercoaster drops? We experienced that every 2 seconds, for 2 full hours. 2 gut-wrenching hours that felt like eternity. After the first ‘crash’, everybody hastened to fasten their seat belts, which were actually of little use. In fact, if any pregnant lady were on the boat, we bet a million dollars she would have suffered a miscarriage within 5 minutes, or gone into premature labour there and then. We kid you not. So, if you have a weak heart or other health problems, do not take the ferry. Consider other options like taking a domestic flight. If you are taking the ferry, do not have lunch before the ride and do remember to bring along your sea sickness pills. By the end of the ride, our bums were sore, red, and battered.
The Long-awaited Arrival at San Cristobal Island (Finally!)
Finally, after two gruelling hours on the ferry, we arrived at San Cristobal Island! We could not help but notice that the buildings looked much newer and more modern than those on Santa Cruz Island.
Walked around a bit to explore en route to our accommodation!
Getting in the mood for Christmas!
Colourful modern buildings…Modern hotels we could not afford :p
One thing that we simply could not miss (like, in our face) was that there were hordes of sea lions EVERYWHERE. Compared to the rest of the islands, San Cristobal is in a league of its own in this aspect. The Sea Lions were lying in the parks, under the trees… basically they were like the stray dogs of the island.
Sea Lion taking an afternoon nap in the middle of a man-made park
We strolled down Ave Charles Darwin, passing by two beaches – Playa de Oro and Playa de Los Marinos – and they were also full of sea lions.
Entire beach practically littered with juvenile sea lions…
… Just doing their thing.
Check out this video of the sea lions lounging on the beach:
In fact, the colonies were so big that males ended up fighting with each other over territories. We witnessed that so many times – it was pretty amusing.
Playa de Oro, where we witnessed a territorial male sea lion chasing other male sea lions awayThis entire beach (and boardwalk) – MINE. No trespassing allowed.
Adult male sea lions are pretty aggressive, especially when it is nearing breeding season, so we were careful not to get too close to them.
Dinner at Giuseppe’s Restaurant
Following our hostel manager’s suggestion, we had dinner at Giuseppe’s Restaurant, an Italian joint located just by the sea.
It’s dinner time! 🙂
It was a tad pricey but the food was (sinfully) seriously good. We had a burger each, and Y ordered an Iced Mocacino. That set us back USD 21.50.
Beef patty, bacon, mushrooms, caramelized onions, lettuce, and ALL. THAT. CHEESE… ❤ ❤ ❤
Address: Av. Charles Darwin,Diagonal al barco de souvenirs, 200150, Ecuador Verdict:
Our Accommodation: Casa de Laura (Highly recommended!)
Our home for 3 nights on San Cristobal was Hostal Casa de Laura, which cost us USD 37 per night for a double room with en suite bath and hot shower. We loved the place for its convenient location, hot shower, hospitality (lots of advice on what to do and very friendly owner!) and amenities (hammocks, WIFI, air-conditioning etc). Not to mention, the place was impeccably clean and affordable!
The main lounge area / Reception area
Address: Callejon 2, Avenida Armada Nacional,Av. Armada Nacional y 2DO callejon, Ecuador
Verdict:
That sums up our 9th day at the islands! We were getting a little land sick (we could feel waves beneath our feet as though we were still on sea haha) and that was quite an interesting experience. Is this how sailors feel when they return ashore? 😀
Thank you for visiting our humble travel blog! Stay tuned for our next update on our 10th day in the Galapagos Islands, including J’s ordeal of being BITTEN by a sea lion – coming your way soon! 😊
*Our Galapagos trip was from 28 November 2017 to 9 December 2017. The first 8 days were spent on board the Samba Cruise, and the subsequent 4 days on land.
We woke up early and had our last meal on board the ship, before bidding farewell to our lovely crew. They were absolutely wonderful, and had made our entire cruise experience a pleasant one! We were especially touched by their sincerity and warm hospitality.
The crew members that we interacted with the most were Oswaldo, our Captain, who taught us a fair bit of Spanish and chatted with us whenever he saw us on the deck, as well as Arnie and Oswaldo (II), our panga drivers, who played a huge role in keeping my frazzled nerves calm for deep sea snorkelling. During my first few snorkelling attempts, Arnie and Oswaldo would make sure that the panga was always near me and they were watching out for me just in case I needed any assistance (the rest of our group were established snorkellers and divers haha). Their presence was so comforting. They were very encouraging and spontaneous, and not to mention fun! 🙂
With our Captain, Oswaldo!With our panga drivers, Arnie (bottom right) and Oswaldo (top right) 🙂
Puerto Ayora and the El Chato Giant Tortoise Reserve
After disembarking from the Samba for the final time, we arrived at Puerto Ayora, a town on Santa Cruz Island, where we were once again greeted by a lounging wild Galapagos Sea Lion.
Sea Lions of Puerto Ayora seem to be much darker coloured than the ones we saw during our cruise. And not to mention, much more well-fed too. 😀
We then took a bus to the El Chato Giant Tortoise Reserve, where Luis first gave us a brief explanation of the giant tortoise’s anatomy, with the help of some real-life preserved skeletons. Each island in the Galapagos is home to a different species of tortoises, so the ones we saw on Santa Cruz were different from the ones we saw at Floreana Island.
Entrance to El Chato Tortoise ReserveLuis explaining the anatomy of the Giant Tortoises using these exoskeletons on displayClose up view: Seems like a pretty nice home to me 🙂
We roamed about the reserve and spotted a couple of them, but what particularly caught my attention was a giant 150-year old tortoise!
Old but shy 🙂
We were wondering why the number of tortoises we managed to spot was quite low… until we came to a pond in the distance. We instantly understood why. LOL the entire park’s population of tortoises was probably taking a dip in the cool waters there.
Pond full of Santa Cruz tortoises 🙂
Is that what they do every single day for a century? Gosh… :O
The Santa Cruz tortoises were really cute, but I still preferred the ones I saw at Floreana island 😊
After spending some time with the tortoises, we visited some very cool underground lava tubes and saw a sinkhole caused by a collapsed crater.
Giant sinkhole caused by collapsed crater
Visiting the Scalesia Forest
Our last stop as a group was the Scalesia Forest, which is endemic to the Galapagos. There are 15 native species altogether, but most of them are threatened by introduced plant invaders like the black berry.
Scalesia Forest and the Giant Sinkhole
Exploring the Santa Cruz Galapagos National Park and the Darwin Research Centre
After bidding our group members goodbye (they left for the airport while we were spending a few more days in the Galapagos at our leisure), we visited the Santa Cruz Galapagos National Park and the Charles Darwin Research Foundation to learn more about the Galapagos giant tortoises.
Getting there was pretty easy… we used GPS and followed road signs. We absolutely loved the fact that road signs were written in both Spanish and English. It was extremely navigable by foot. Comfortable covered shoes are recommended!
Road signs like these were aplenty, making it easy for us to walk to the park itselfEntrance to the National ParkSun was scorching – be sure to bring enough water, a cap, and put on sunscreen!One of the paths led us to this insanely beautiful coastline!
There were lots of tortoise species being bred in captivity in the Park, and the preserved ‘Lonesome George’ was on display too! For those who are unaware, Lonesome George was actually the last tortoise of his kind – the Pinta Tortoise – and he died in 2012. The species is now extinct. We are only allowed to view Lonesome George with a trained Park Guide under strictly controlled conditions.
Juveniles bred in captivity 🙂This is just the statue of Lonesome George… pictures are prohibited for the actual exhibit!Found the shape of this shell very interesting but there wasn’t any discernable signage around for me to be able to find out its type
Check out a video we took of a tortoise bred in captivity:
Of course, besides tortoises, there are other animals to see, such as iguanas, insects, finches etc. Lots of cacti species too!
Was so afraid that one of these would suddenly collapse on me
We also took the time to visit the exhibitions in the Park to learn more about conservation efforts in the Galapagos, and we must say that they were very extensive and informative (not to mention impressive!). I have to admit that I lingered a little longer than planned because of the air-conditioning as well. 😀
Candid shot of the hubs ❤Galapagos Giant Tortoise species!
Random Snapshots of Puerto Ayora
We spent a good 3.5 – 4 hours at the Reserve and had a couple of hours left before dinner, so we decided to roam about Puerto Ayora. Here are some pictures we took of the charming town.
Random houses facing the sea ❤The local wet market and its resident Sea LionResident Pelican stationed just in front of the local wet market❤ ❤ ❤The entire island was dotted with colourful murals and statues such as these ❤Plus very artistically decorated store fronts ❤
Seafood Feast at Los Kioskos
We ended the day with a seafood feast at Los Kioskos, a local food street comprising many kiosks selling fresh lobsters and fish at an affordable price. The road is converted into a dining street from about 5pm onwards daily, and fishermen bring their catch to grill them and serve them to you fresh, complete with sides.
Before the crowd cameCatch of the day
Most kiosks sell similar things, so we chose one that looked clean and less cluttered. J ordered fresh lobster and I ordered fish. 🙂
Our foooooddddSo happy, can’t wait!!!! 😀The mister with his refreshing cerveza
After waiting for about 15 to 20 minutes, our food finally arrived. The fish was so fresh and tasted so yummy. The lobster too! Portions were huge.
Freshly grilled fish with a tangy orange sauceFreshly grilled lobster with garlic and cream sauce. YUMMM
Address: Calle 23 De Octubre y Chimborazo, Puerto Ayora 200350, Ecuador Verdict:
The meal left us feeling SO FULL, we just had to take a stroll around the neighbourhood for our food to digest. We made our way to the jetty – it was very pretty at night as it was decorated with colourful lights! The lights also made it easy to spot reef sharks swimming in the clear water.
Couldn’t resist this picture – such an apt resting place haha
***
We love this place so much, we could almost live here.
Thank you for visiting our humble travel blog! Stay tuned for our next update on our 9th day in the Galapagos Islands – coming your way soon! 😊
*Our Galapagos trip was from 28 November 2017 to 9 December 2017. The first 8 days were spent on board the Samba Cruise, and the subsequent 4 days on land.
We woke up really tired – we didn’t manage to rest well the previous night with the Samba rocking incessantly as we sailed from Isabela to Floreana Island, the southern part of the Galapagos Islands. Although we had gotten accustomed to life on the ship, we had to down a couple of pills to manage our seasickness. Before we arrived, our guide, Luis, was sharing bizarre stories about the island with us – apparently, as the first populated island in the Galapagos, the island itself has been associated with mysterious disappearances of some of its inhabitants since the 1930s (think love triangle, murder, tragedy etc). You can read more about it here.
Hiking to Asilo de La Paz
The day began with a 3 hour hike to Asilo de La Paz, a hill that is 450m high and located on Floreana Island. The area used to be considered the most important island in the Southern Hemisphere for whalers as it contained fresh spring water. It was also of historical significance as it was the earliest inhabited island in the Galapagos. Today, it is home to about 100 people.
Arrival at Floreana Island
To get to the hike spot, we took a panga to the island of Floreana. When we arrived, we were once again greeted by Sea Lions lazing around, and a rather peculiar looking Marine Iguana that was brightly decked in red, green and black. The iguanas here looked different from the ones we had seen at Isabela – they were bigger and much more brightly coloured!
Mother and pup snoozing – watch a video below!
The brightly coloured marine iguanas of Floreana
There was also a Pelican that landed right before us, and a Cactus Finch feeding on the prickly pear cactus.
How’s it going, Mr. Pelican? 🙂The Cactus Finch in action
We took an open-air bus up to the start of the trail, passing by a cloud forest on the way. As we ascended, it was drizzling and cooling, and there was a slight and comfortable breeze.
Cloud Forest at Asilo de La Paz
We then arrived at the park that housed the famous Giant Tortoises. There were LOTS of them everywhere – in different sizes and species!
The hill of Giant Tortoises 😀
Half of the time, the tortoises were pretending to hide in the bushes or flashing their cute butts at us. I wonder if they knew that their camouflage wasn’t all that successful? 😀
Butt flash 1Butt flash 2#CamouflageFAIL
As our hike continued, we arrived at “The Labyrinth”, which was really a collection of huge rocks that had been eroded and modified by early inhabitants for the purposes of herding cattle.
Next to it was the Pirate’s Cave, which was really a shelter for the early whalers who arrived at the island to hunt for tortoises for food and to gather spring water.
Our awesome naturalist guide, Luis 🙂
Snorkeling at Devil’s Crown
After our hike, the Samba took us to the Devil’s Crown, which was located at the northern tip of Floreana island. With its black, sharp and jagged rock outcrops, it was easy to understand why this place was named as such.
View of the Devil’s Crown from the pangaOur last chance to snorkel!The excited husband who left the Go-Pro in my hands (as usual) to multitask snorkelling and taking pictures underwater while he happily snorkeled off in glee with his free hands *so much hate*
The waters were clear and rich with lots of reef fish, but there was a really strong current that caused me to struggle quite a bit before I got the hang of flowing along with it. It was quite an unnerving experience, though fun! We spotted some rays, sea turtles and sea lions, and also the Galapagos Shark and Whitetip Reef Shark.
Strong currents, hard to take decent pics but these are the better ones we had
Docking at Santa Cruz Island
We enjoyed a decent hour of snorkelling before heading back to the Samba. The rest of the day was spent at leisure on the deck of the boat, as it navigated through strong waves to get us to our final destination for the trip – Santa Cruz Island. We docked amidst other cruises at Santa Cruz Harbour for the last night, as we watched the sun set on our final night on the Samba. ☹
Approaching Santa Cruz harbour to dock for the night
Sunset over the Santa Cruz Harbour ❤
We couldn’t believe that our cruise was coming to an end. It was bordering on heartbreaking. 😦
As if to cheer me up, I was greeted by a group of Concentric Pufferfish swimming in the clear blue waters as I peered over the side of the Samba.
Galapagos Islands, you are truly breathtaking. 😊
***
Thank you for visiting our humble travel blog! Stay tuned for our next update on our 8th day in the Galapagos Islands – coming your way soon! 😊


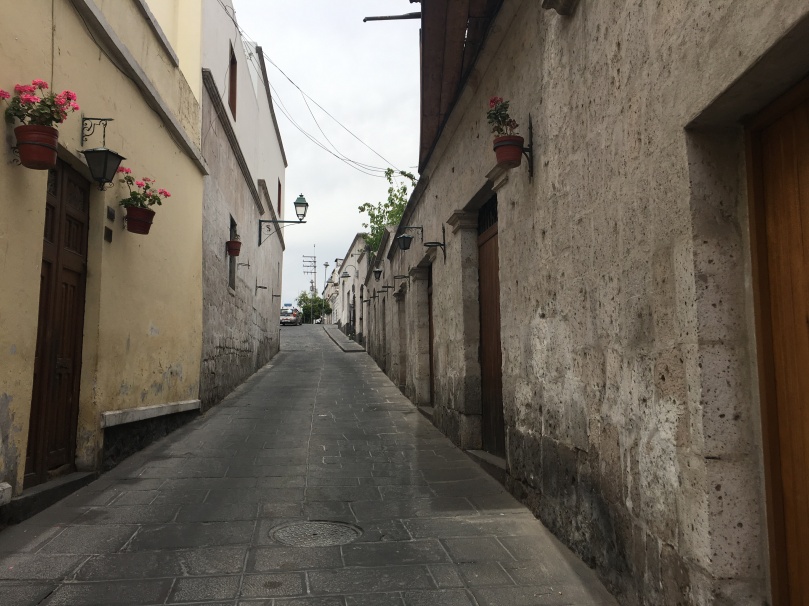


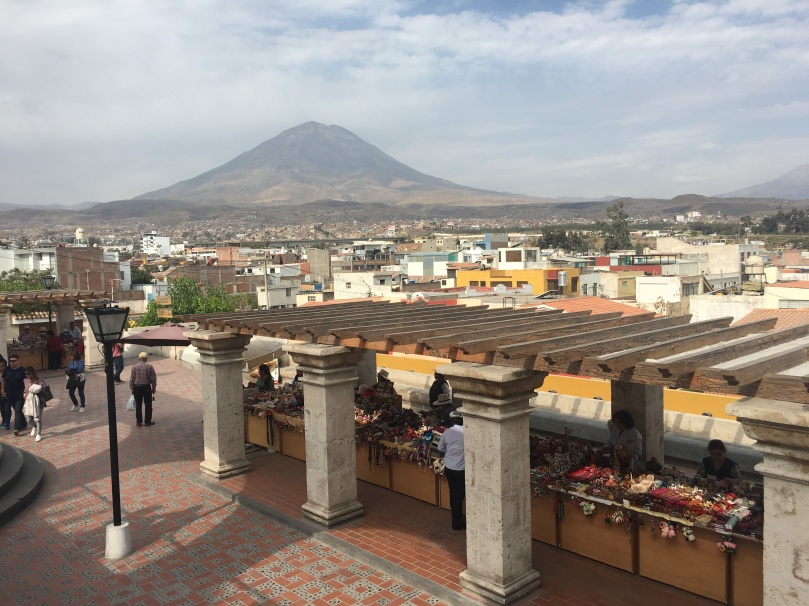
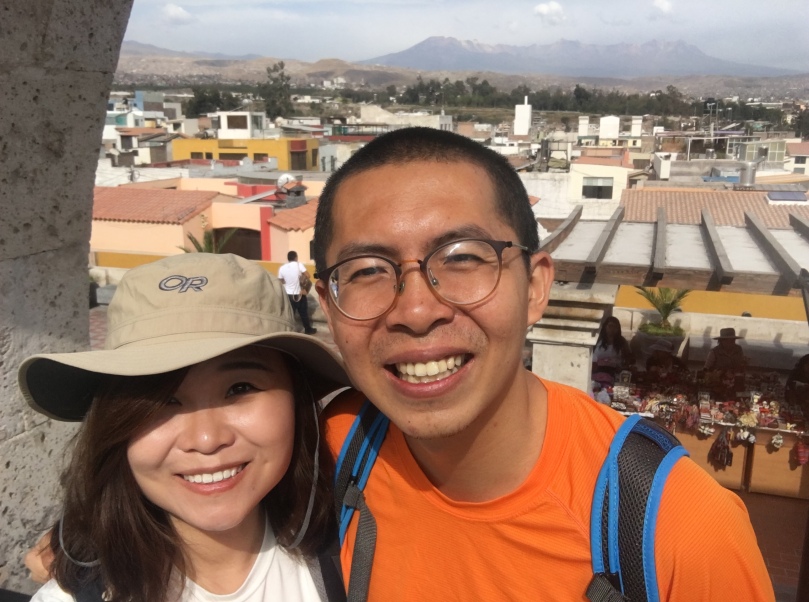


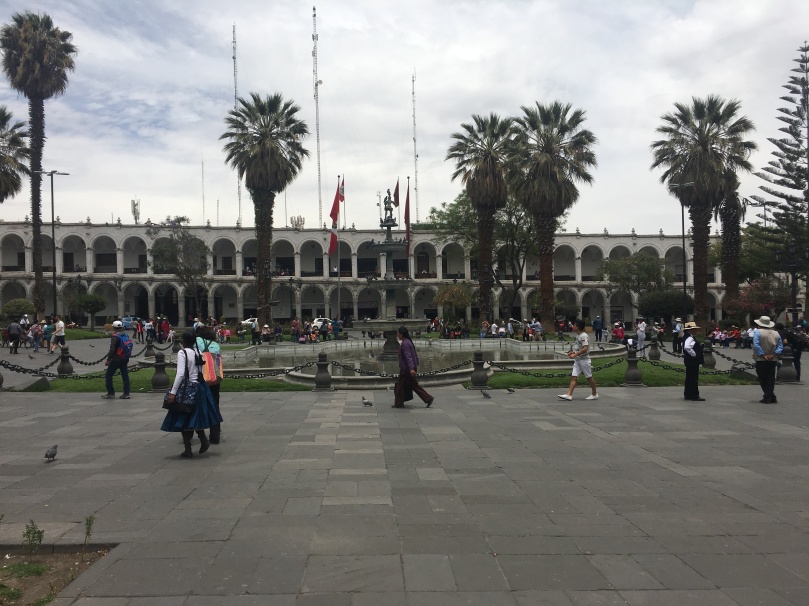
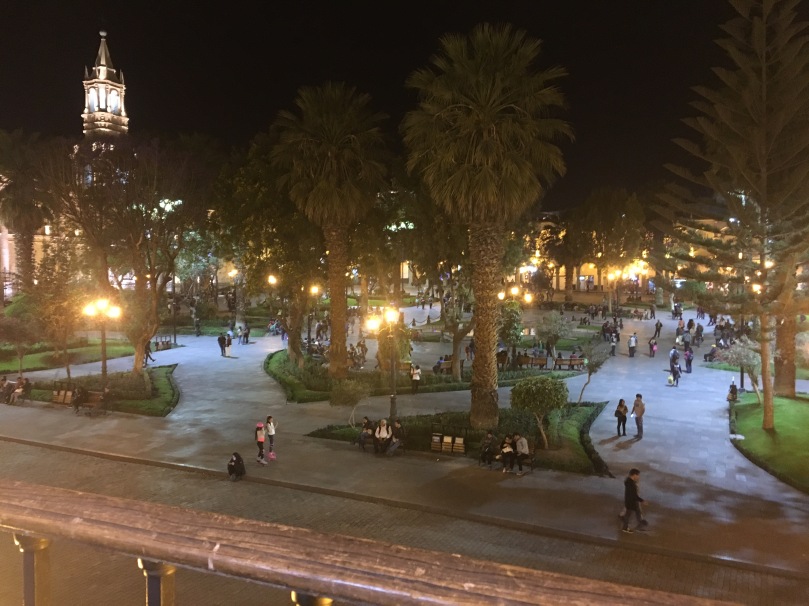
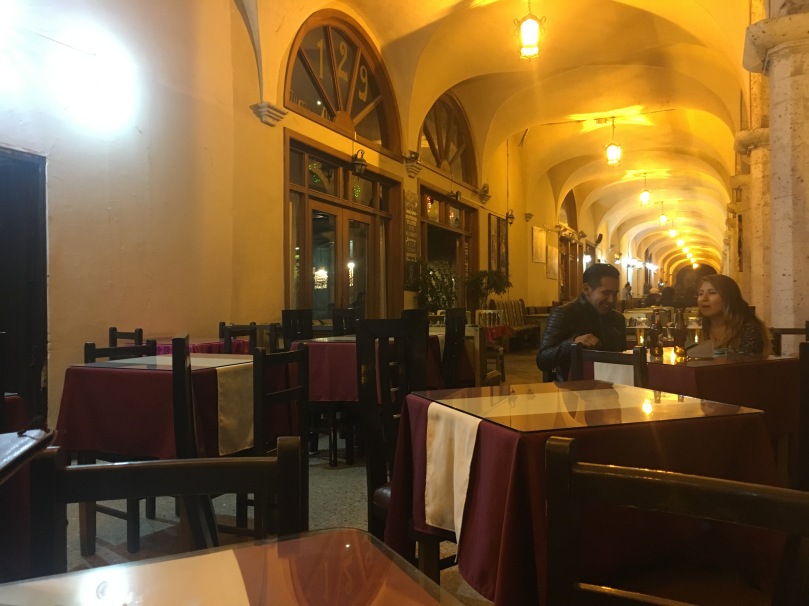
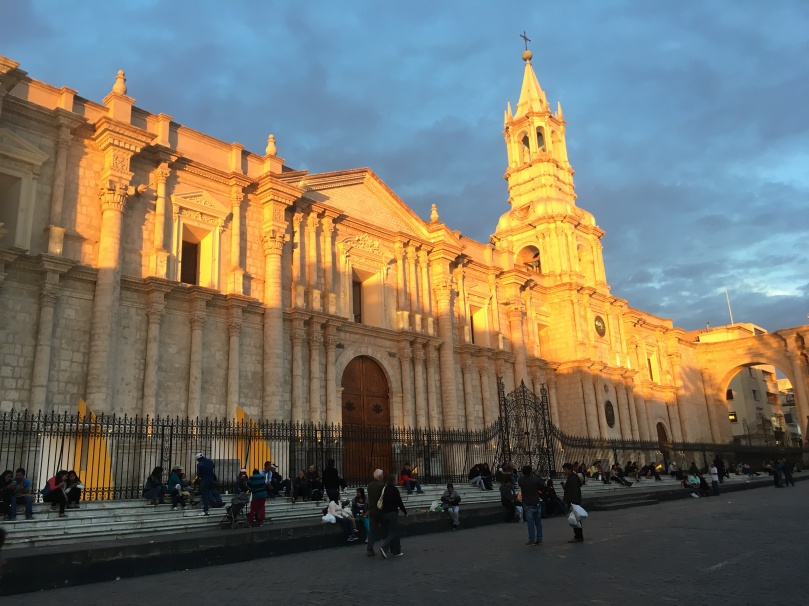
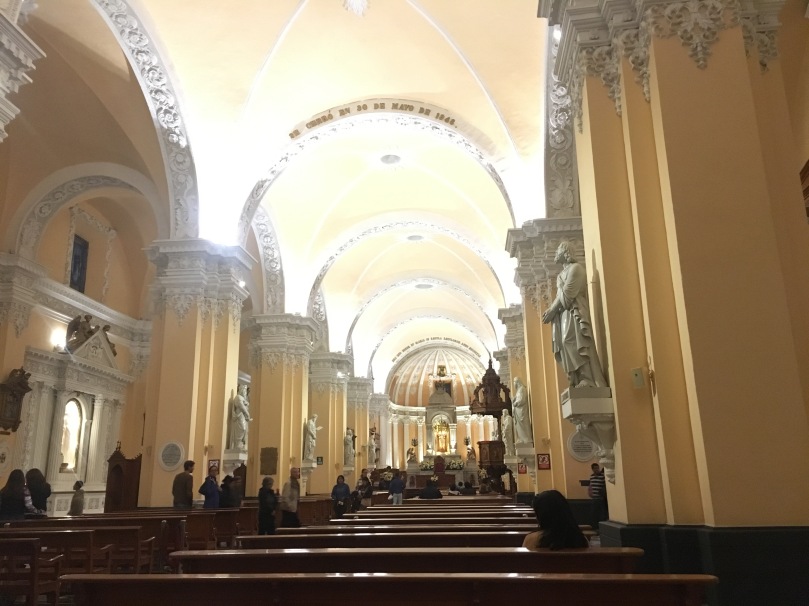
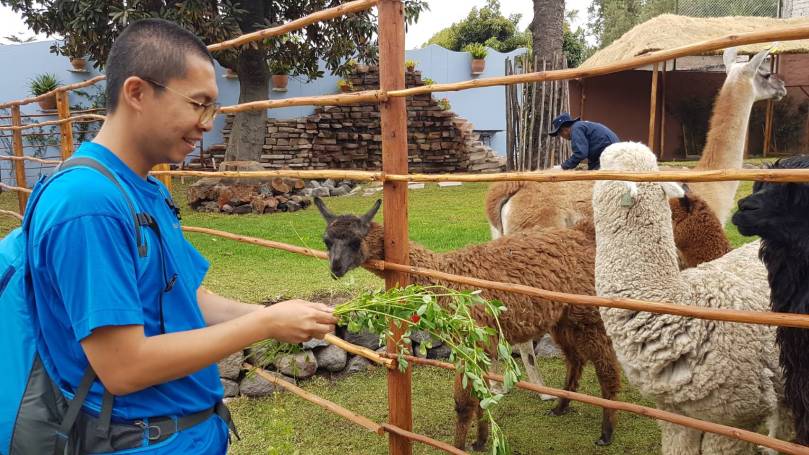
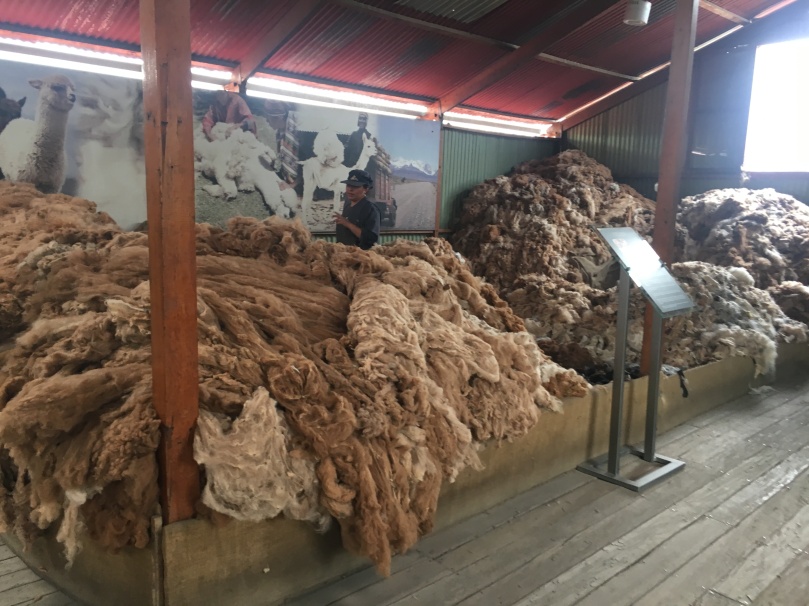
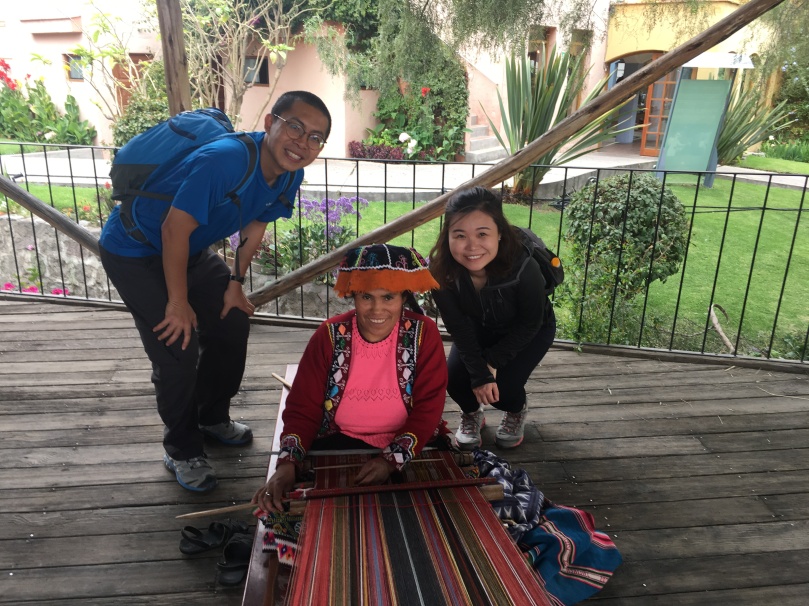
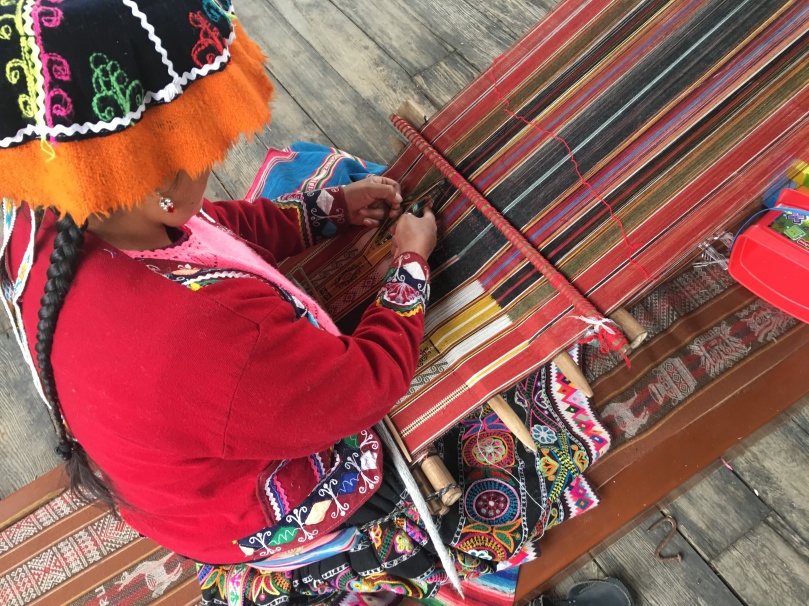
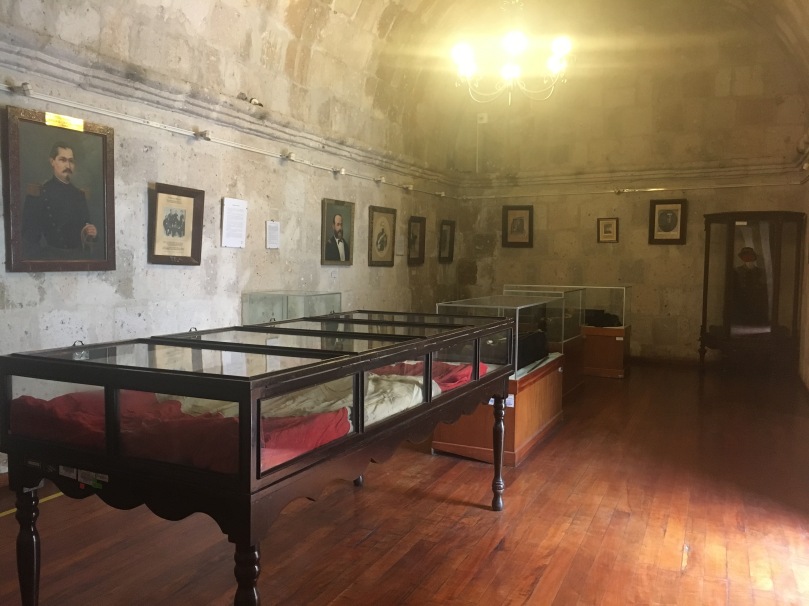

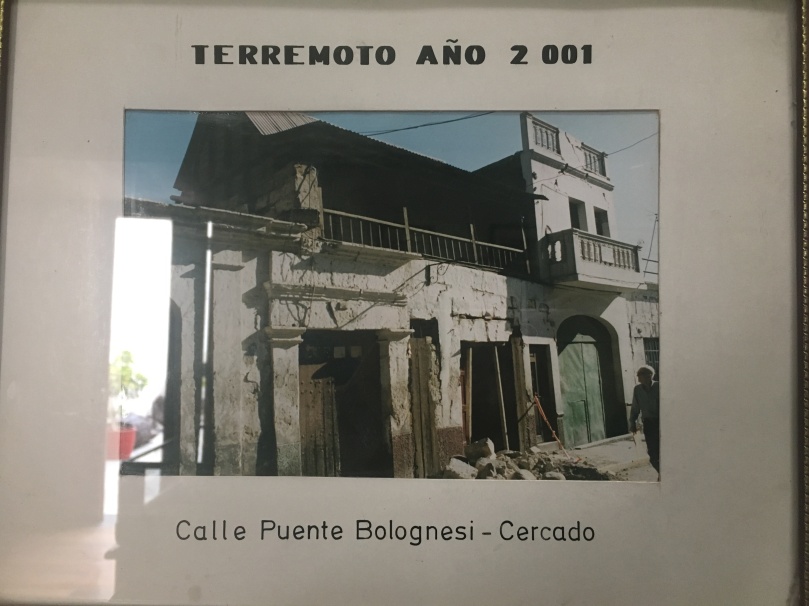
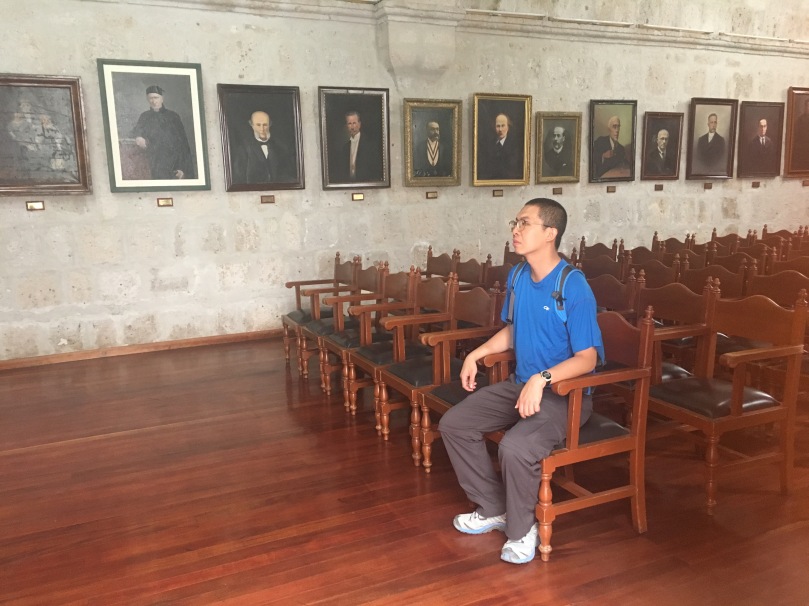
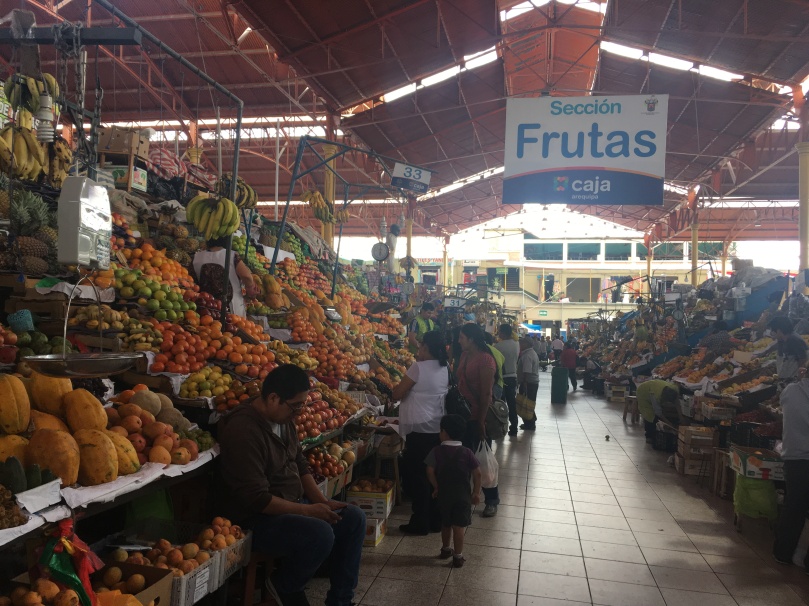
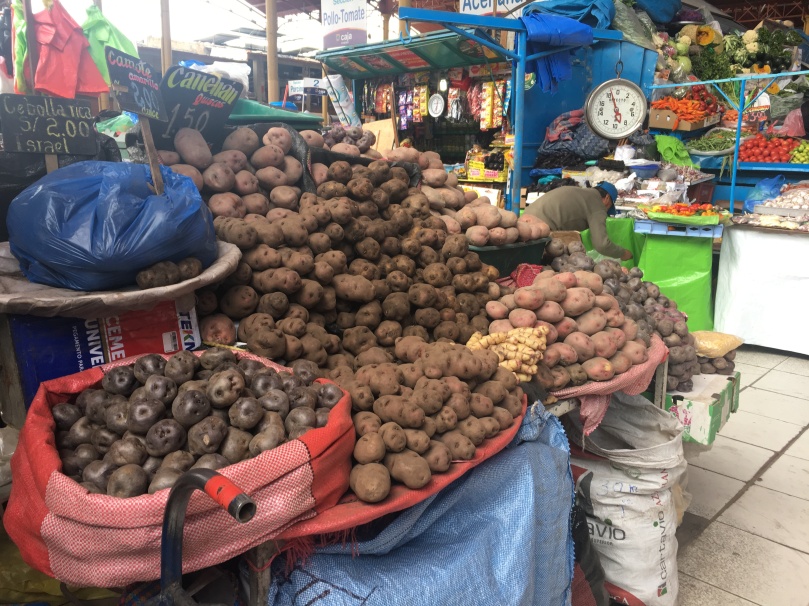
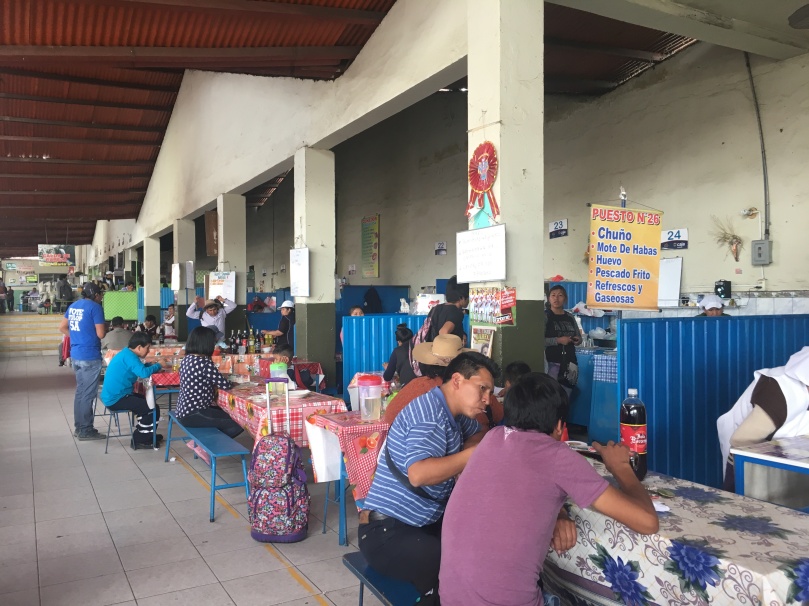


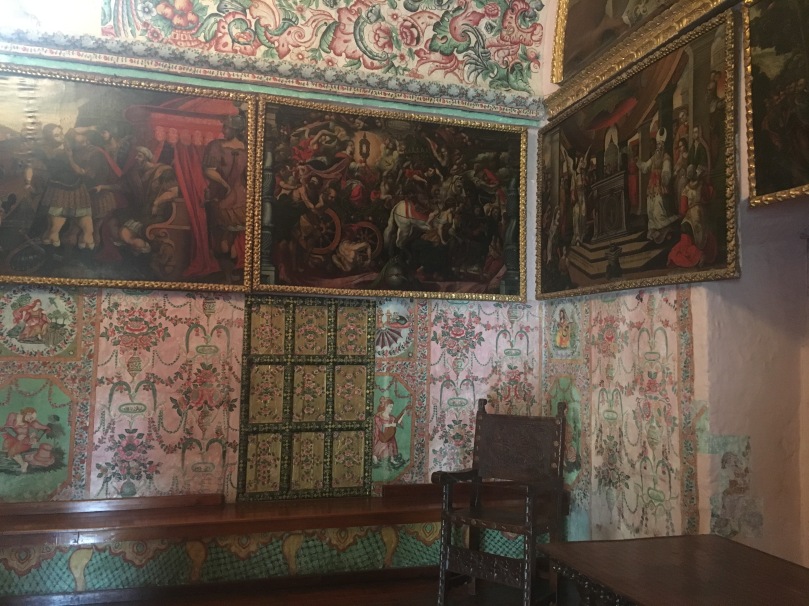


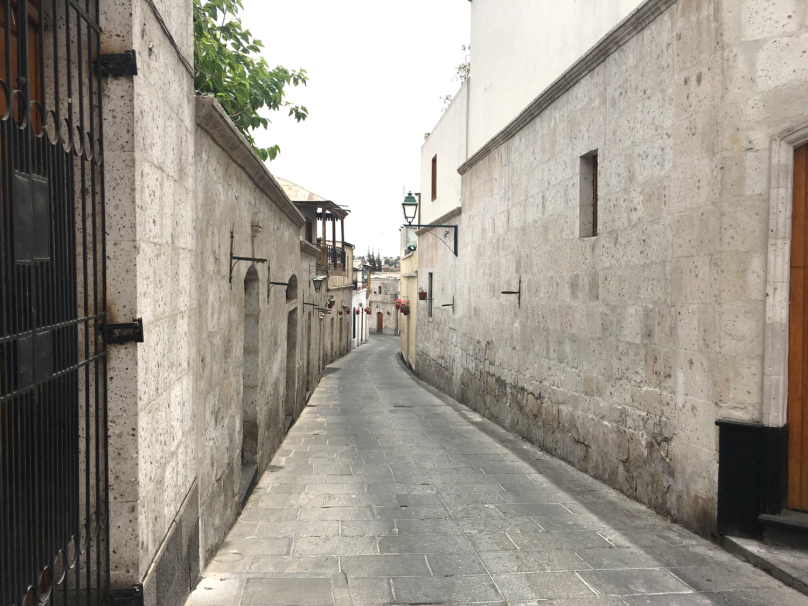
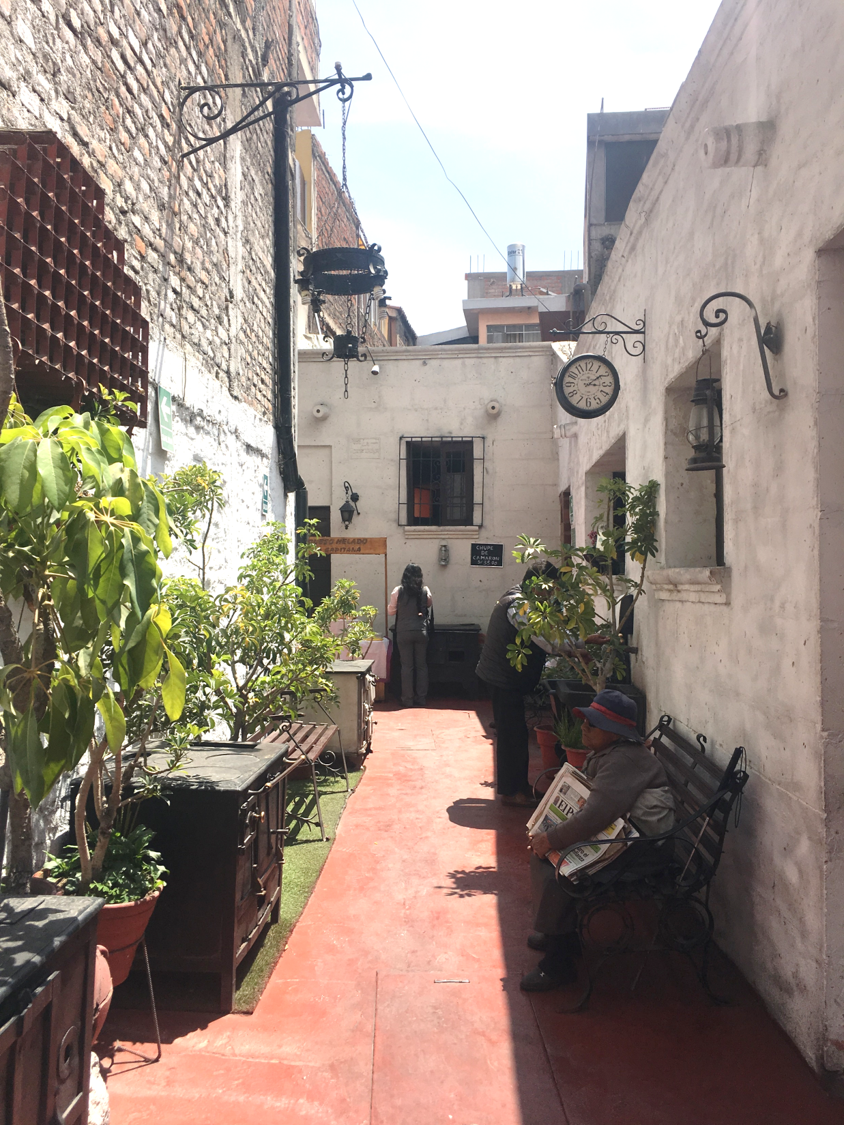
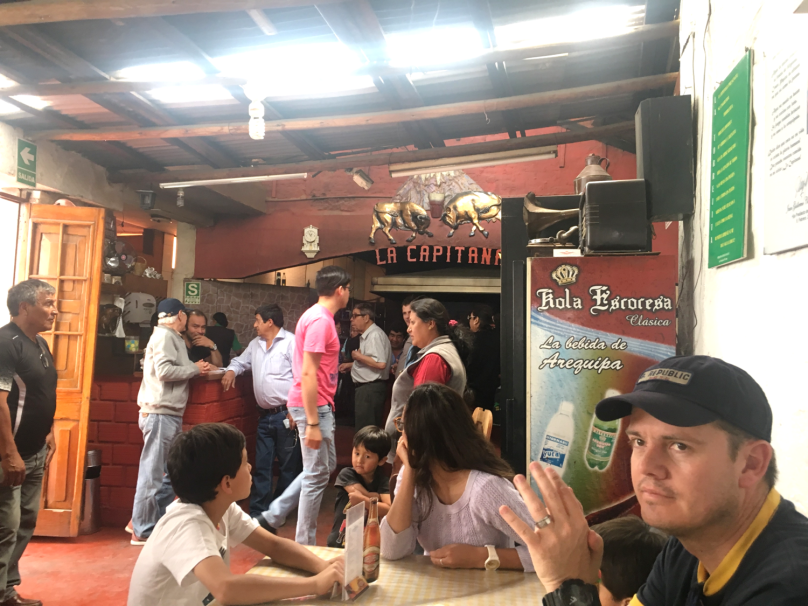
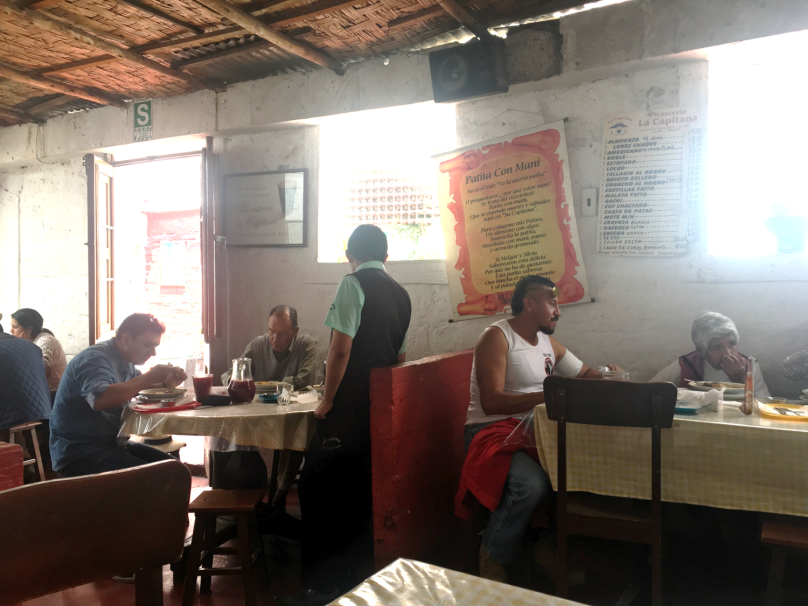
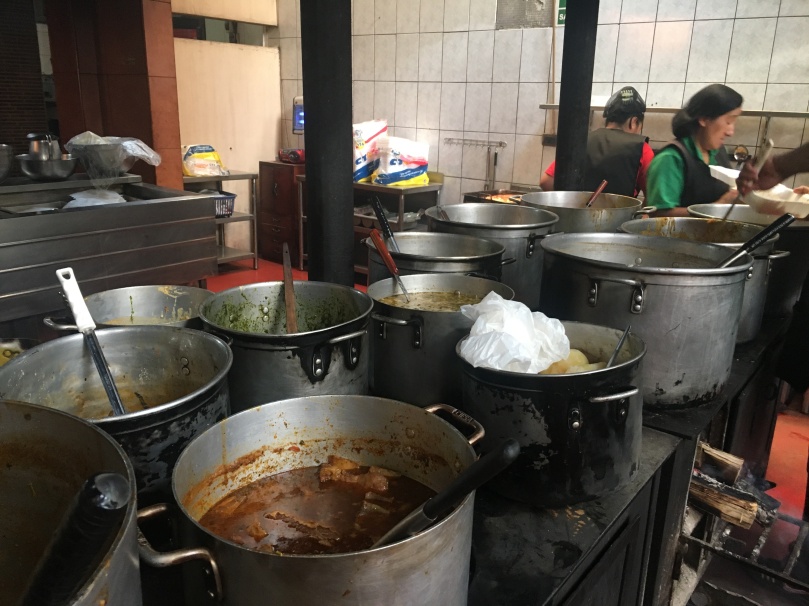
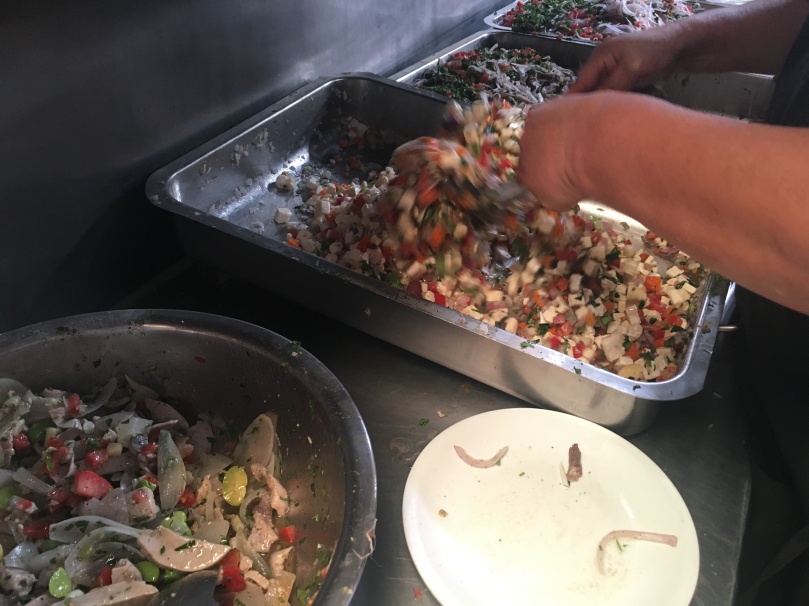
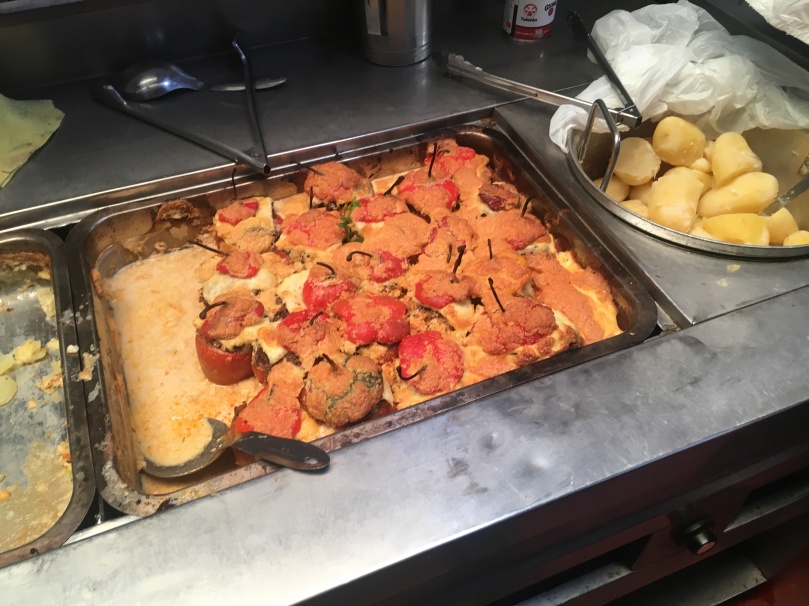
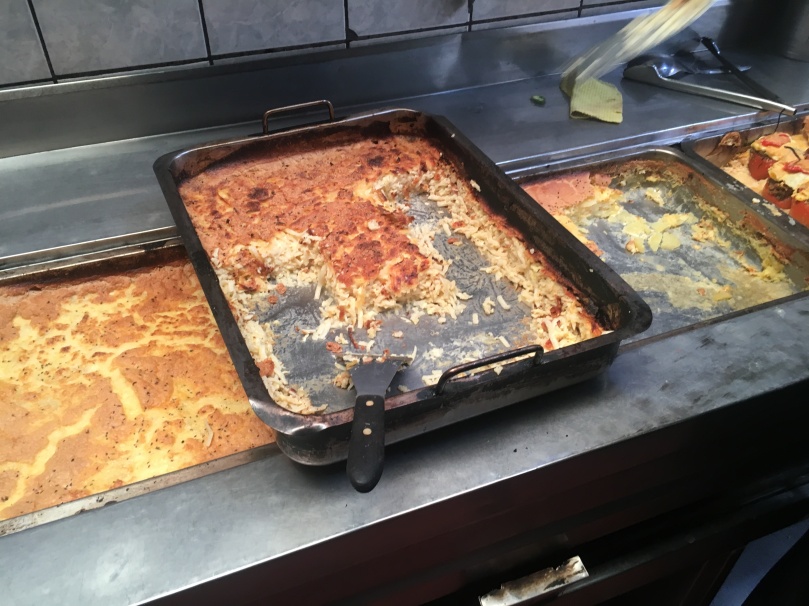
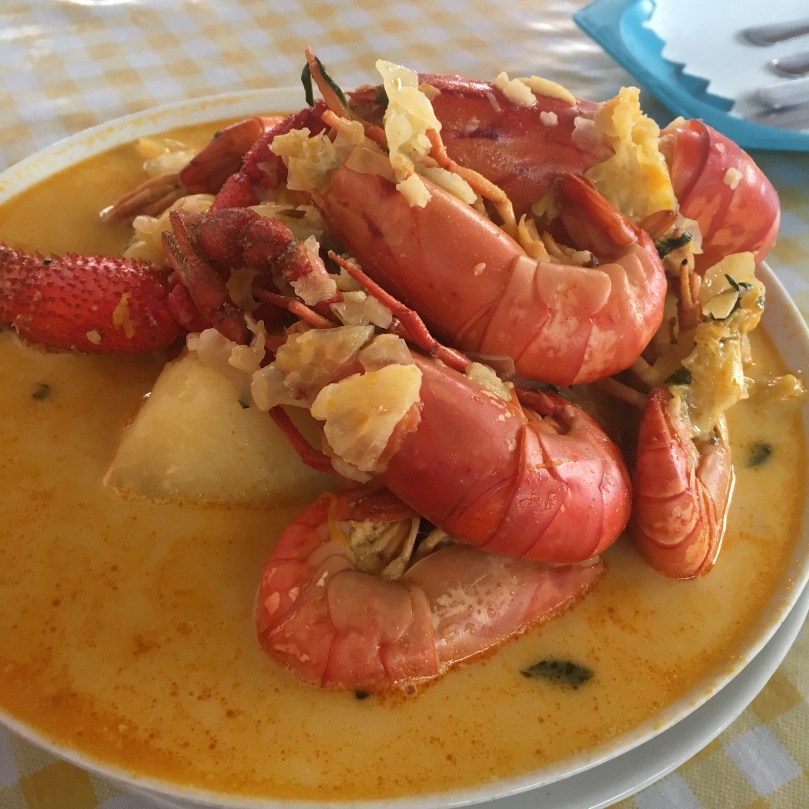
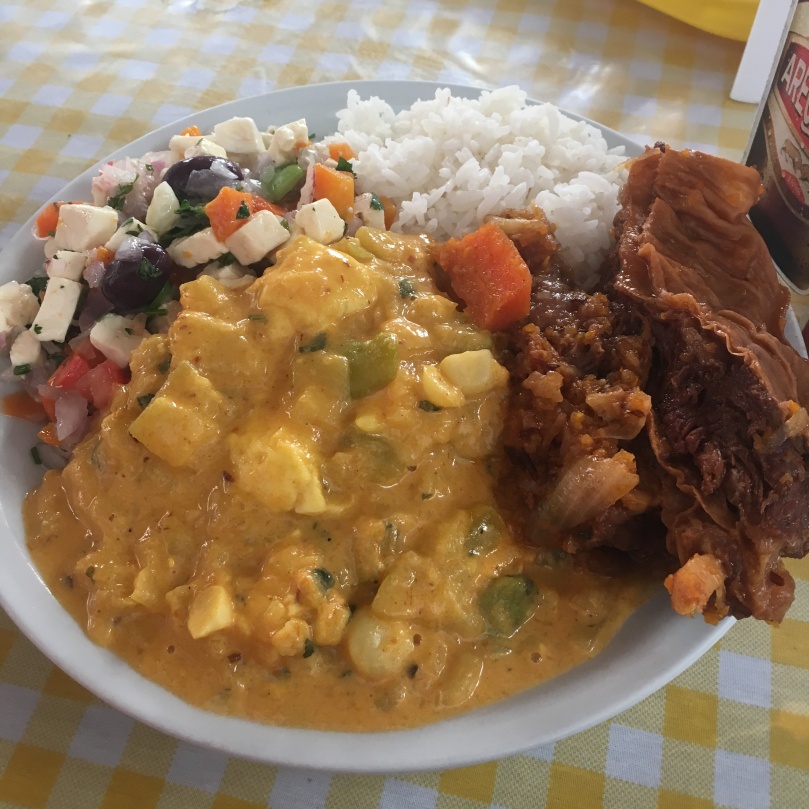


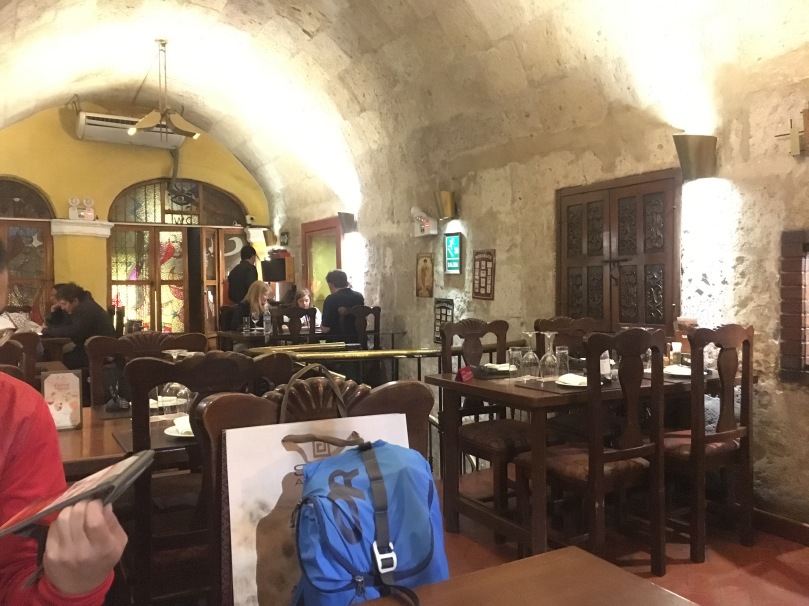

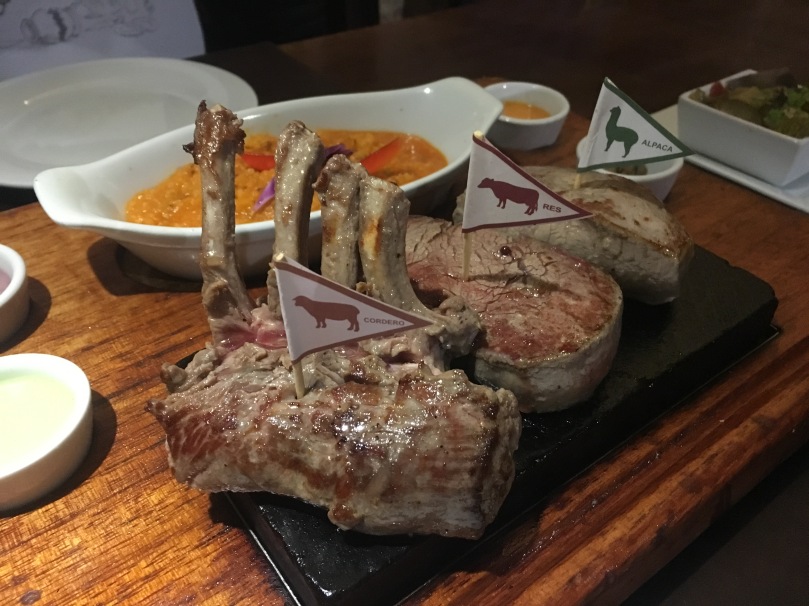


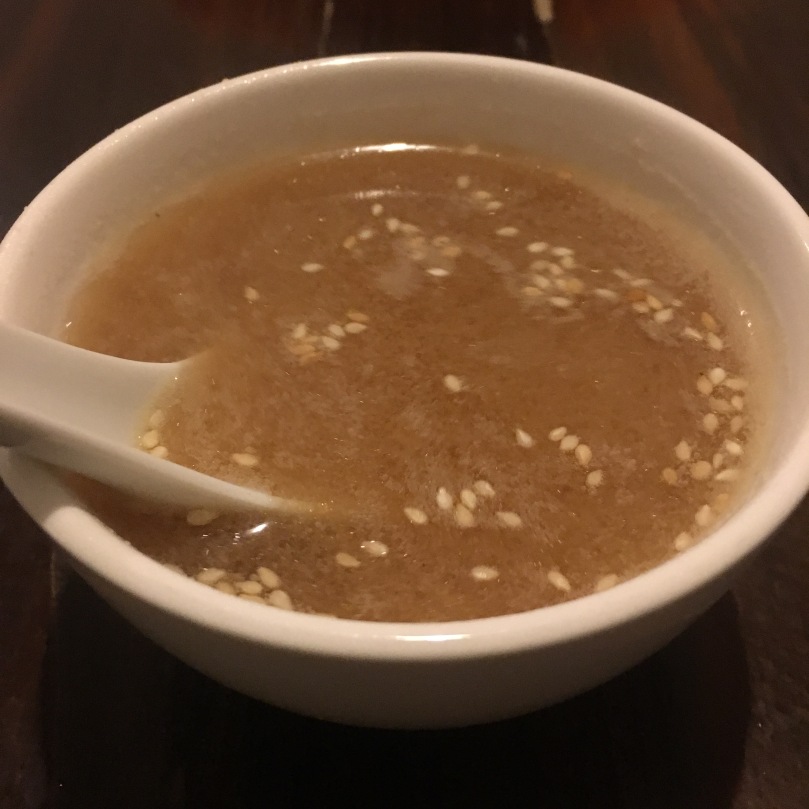
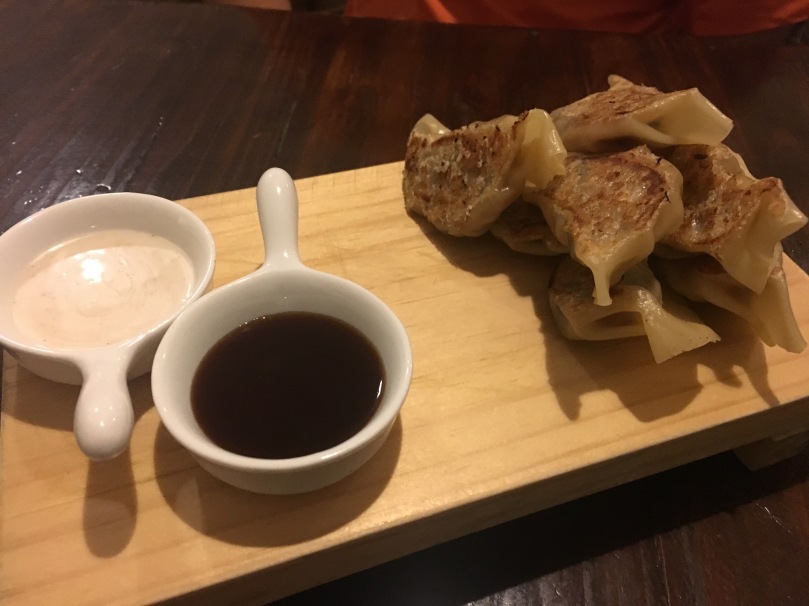
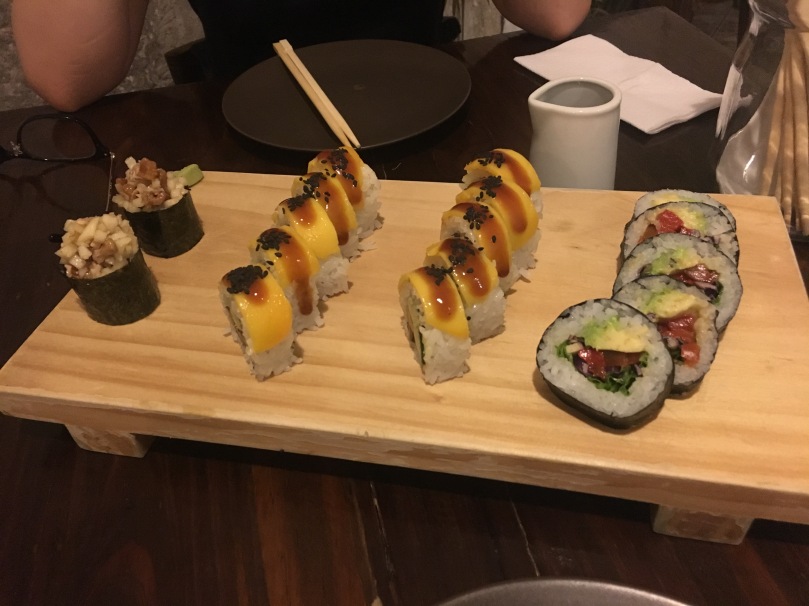

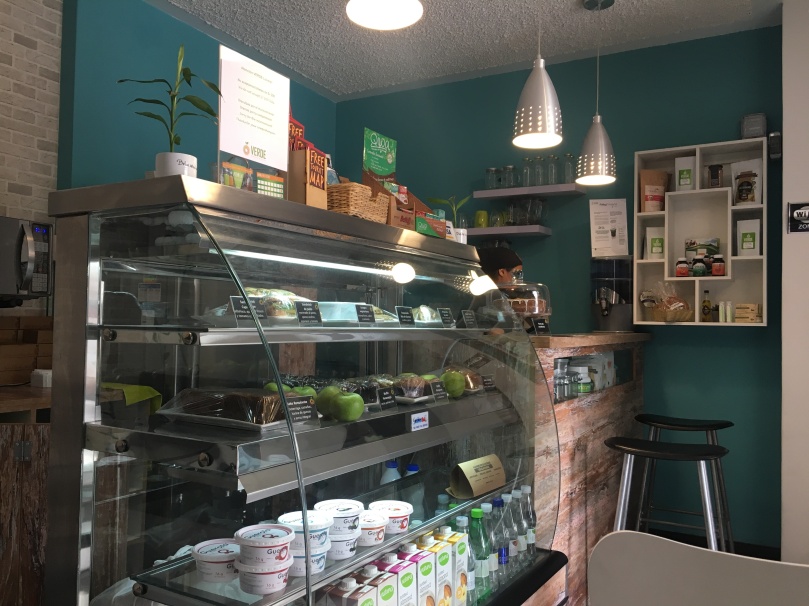


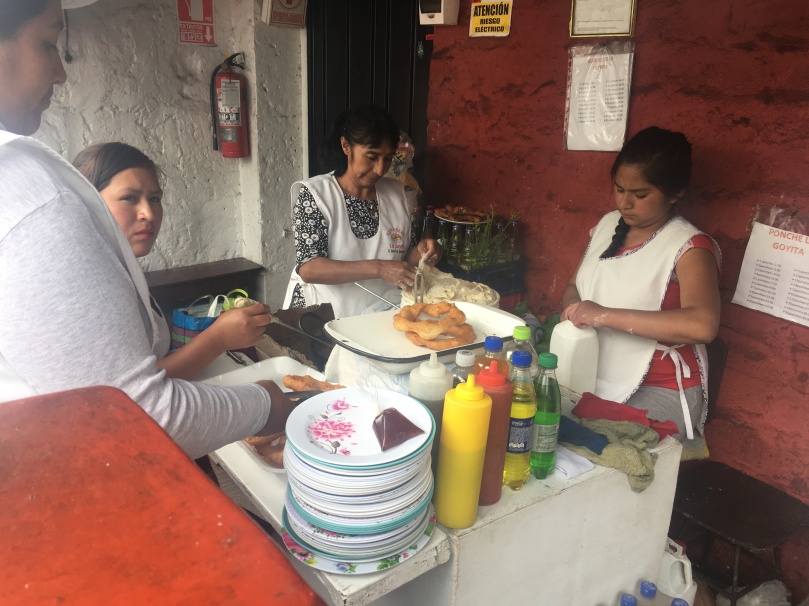
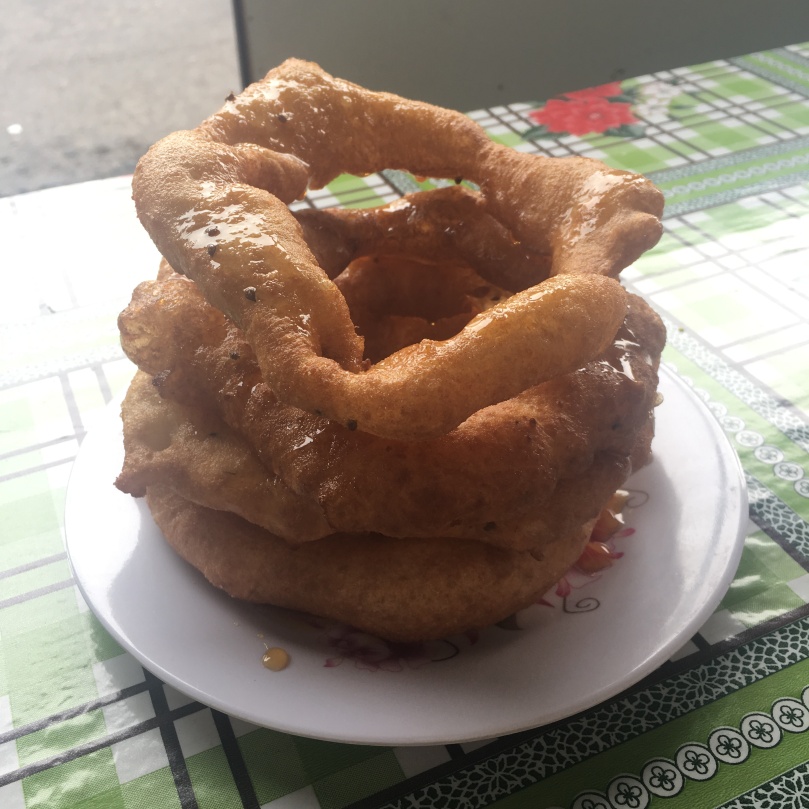


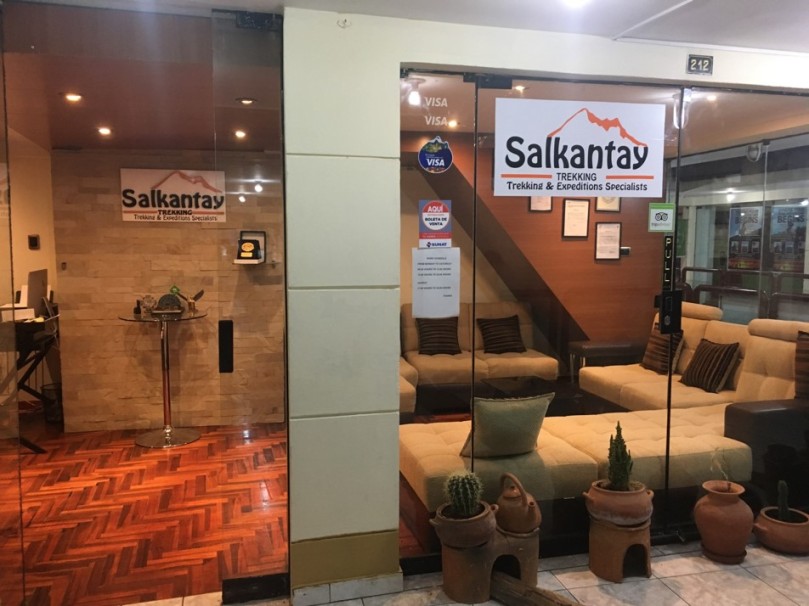
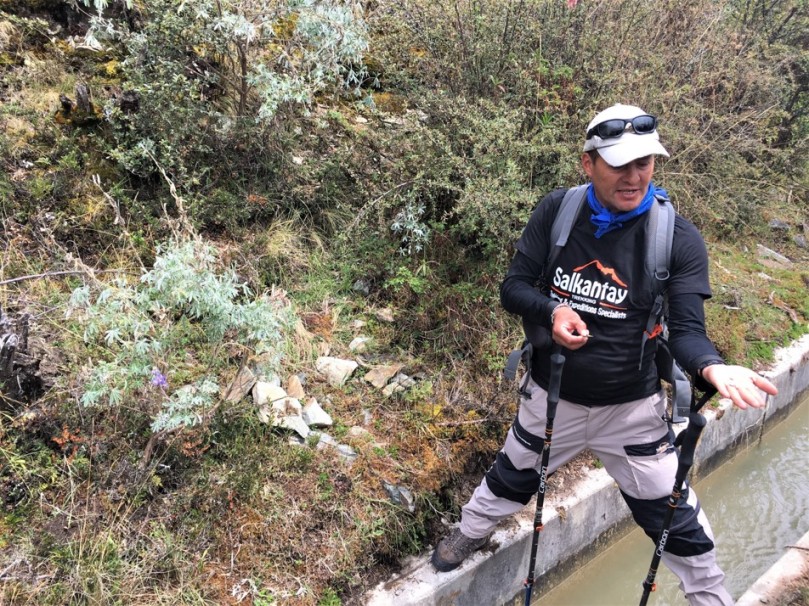
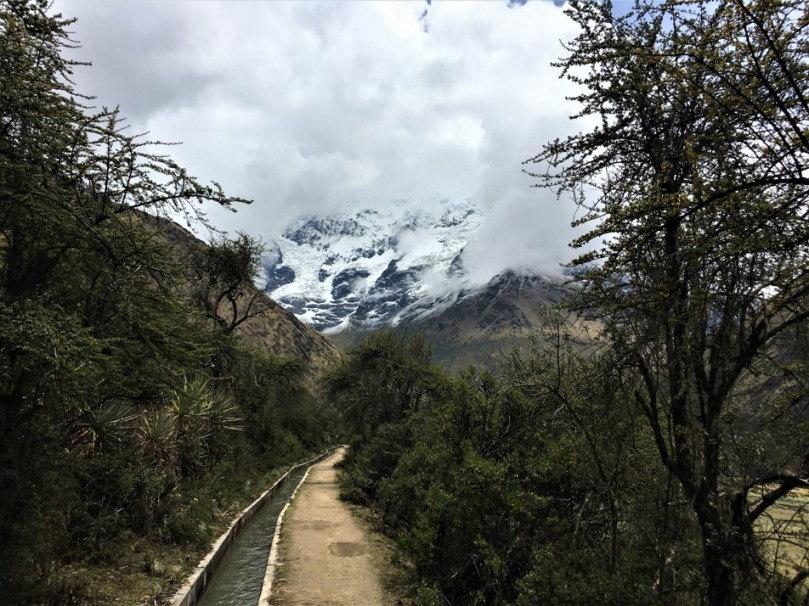
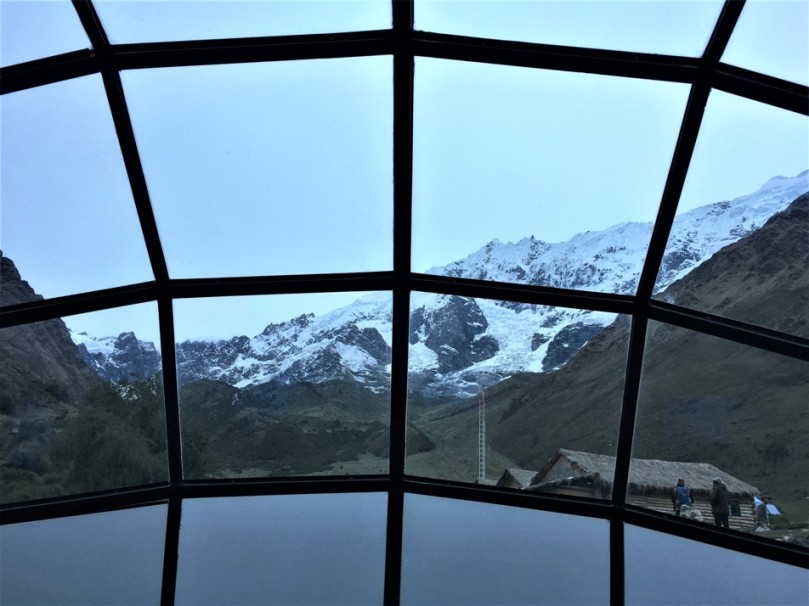
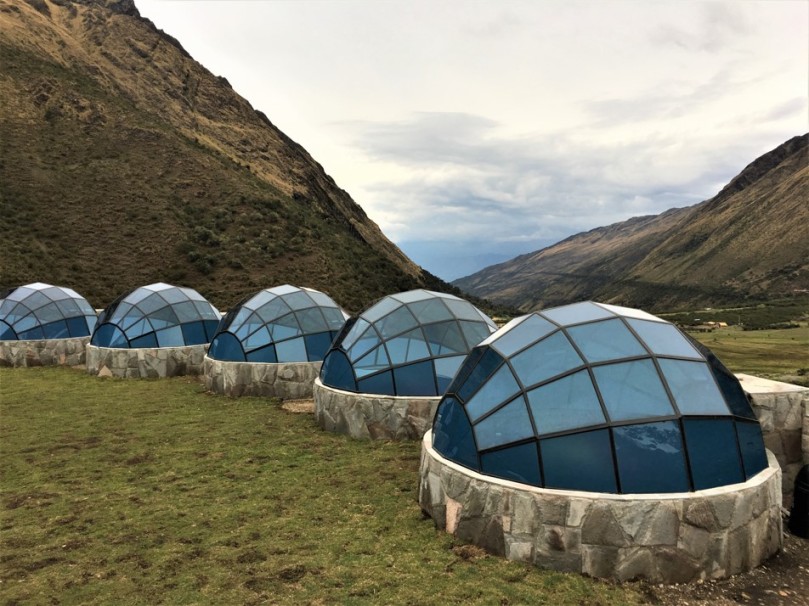

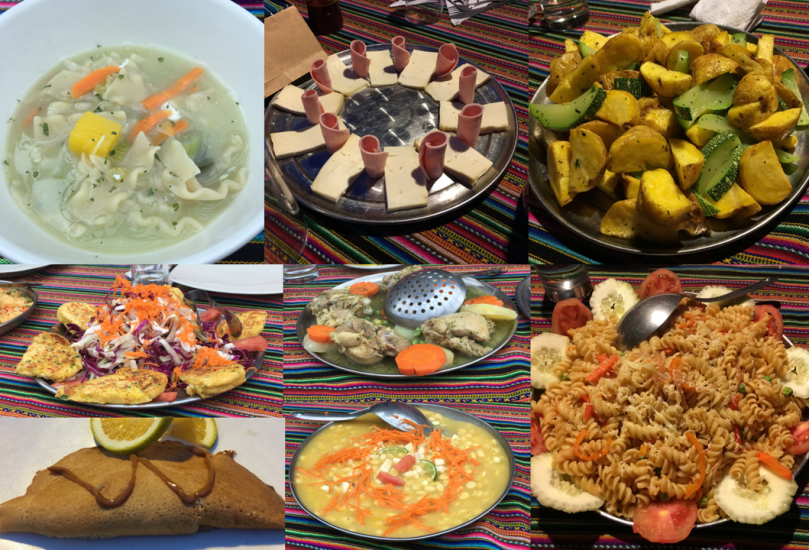


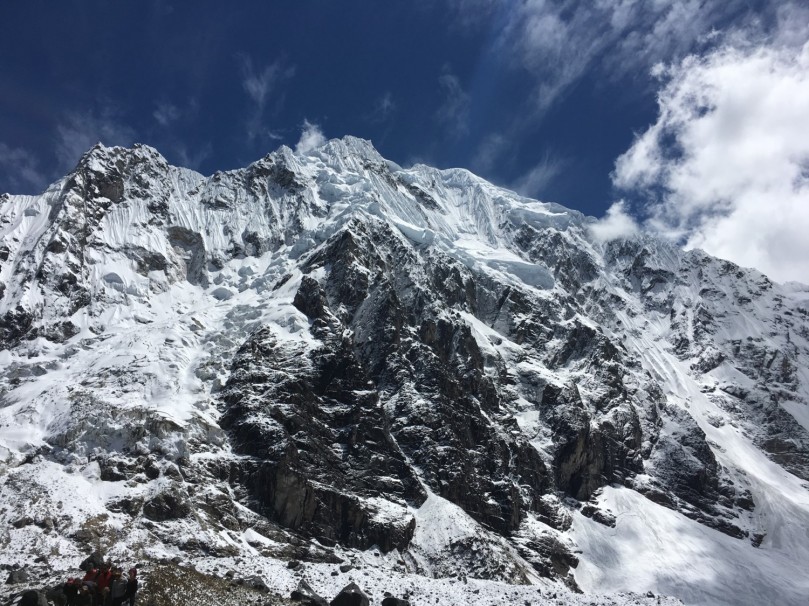
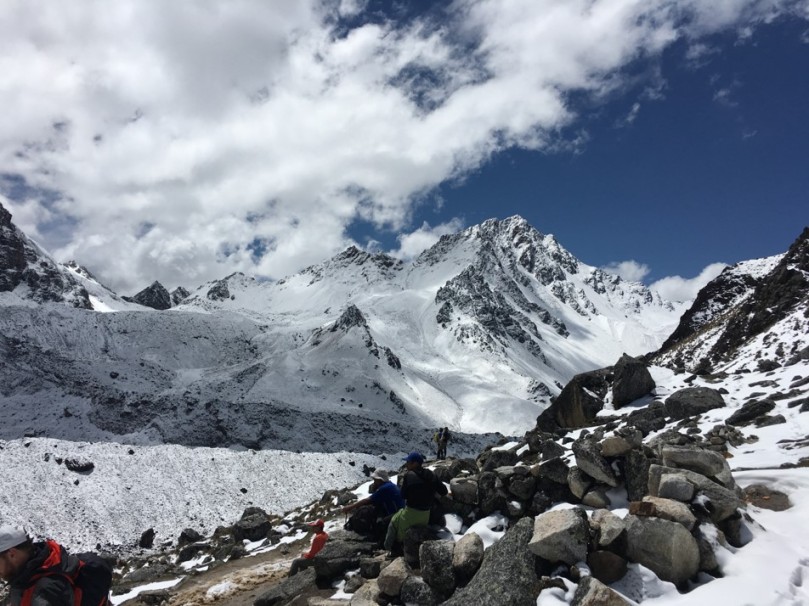
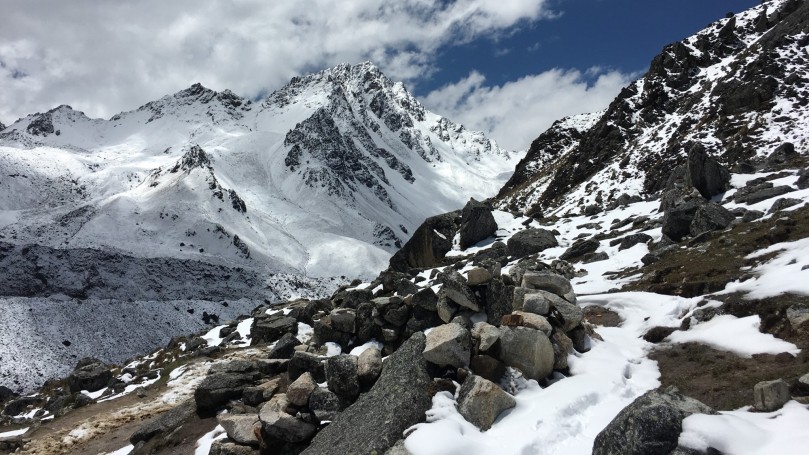


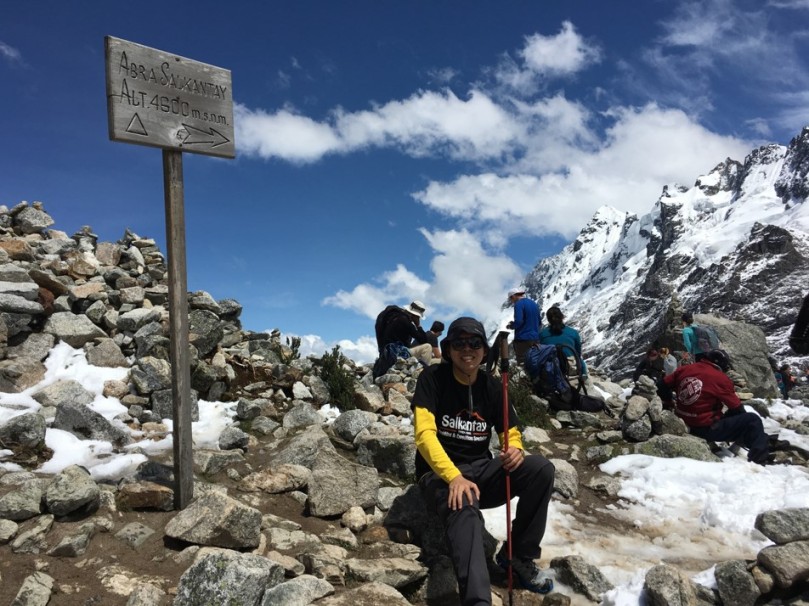

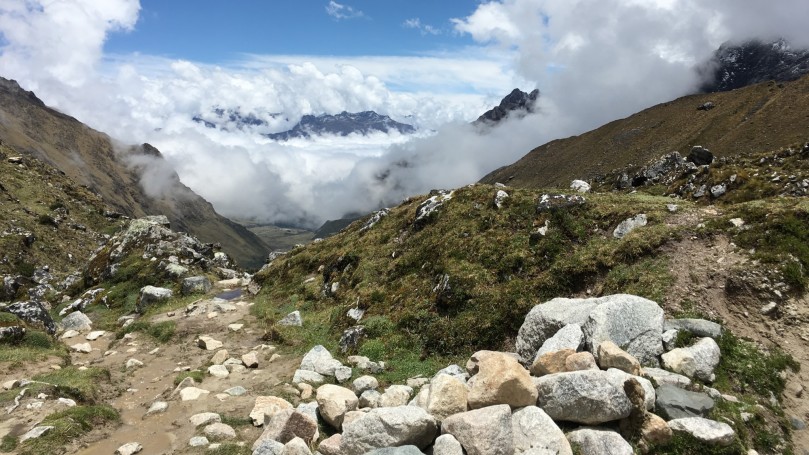
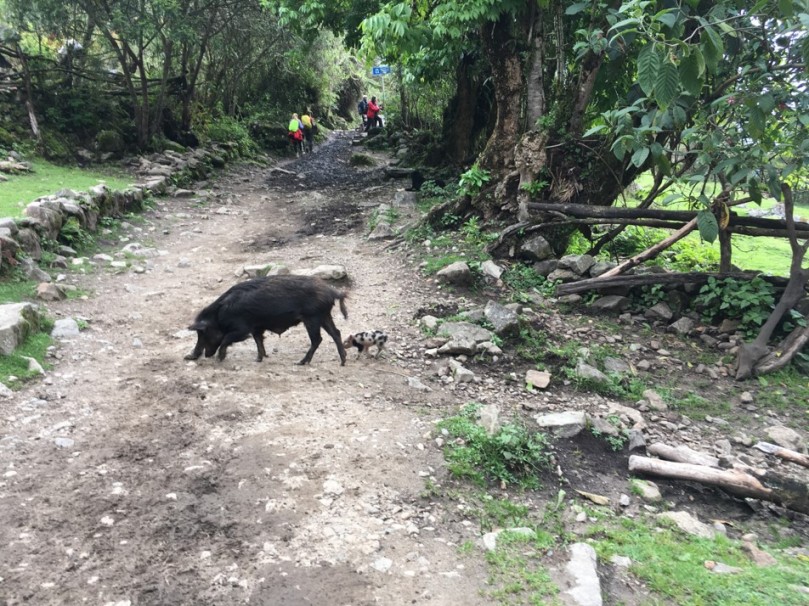
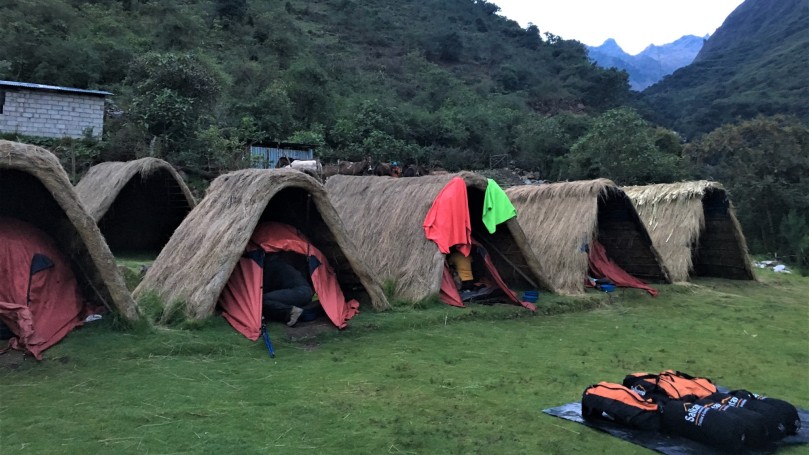
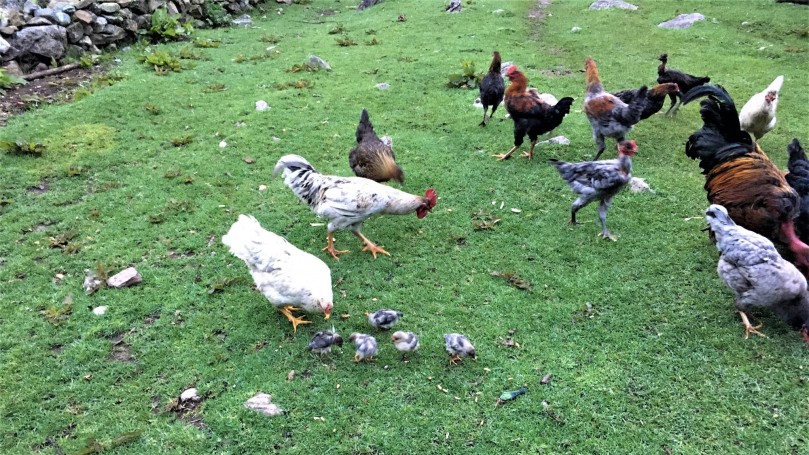
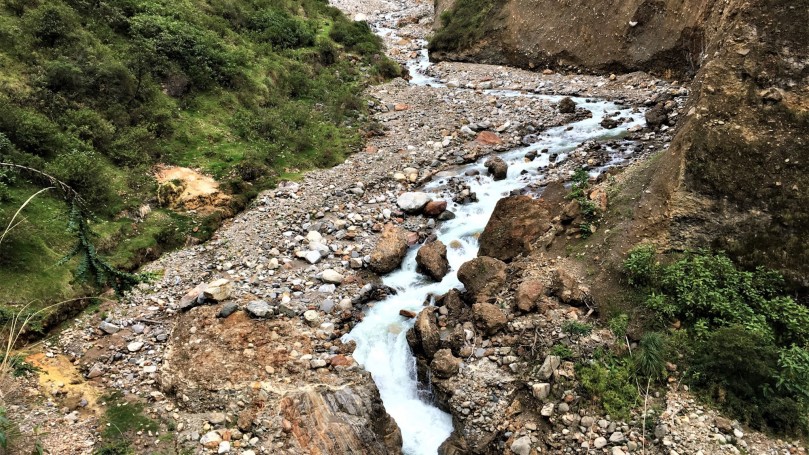
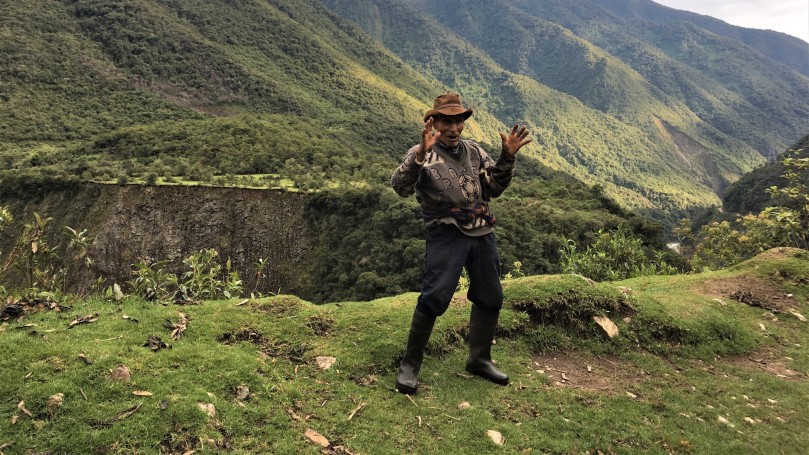
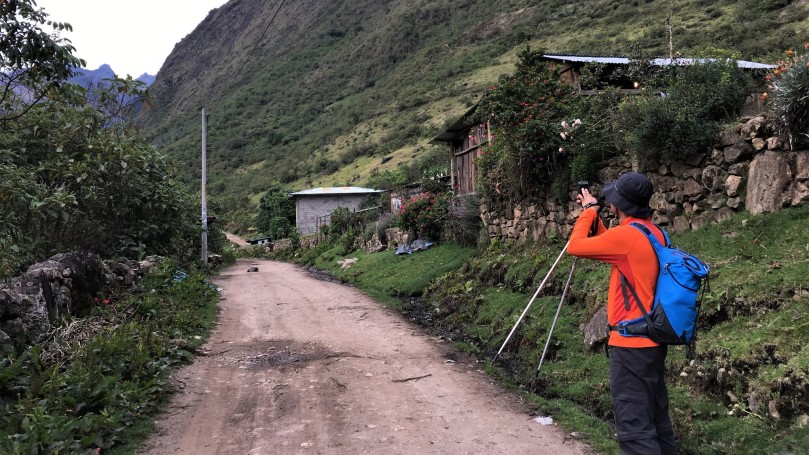
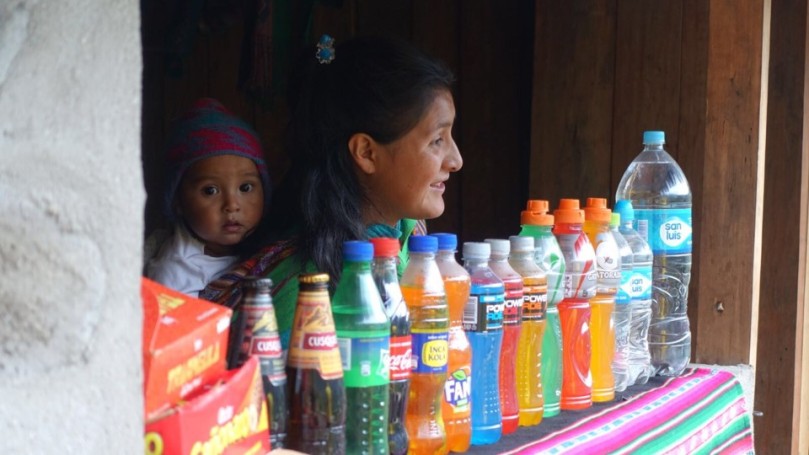
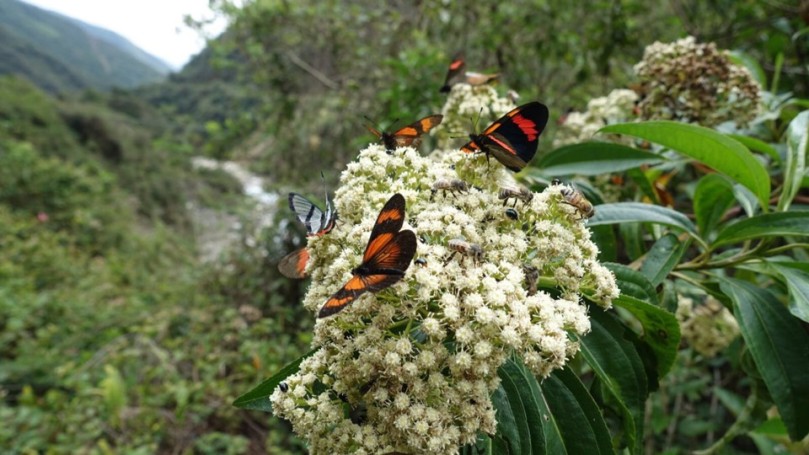
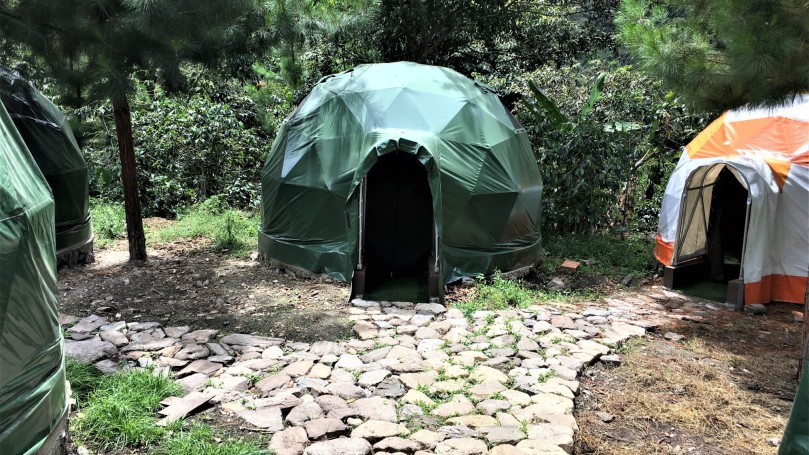

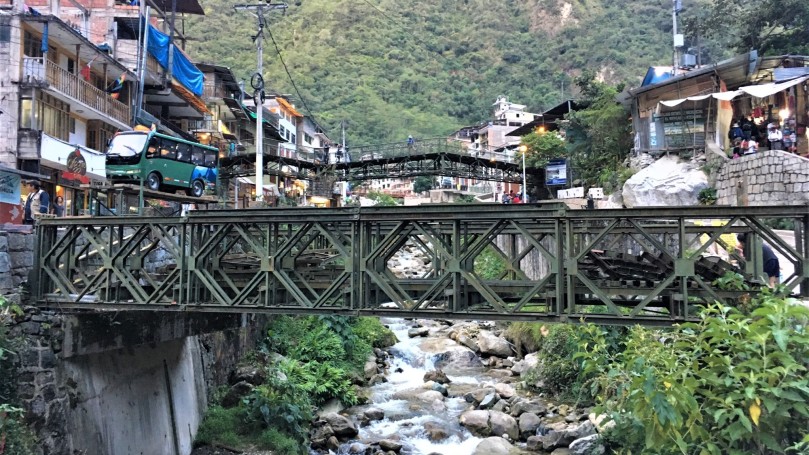
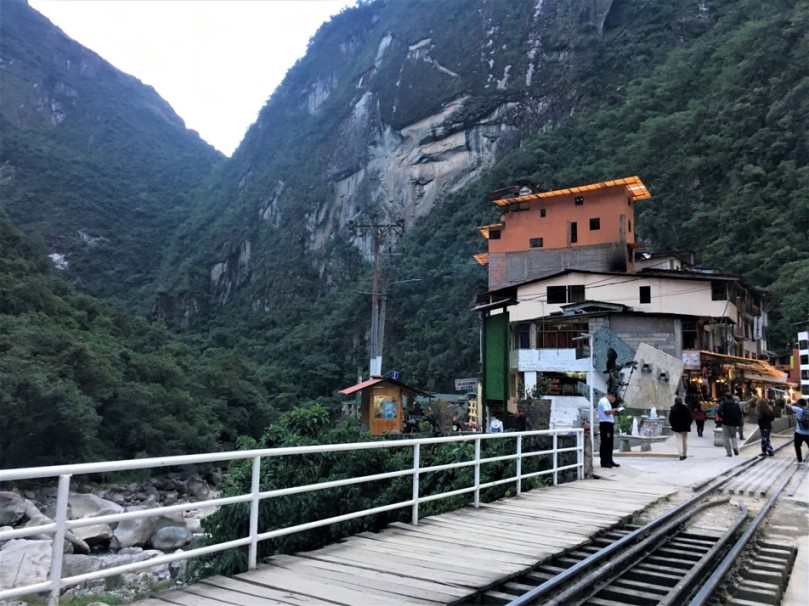
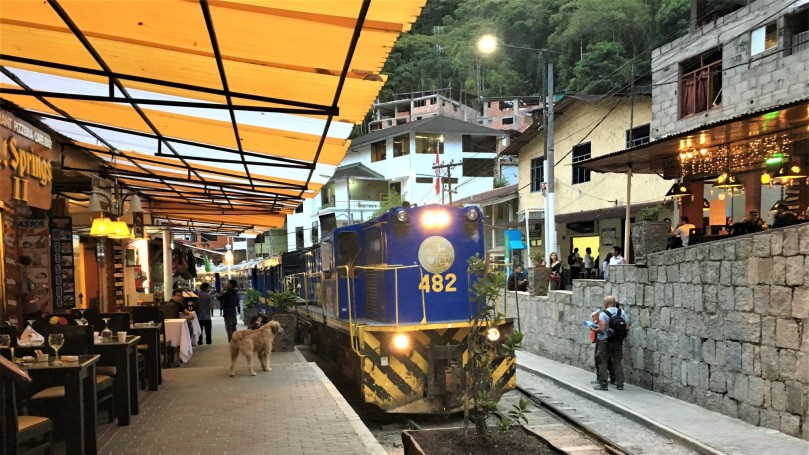
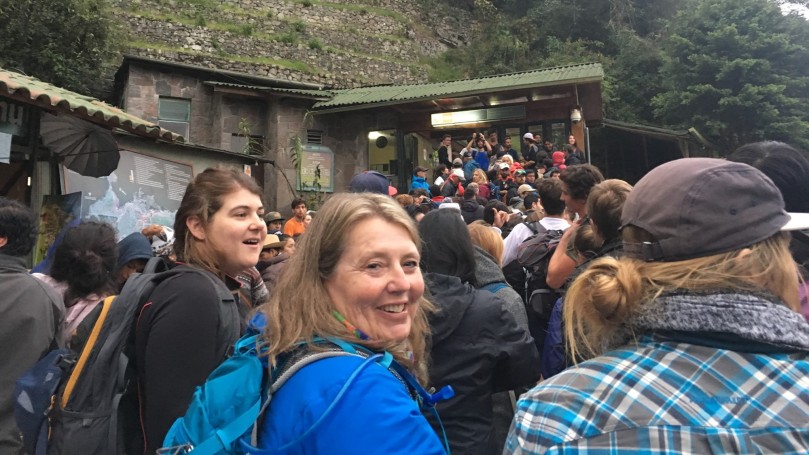
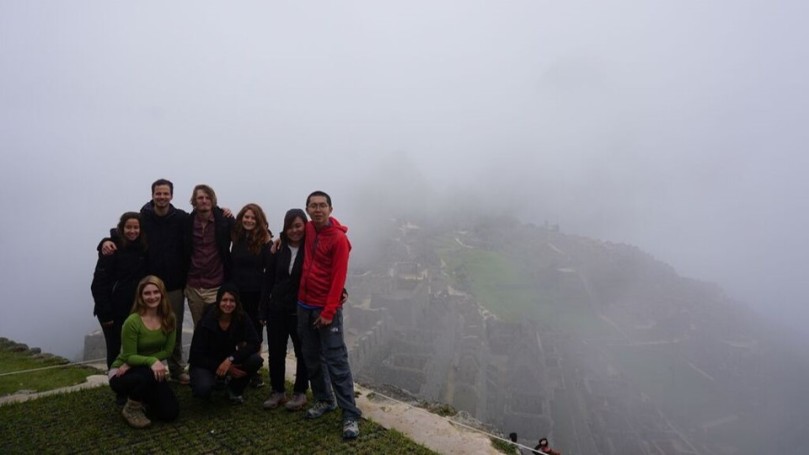
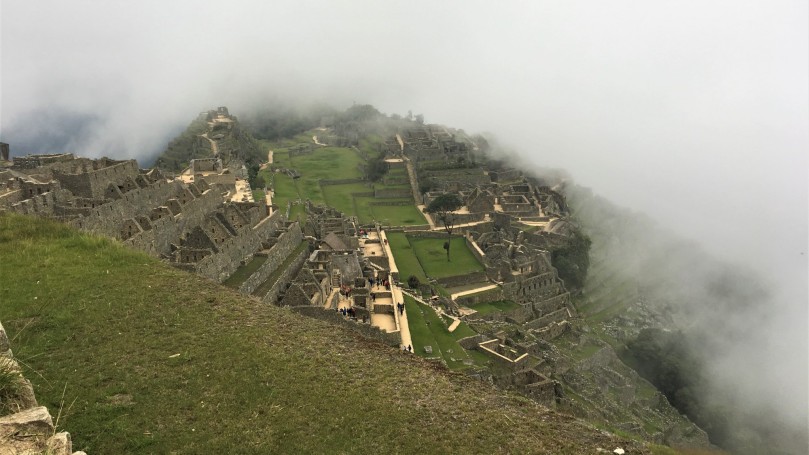

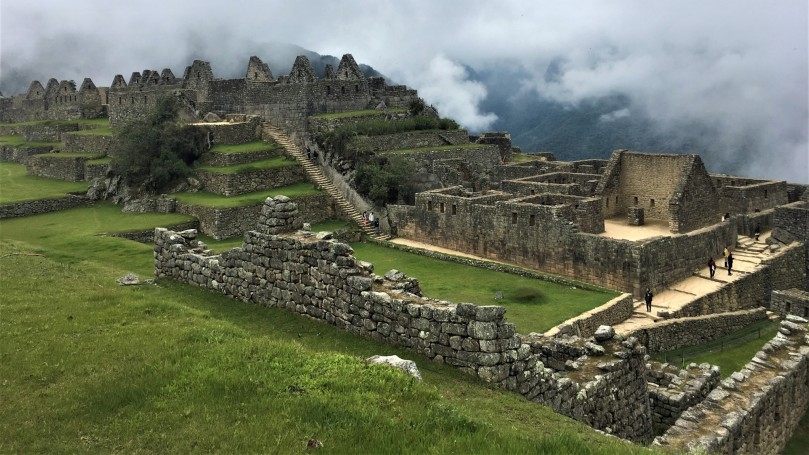

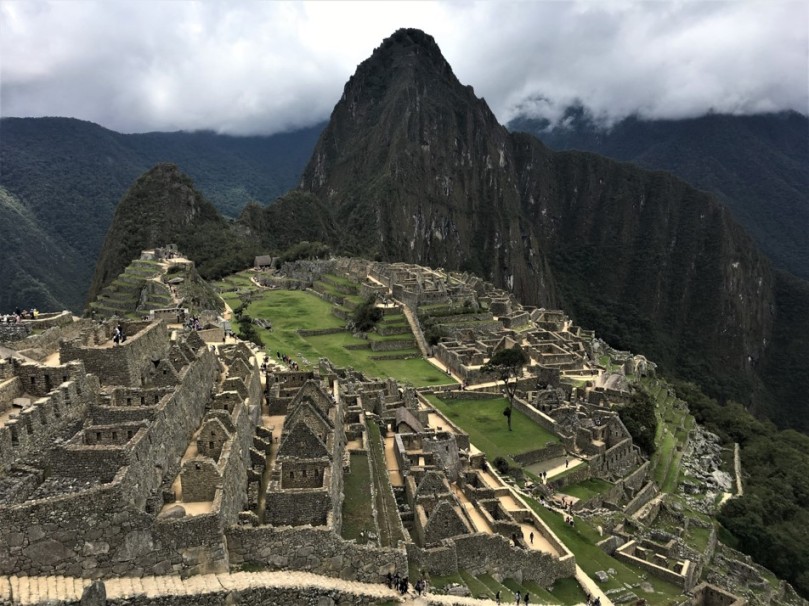
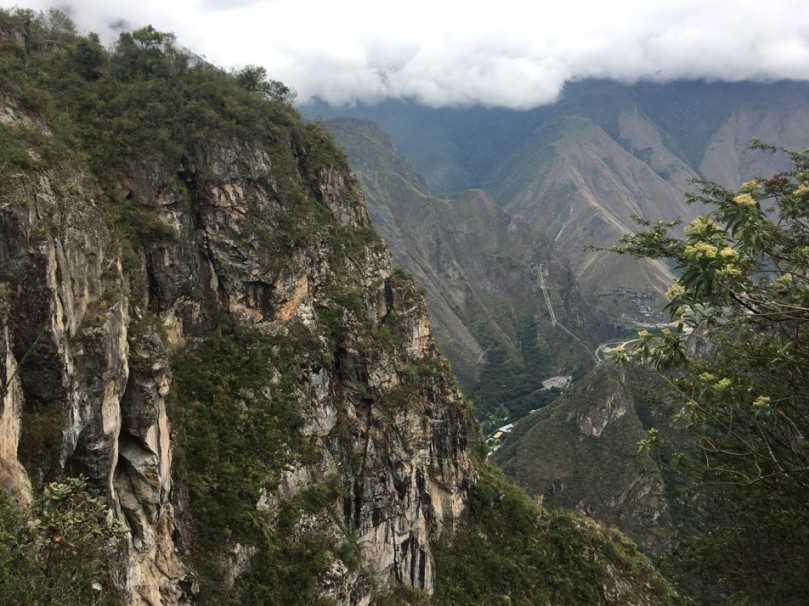
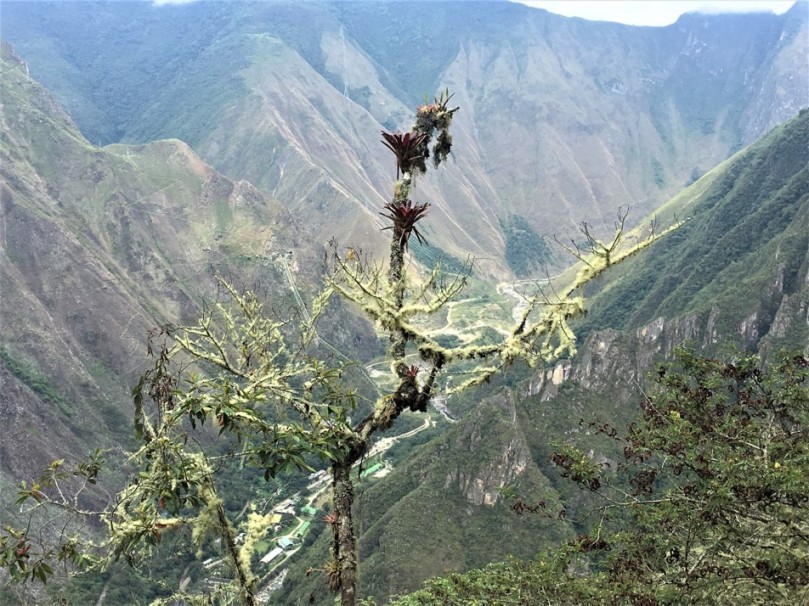


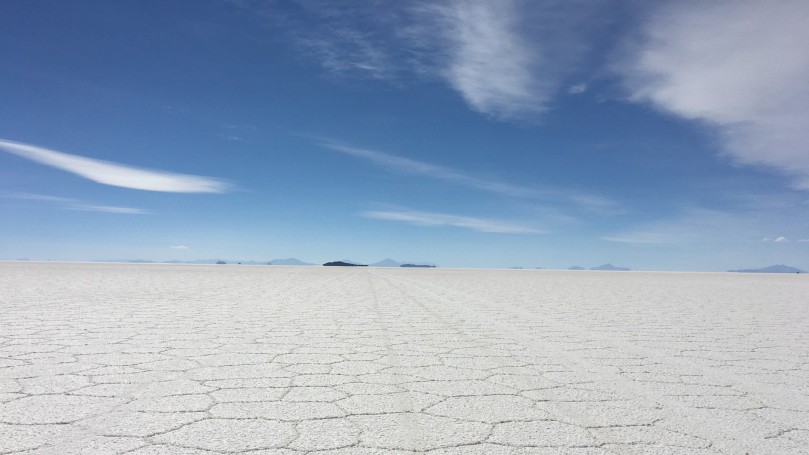

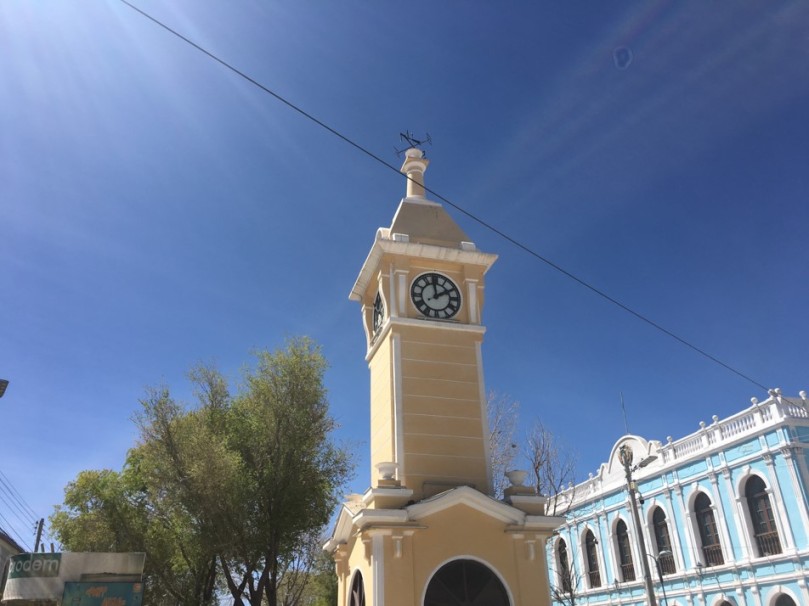

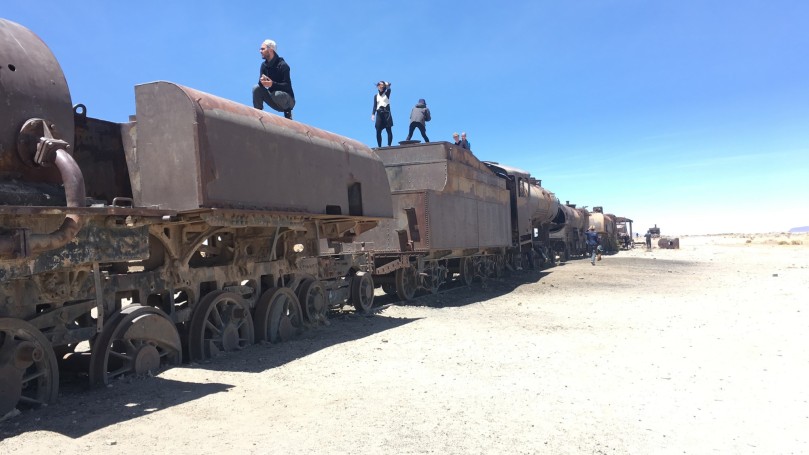
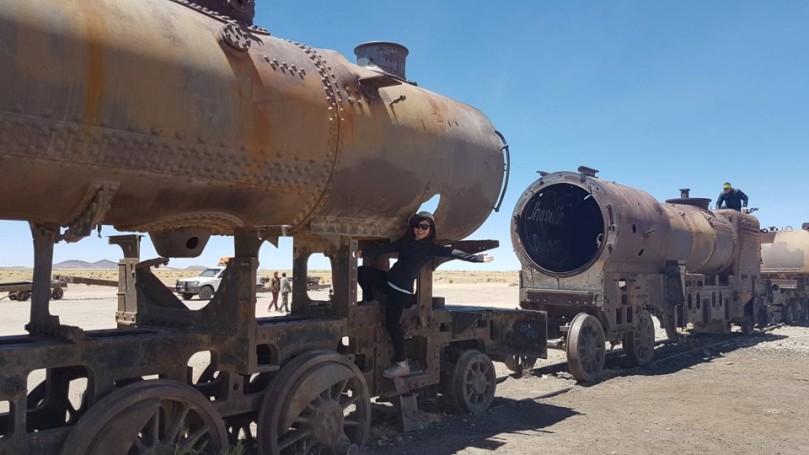
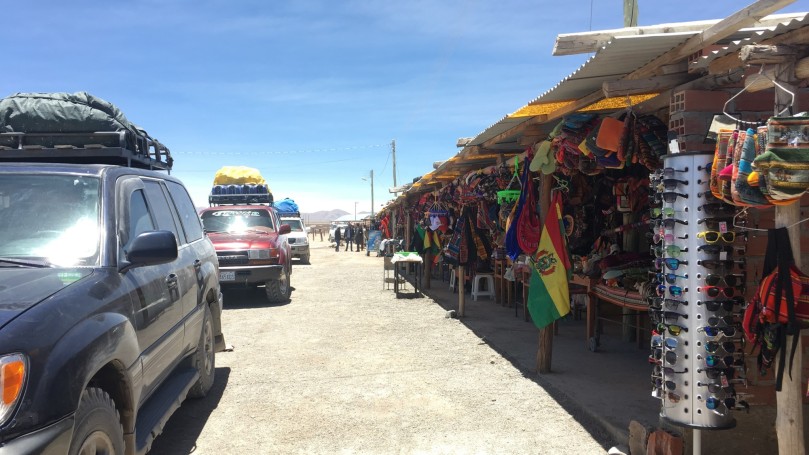

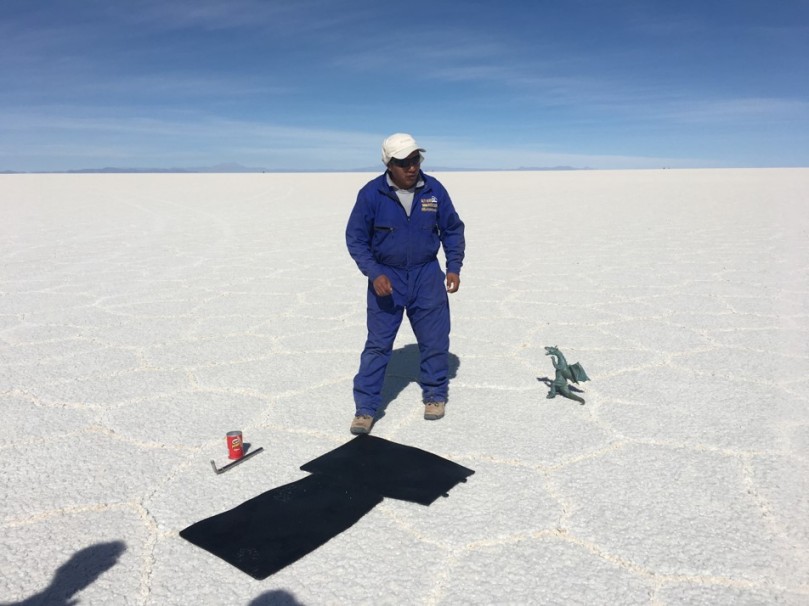
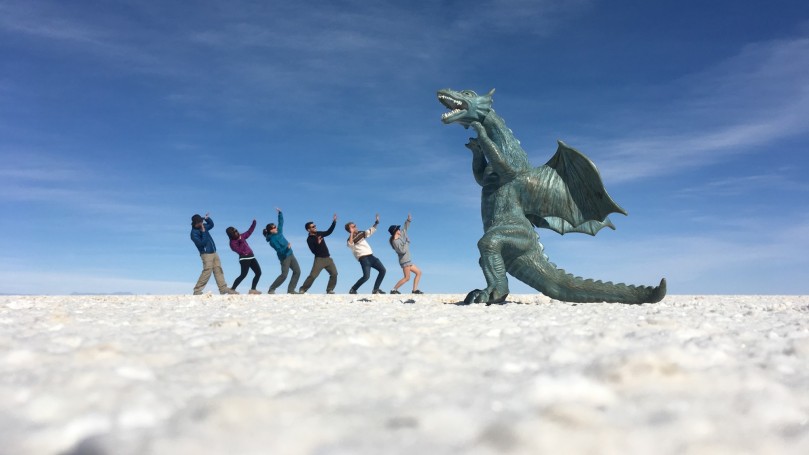
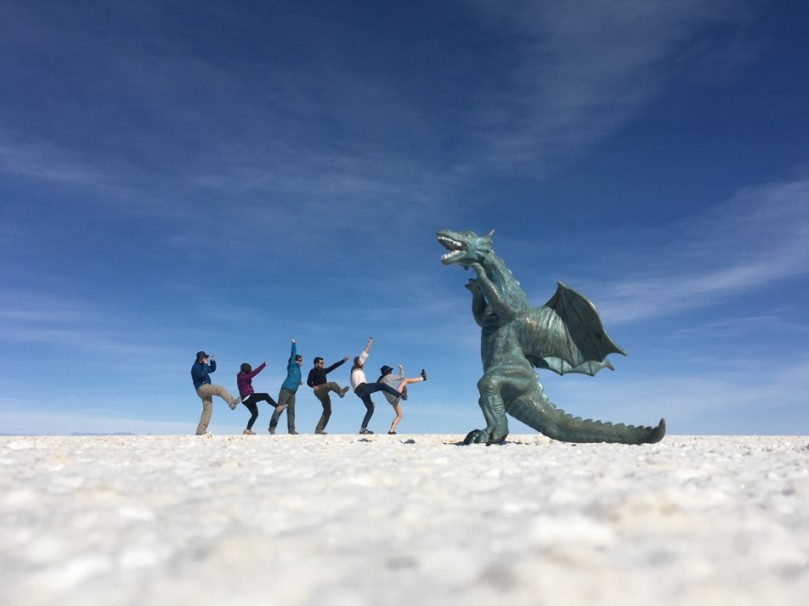
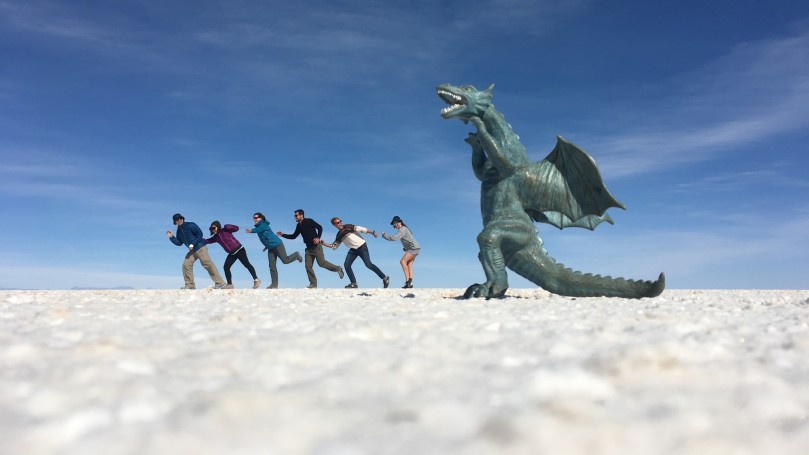
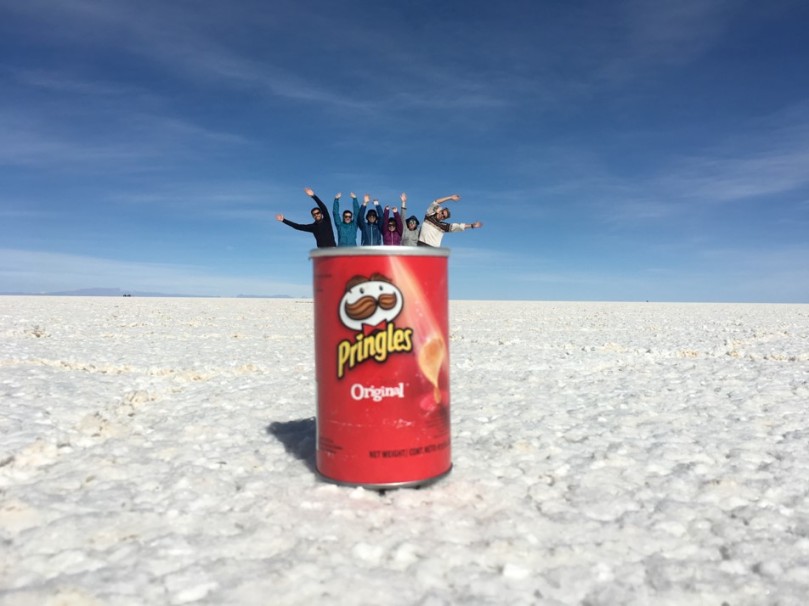
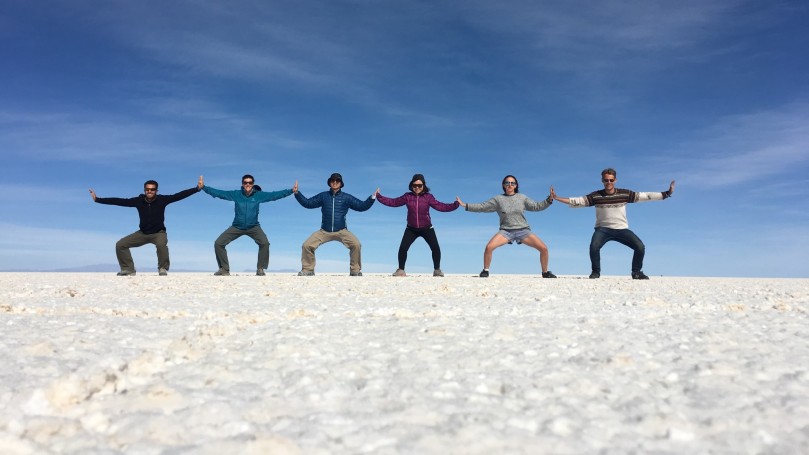
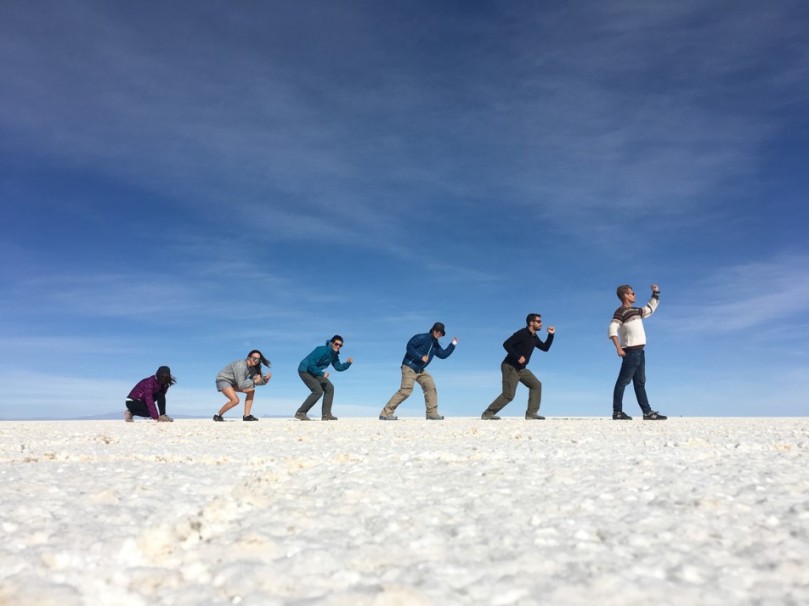
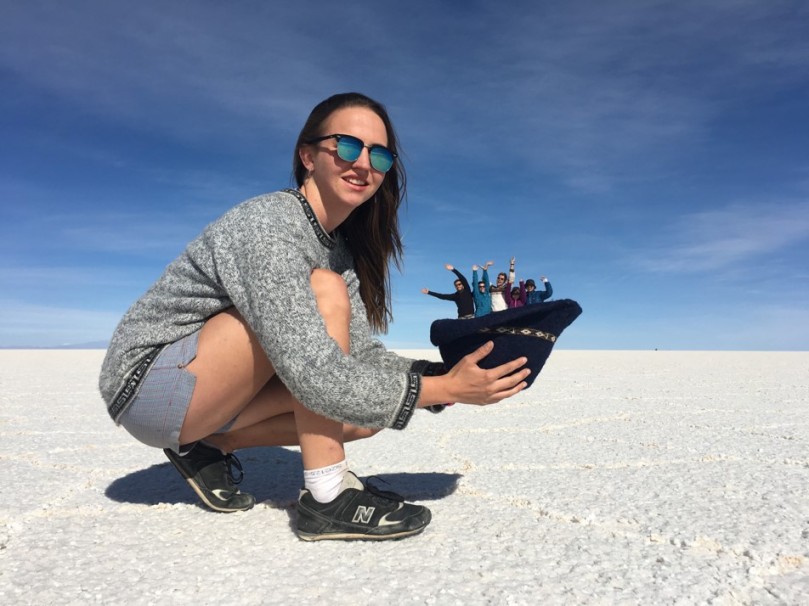
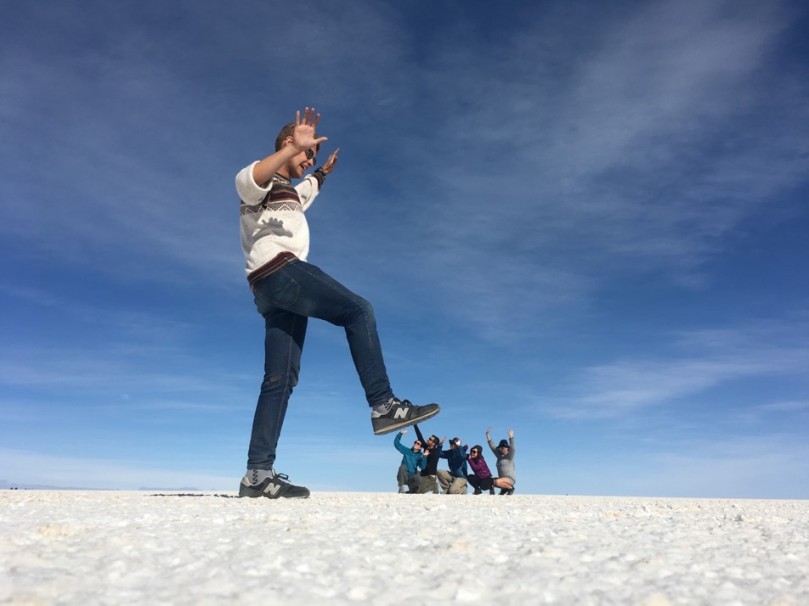
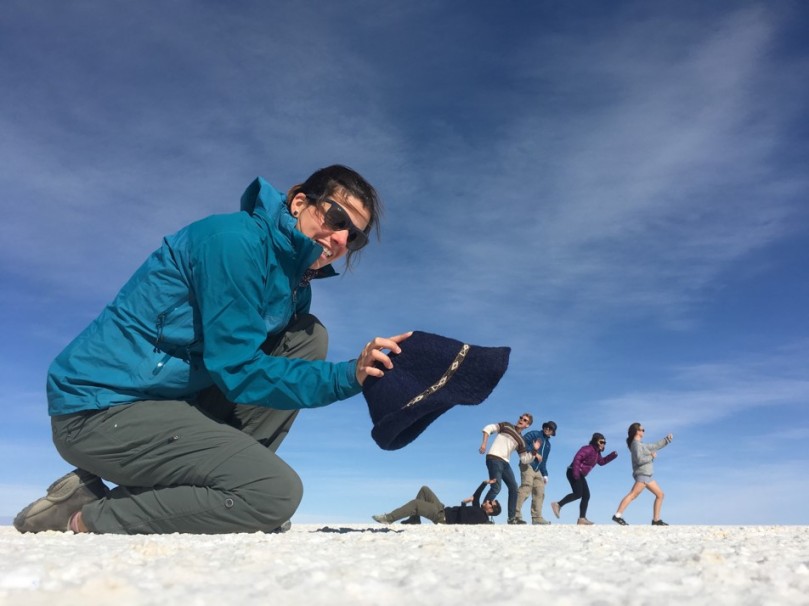
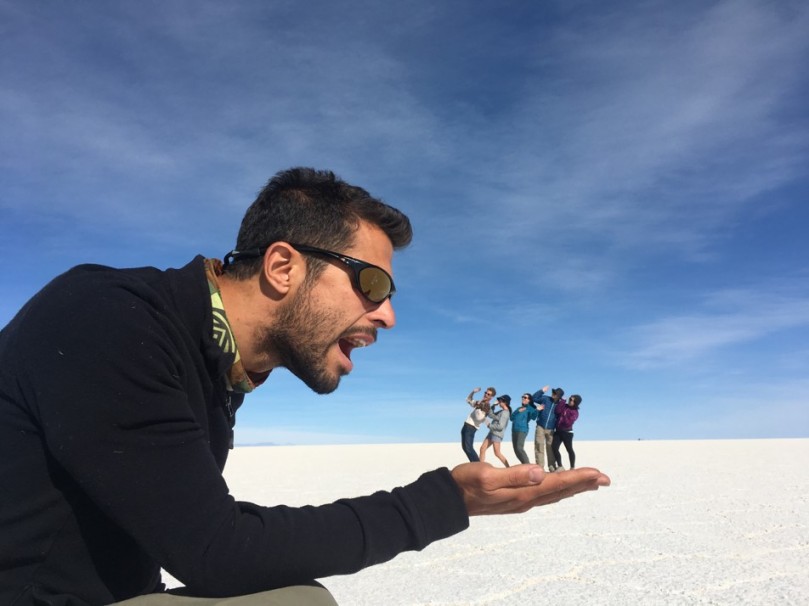

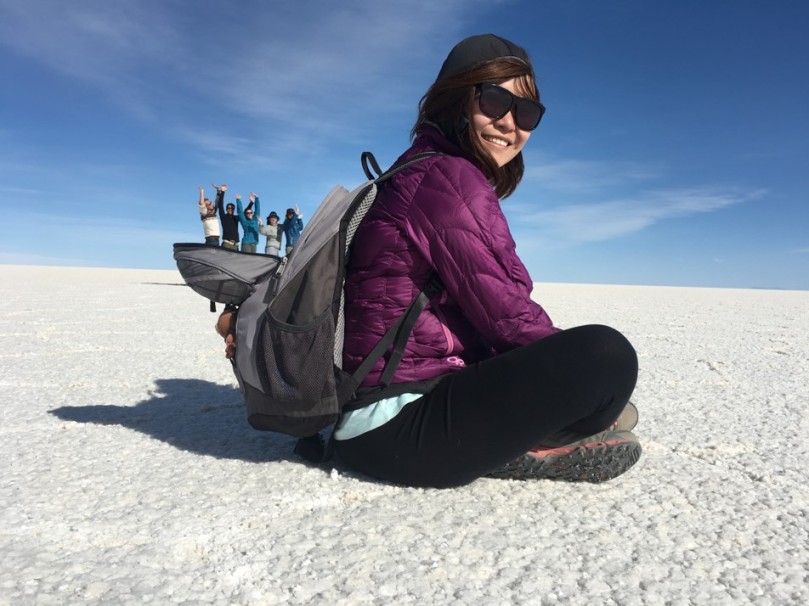
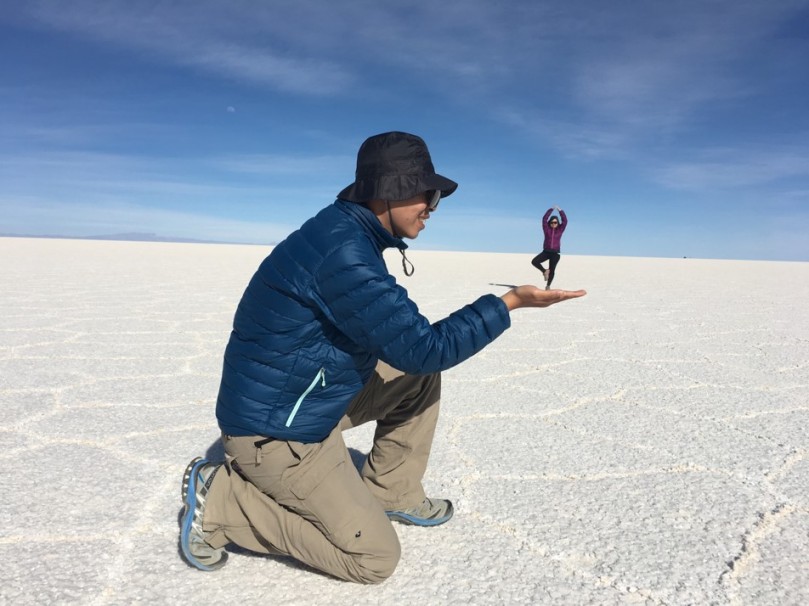
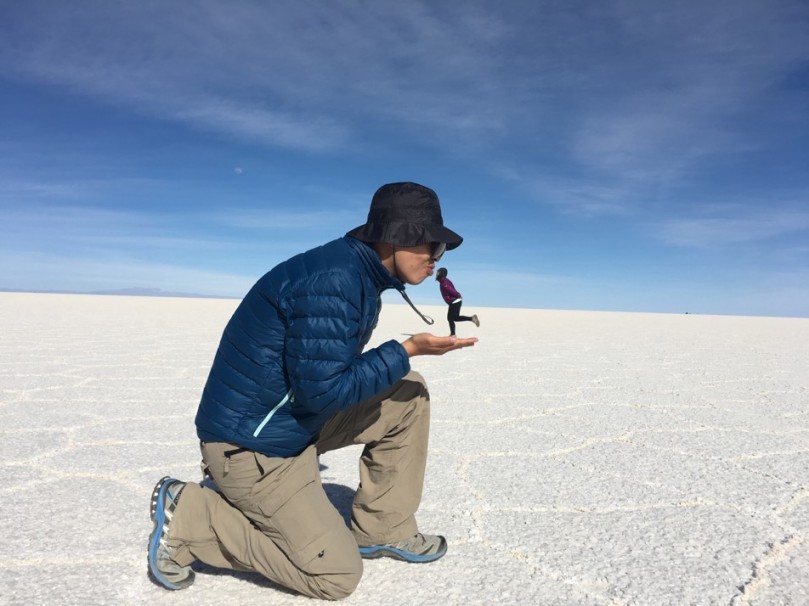
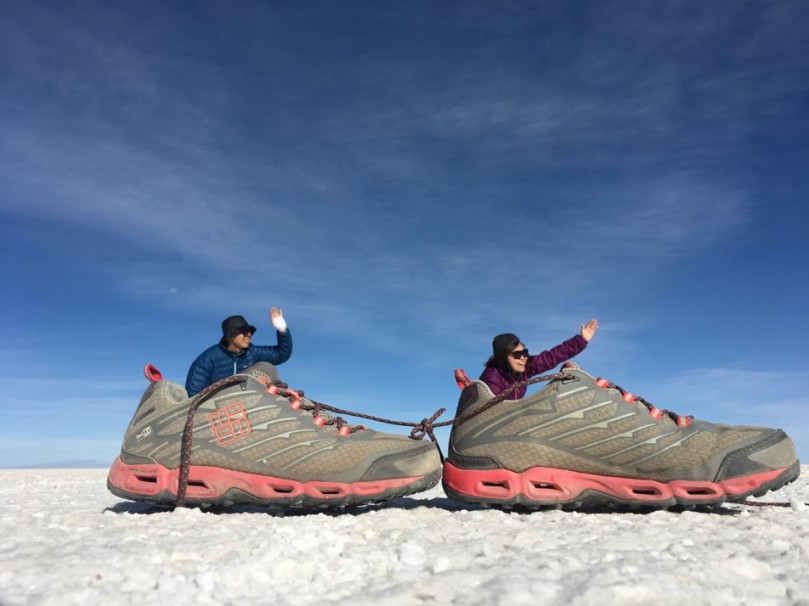

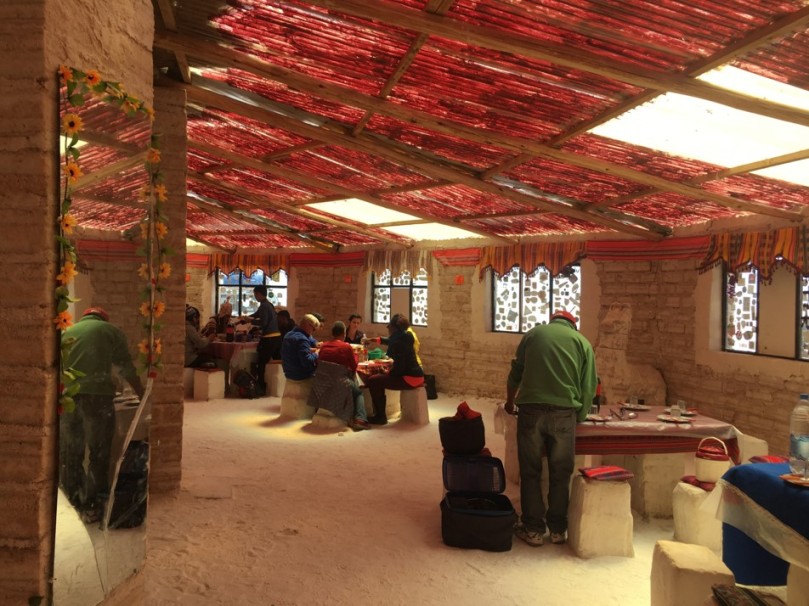
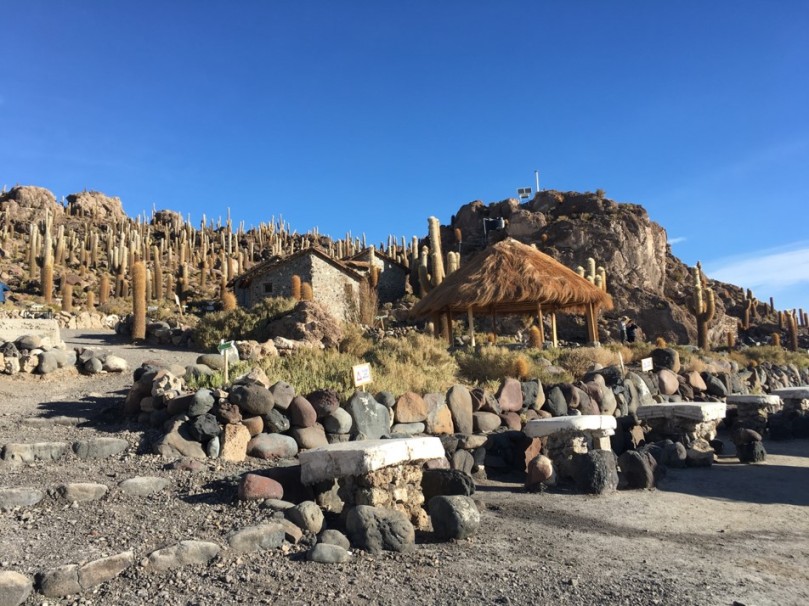

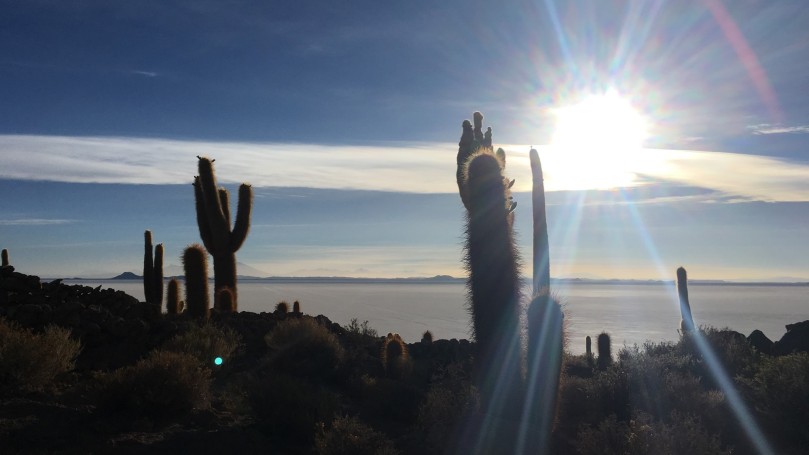
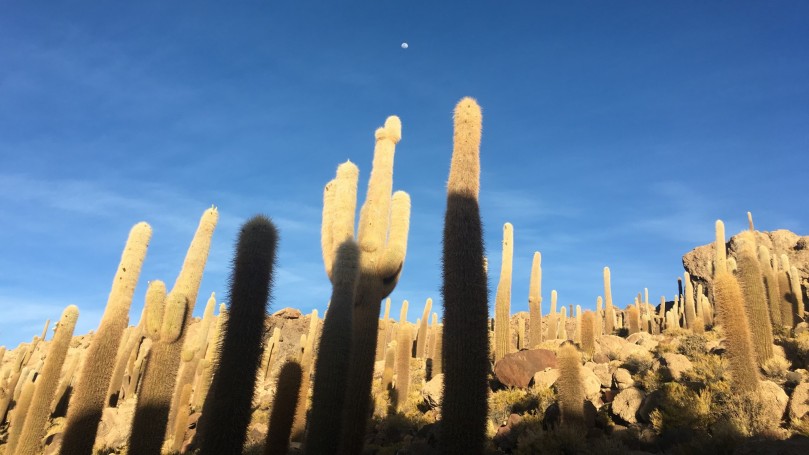
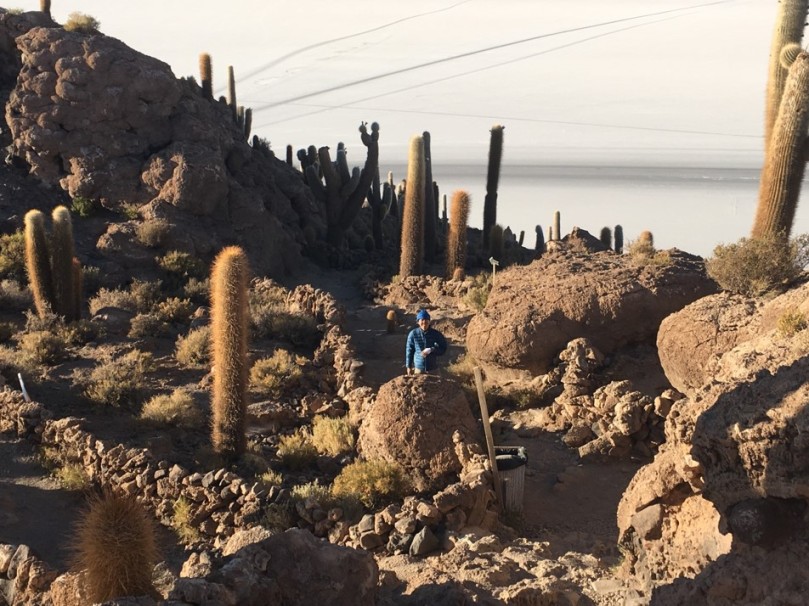
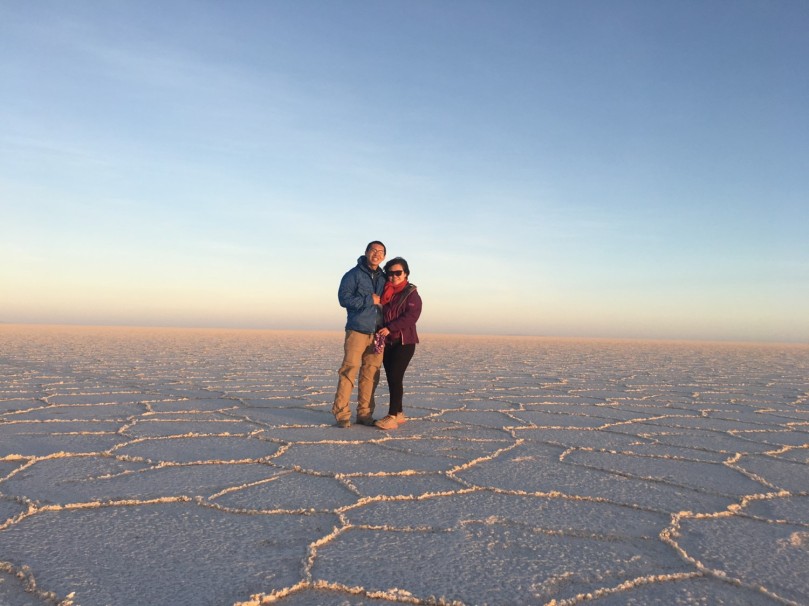
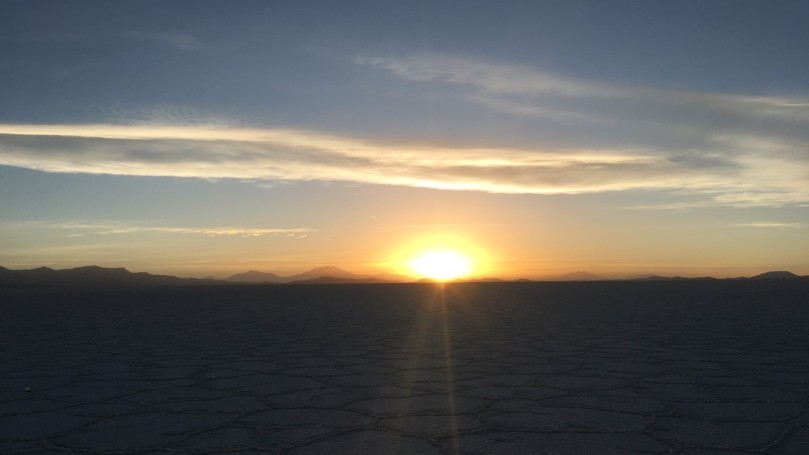
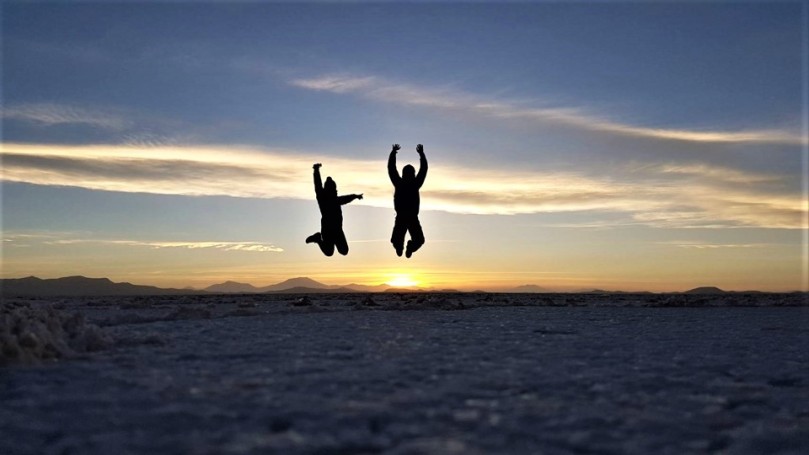
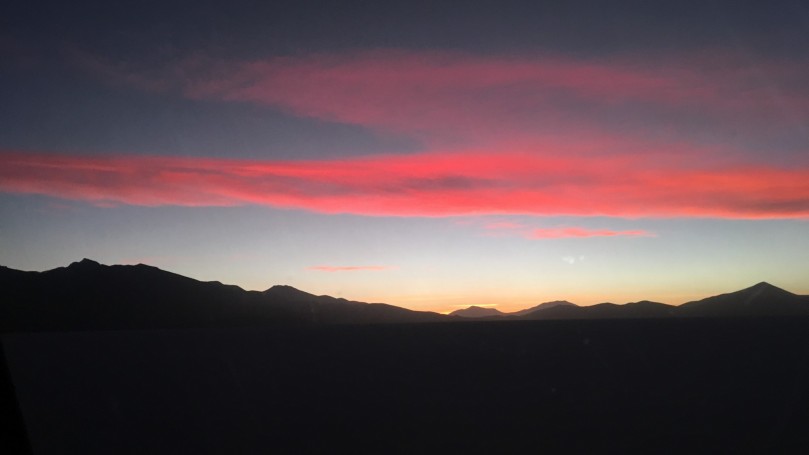 Our accommodation for the night was a salt hotel with private rooms and a shared bath. Hot showers were available at an additional Bs/10 (USD 0.20) per pax. Sleeping bags were provided and proved extremely useful for the subzero temperatures at night. Dinner was cooked by France, our guide – it was delicious and substantial! 😊